Advertisement
Quick Links
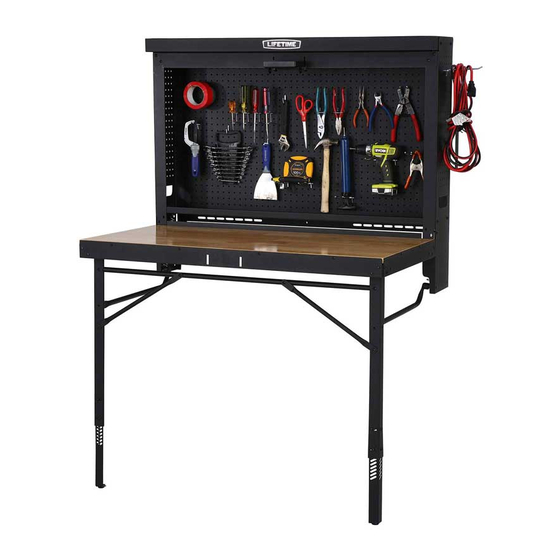
WALL-MOUNTED
FOLDING WORK TABLE
MODEL #60091
MODEL 80421 / 80578
BEFORE ASSEMBLY:
• Assemble on a level surface
• Enlist the help of a friend or family member
Assembly should take 2 adults abour 2 hours
• Videos and help guides available
Scan the code below to see the assembly
http://go.lifetime.com/worktableplaylist
TOOLS REQUIRED
QUESTIONS?
CONTACT LIFETIME CUSTOMER SERVICE:
Call: 1-800-225-3865
7:00 am–5:00 pm (Monday–Friday) MST
and 9:00 am–1:00 pm Saturday MST
DBD (Included)
Live Chat: www.lifetime.com
(click on "Ask An Expert" tab)
Video Instructions:
www.youtube.com/lifetimeproducts
ASSEMBLY INSTRUCTIONS
Pour le français, voir la page 2. Para el español, ver la página 3.
Icon Legend...............................4
Warnings & Notices.....................5
Parts Identifi er............................6
Frame Assembly..........................7
Wall Mounting..........................13
Tabletop & Leg Assembly............18
Final Assembly..........................26
Additional Warnings..................30
Cleaning & Care........................31
Registration.........................32
Warranty..............................33
MODEL# AND PRODUCT ID
Model Number: 80421 / 80578
Product ID:
TABLE OF CONTENTS
(you will need both when contacting us)
Advertisement

Related Manuals for Lifetime 80421


Summary of Contents for Lifetime 80421
- Page 1 MODEL# AND PRODUCT ID Call: 1-800-225-3865 Live Chat: www.lifetime.com (you will need both when contacting us) (click on “Ask An Expert” tab) Model Number: 80421 / 80578 7:00 am–5:00 pm (Monday–Friday) MST Product ID: Video Instructions: and 9:00 am–1:00 pm Saturday MST...
- Page 2 Nettoyage et entretien....31 Enregistrement....32 Garantie......34 DBD (Incluse) ® QUESTIONS ? CONTACTEZ AUX SERVICES À LA CLIENTÈLE LIFETIME MODEL# AND PRODUCT ID (vous aurez besoin des deux lorsque vous nous Live Chat: www.lifetime.com Composer le 1-800-225-3865 contactez) (click on “Ask An Expert” tab) Model Number: 80421 / 80578 Du lundi au vendredi 7:00 hr–17:00 hr (HNR)
- Page 3 Limpieza y cuidado....31 Registro......32 Garantía......35 DBD (Incluida) ¿PREGUNTAS? ® PÓNGASE EN CONTACTO CON LOS SERVICIOS DE CLIENTES LIFETIME MODEL# AND PRODUCT ID (vous aurez besoin des deux lorsque vous nous Composer : 1-800-225-3865 Live Chat: www.lifetime.com contactez) (click on “Ask An Expert” tab) Model Number: 80421 / 80578 7:00 am –...
- Page 4 ICON LEGEND / LÉGENDE DES ICÔNES / LEYENDA DE ÍCONOS • Indicates special heed should be taken when reading. • Indique qu’une attention spéciale doit être prise lors de la lecture. • Indica que uno debe prestar atención al leer. •...
- Page 5 WARNINGS & NOTICES / AVERTISSEMENTS ET AVIS / ADVERTENCIAS Y AVISOS English: • Failure to follow these warnings may result in serious injury or property damage and will void warranty. • To ensure safety, do not attempt to assemble this product without following the instructions carefully. •...
- Page 6 PARTS IDENTIFIER / IDENTIFICATEUR DE PIÈCES / IDENTIFICADOR DE PIEZAS LARGE PARTS / GRANDES PIÈCES / PIEZAS GRANDES Large Parts / Grandes pièces Piezas grandes EMP (x1) ESY (x1) EMR (x1) EMS (x1) EMV (x1) EMX (x1) ENB (x1) EMU (x2) ENE (x1) EMQ (x1) EMY (x2)
- Page 7 FRAME ASSEMBLY / ASSEMBLAGE DE LA CHARPENTE / ENSAMBLE DEL ARMAZÓN HARDWARE REQUIRED / QUINCAILLERIE REQUISE / HERRAJE REQUERIDO Hardware / Quincaillerie Herraje ESC (x4) ENC (x37) ENA (x41) PARTS REQUIRED / PIÈCES REQUISES / PIEZAS REQUERIDAS Metal Parts / Pièces en métal Piezas de metal EMQ (x1)
- Page 8 (EMP) usando cinco (5) tornillos (ENC) y tuercas (ENA). No apriete por completo las tuercas. http://go.lifetime.com/worktable1 • Attach the Left Side/Leg Assembly (EMX) to the • Attach the Right Side/Leg Assembly (ENB) to the Top Top Shelf using the hardware indicated.
- Page 9 u SECTION 1 (CONTINUED) / SECTION 1 (SUITE) SECCIÓN 1 (CONTINUACIÓN) TOOLS AND HARDWARE REQUIRED / OUTILS ET QUINCAILLERIE REQUIS INSTRUMENTAL Y HERRAJE REQUERIDOS 7/16 in/po (11 mm) ENC (x16) ENA (x16) • Secure the two Assemblies to the Top Shelf at •...
- Page 10 u SECTION 1 (CONTINUED) / SECTION 1 (SUITE) SECCIÓN 1 (CONTINUACIÓN) TOOLS AND HARDWARE REQUIRED / OUTILS ET QUINCAILLERIE REQUIS INSTRUMENTAL Y HERRAJE REQUERIDOS 7/16 in/po (11 mm) ENC (x10) ENA (x10) • Align the holes in the Perforated Panel (EMR) with those at •...
- Page 11 u SECTION 1 (CONTINUED) / SECTION 1 (SUITE) SECCIÓN 1 (CONTINUACIÓN) TOOLS AND HARDWARE REQUIRED / OUTILS ET QUINCAILLERIE REQUIS INSTRUMENTAL Y HERRAJE REQUERIDOS 7/16 in/po (11 mm) ESC (x2) ENA (x2) 1.12 1.13 • Insert the Brace Tube (EMQ) at an angle underneath •...
- Page 12 u SECTION 1 (CONTINUED) / SECTION 1 (SUITE) SECCIÓN 1 (CONTINUACIÓN) TOOLS AND HARDWARE REQUIRED / OUTILS ET QUINCAILLERIE REQUIS INSTRUMENTAL Y HERRAJE REQUERIDOS 7/16 in/po (11 mm) ESC (x2) ENC (x2) ENA (x4) 1.15 • Secure the Diagonal Braces to the Assembly using the hardware indicated. Tighten all hardware now. •...
- Page 13 WALL MOUNTING / MONTAGE AU MUR / MONTAJE AL MURO HARDWARE REQUIRED / QUINCAILLERIE REQUISE / HERRAJE REQUERIDO Hardware / Quincaillerie Herraje EMZ (x6) PARTS REQUIRED / PIÈCES REQUISES / PIEZAS REQUERIDAS Metal Parts / Pièces en métal Piezas de metal ENE (x1) TOOLS REQUIRED / OUTILS REQUIS / INSTRUMENTAL REQUERIDO 7/16 in/po (11 mm)
- Page 14 • Si vous avez des problèmes avec cette section, suivez le code en bas pour voir un vidéo sur le montage de la Table de travail. http://go.lifetime.com/worktable2 • If the bottom border of the Mounting Bracket is set at a height of 60 3/4" (154,3 cm) from the floor, the height of the table, when unfolded, will be at a standard counter height of 36"...
- Page 15 u SECTION 2 (CONTINUED) / SECTION 2 (SUITE) SECCIÓN 2 (CONTINUACIÓN) TOOLS AND HARDWARE REQUIRED / OUTILS ET QUINCAILLERIE REQUIS INSTRUMENTAL Y HERRAJE REQUERIDOS • Wall studs are normally 16" (40,1 cm) away from each other from the center of one stud to the center of the next. The two outer oval holes in the Mounting Bracket (ENE) are 16"...
- Page 16 u SECTION 2 (CONTINUED) / SECTION 2 (SUITE) SECCIÓN 2 (CONTINUACIÓN) TOOLS AND HARDWARE REQUIRED / OUTILS ET QUINCAILLERIE REQUIS INSTRUMENTAL Y HERRAJE REQUERIDOS 1/4 in/po EMZ (x3) (6 mm) 7/16 in/po (11 mm) • Using a 1/4" drill bit, drill 2–3 holes through the wall and into the studs. Then, secure the Mounting Bracket to the studs using two–three (2–3) Lag Screws (EMZ) as shown.
- Page 17 u SECTION 2 (CONTINUED) / SECTION 2 (SUITE) SECCIÓN 2 (CONTINUACIÓN) TOOLS AND HARDWARE REQUIRED / OUTILS ET QUINCAILLERIE REQUIS INSTRUMENTAL Y HERRAJE REQUERIDOS 1/4 in/po (6 mm) EMZ (x3) 7/16 in/po (11 mm) • After hanging the Work Table from the Mounting Bracket, secure the Frame to the studs in the wall using the hardware provided.
- Page 18 TABLETOP & LEG ASSEMBLY / ASSEMBLAGE DU TABLEAU ET DES PIEDS / ENSAMBLE DEL TABLERO Y DE LAS PATAS HARDWARE REQUIRED / QUINCAILLERIE REQUISE / HERRAJE REQUERIDO • Short End Hardware / Quincaillerie Herraje • Extrémité courte • Extremo corto ENC (x8) ADX (x26) •...
- Page 19 • Si tiene problemas con esta sección, siga el código debajo para ver un video sobre el montaje en esta sección. http://go.lifetime.com/worktable3 • With the Work Table mounted to the Mounting Bracket and wall, unfold the Frame. Secure the Legs to the Frame using the hardware indicated.
- Page 20 u SECTION 3 (CONTINUED) / SECTION 3 (SUITE) SECCIÓN 3 (CONTINUACIÓN) TOOLS AND HARDWARE REQUIRED / OUTILS ET QUINCAILLERIE REQUIS INSTRUMENTAL Y HERRAJE REQUERIDOS ADX (x8) 1/8 in/po (3 mm) • Set the Tabletop (EMV) into the Frame, pre-drill the holes shown, and then secure with eight (8) Screws (ADX). •...
- Page 21 u SECTION 3 (CONTINUED) / SECTION 3 (SUITE) SECCIÓN 3 (CONTINUACIÓN) TOOLS AND HARDWARE REQUIRED / OUTILS ET QUINCAILLERIE REQUIS INSTRUMENTAL Y HERRAJE REQUERIDOS 1/8 in/po ADX (x6) (3 mm) • Set the Tabletop (EMV) into the Frame and close the Latch. While another adult holds the Table closed, pre-drill the six holes indicated, and then secure with six (6) Screws (ADX).
- Page 22 u SECTION 3 (CONTINUED) / SECTION 3 (SUITE) SECCIÓN 3 (CONTINUACIÓN) TOOLS AND HARDWARE REQUIRED / OUTILS ET QUINCAILLERIE REQUIS INSTRUMENTAL Y HERRAJE REQUERIDOS 1/8 in/po (3 mm) • Pre-drill these ten holes indicated without drilling completely through the Tabletop. •...
- Page 23 u SECTION 3 (CONTINUED) / SECTION 3 (SUITE) SECCIÓN 3 (CONTINUACIÓN) TOOLS AND HARDWARE REQUIRED / OUTILS ET QUINCAILLERIE REQUIS INSTRUMENTAL Y HERRAJE REQUERIDOS ADX (x10) EMW (x2) • Attach each Angle Bracket (EMW) with three (3) Screws (ADX) at the locations shown. Then, insert the four (4) remaining Screws (ADX) at the locations indicated.
- Page 24 u SECTION 3 (CONTINUED) / SECTION 3 (SUITE) SECCIÓN 3 (CONTINUACIÓN) TOOLS AND HARDWARE REQUIRED / OUTILS ET QUINCAILLERIE REQUIS INSTRUMENTAL Y HERRAJE REQUERIDOS 1/8 in/po ADX (x2) (3 mm) • Completely unfold the Work Table. From underneath, drill and insert the last two (2) Screws (ADX) into the L-Brackets. •...
- Page 25 u SECTION 3 (CONTINUED) / SECTION 3 (SUITE) SECCIÓN 3 (CONTINUACIÓN) TOOLS AND HARDWARE REQUIRED / OUTILS ET QUINCAILLERIE REQUIS INSTRUMENTAL Y HERRAJE REQUERIDOS Long End / Extrémité longue Extremo largo EST (x2) Short End / Extrémité courte Extremo corto •...
- Page 26 FINAL ASSEMBLY / ASSEMBLAGE FINAL / ENSAMBLE FINAL HARDWARE REQUIRED / QUINCAILLERIE REQUISE / HERRAJE REQUERIDO Hardware / Quincaillerie Herraje ESR (x4) ESQ (x12) ESM (x2) ESL (x2) ESK (x2) ESN (x2) ESO (x2) ESP (x4) ESS (x4)
- Page 27 u SECTION 4 (CONTINUED) / SECTION 4 (SUITE) SECCIÓN 4 (CONTINUACIÓN) TOOLS AND HARDWARE REQUIRED / OUTILS ET QUINCAILLERIE REQUIS INSTRUMENTAL Y HERRAJE REQUERIDOS ESS (x4) • Insert the Cord Minders (ESS) into the holes in the Lower Shelf as shown. •...
- Page 28 u SECTION 4 (CONTINUED) / SECTION 4 (SUITE) SECCIÓN 4 (CONTINUACIÓN) TOOLS AND HARDWARE REQUIRED / OUTILS ET QUINCAILLERIE REQUIS INSTRUMENTAL Y HERRAJE REQUERIDOS ESR (x4) ESL (x2) ESM (x2) ESK (x2) ESP (x4) ESQ (x12) ESN (x2) ESO (x2) •...
- Page 29 u SECTION 4 (CONTINUED) / SECTION 4 (SUITE) SECCIÓN 4 (CONTINUACIÓN) TOOLS AND HARDWARE REQUIRED / OUTILS ET QUINCAILLERIE REQUIS INSTRUMENTAL Y HERRAJE REQUERIDOS • There are slits located at the top of the Frame. These slits allow you to mount a light or lights inside the Frame. The cord(s) can then be run down through the Cord Minders and to the outlet(s).
- Page 30 ADDITIONAL WARNINGS / AVERTISSEMENTS SUPPLÉMENTAIRES / ADVERTENCIAS ADICIONALES WARNING • Do not climb on or around work table. • Ensure latch is engaged when closed. • Watch for pinch points! AVERTISSEMENT • Ne pas entrer dans ni grimper sur ou autour du composteur.
- Page 31 à l’aide d’une protection contre la chaleur. LIMPIEZA Y CUIDADO Felicidades por la compra de su producto Lifetime®. Al seguir las siguientes instrucciones, su nuevo producto Lifetime le brindará años de servi- cio y satisfacción.
- Page 32 REGISTER today! ENREGISTREZ VOTRE PRODUIT EN LIGNE À WWW.LIFETIME.COM Chez Lifetime®, nous nous engageons à fournir des produits innovateurs de qualité. Lors de votre inscription, vous aurez l’occasion de nous faire parvenir vos commentaires. Votre opinion est importante pour nous.
- Page 33 7. This warranty is expressly in lieu of all other warranties, expressed or implied, including warranties of merchantability ® or fi tness for use to extent permitted by Federal and state law. Neither Lifetime Products, Inc., nor any representative assumes any other liability in connection with this product. This warranty gives you specifi c legal rights, and you may also have other rights which vary from state to state.
- Page 34 2. Cette garantie n’est pas transférable et est expressément limitée à la réparation ou au remplacement du produit ® défectueux. Si le produit est déclaré défectueux selon les termes de cette garantie, Lifetime Products, Inc. réparera ou remplacera les parties défectueuses gratuitement pour l’acheteur. Les frais d’expéditions aller et retour de l’usine ne sont pas couverts et sont à...
- Page 35 6. Esta garantía se otorga en reemplazo expreso de toda otra garantía, expresa o implícita, incluidas las garantías de ® comercialización o adaptación para el uso en la medida permitida por las leyes federales y estatales. Ni Lifetime Products, Inc., ni ninguno de sus representantes asume ninguna otra responsabilidad en conexión con este producto.
- Page 36 7:00 am–5:00 pm (M–F) MST and 9:00 am–1:00 pm Saturday MST ® AMÉLIOREZ VOTRE ACHAT LIFETIME EN AJOUTANT DES ACCESSOIRES OU DES AUTRES PRODUITS Pour acheter des accessoires ou des autres produits Lifetime , rendez-vous une visite à : ® www.lifetime.com Ou appelez-nous au 1-800-424-3865 Du lundi au vendredi 7 h –...
Need help?
Do you have a question about the 80421 and is the answer not in the manual?
Questions and answers