
Related Manuals for Lifetime 60030


Summary of Contents for Lifetime 60030
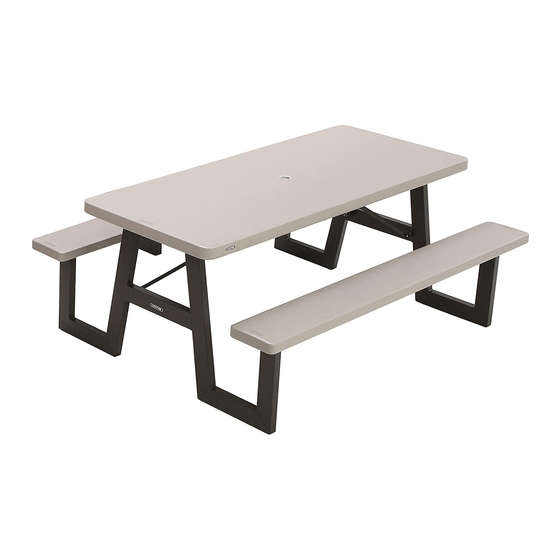
- Page 1 MODEL N° 60030 OWNER’S MANUAL Keep this Identification Number in case you must contact our Customer Service Department.
-
Page 2: Safety Instructions
REGISTER YOUR PRODUCT ONLINE AT WWW.LIFETIME.COM At Lifetime, we are committed to providing innovative and quality products. While registering, you will have the opportunity to give us your feedback. Your input is valuable to us. directly. LIFETIME’S PROMISE TO YOU: Maintaining your privacy is our long-standing policy at Lifetime. -
Page 3: Before Beginning Assembly
BEFORE BEGINNING ASSEMBLY Keep the hardware bags and their contents separate. If any parts are missing, call our Customer Service Department. The plastic pieces of your table may become damaged by over tightening the screws. If you choose to use a power screwdriver, we strongly recommend the use of a low-powered power screwdriver or a drill that has an adjustable clutch that is set to a low-torque setting. -
Page 4: Assembly Guide
ASSEMBLY GUIDE Refer to the following areas throughout the instructions to assist in the assembly process: This area is located at the top, left-hand TOOLS AND HARDWARE REQUIRED FOR THIS PAGE corner of the page and indicates which tools and hardware are needed to complete the assembly steps on a page. -
Page 5: Parts & Hardware List
PARTS & HARDWARE LIST DESCRIPTION DESCRIPTION Table Top Assembly BWL W-FRAME TABLE HARDWARE Bench Assembly Sliding End Cap W-Frame Leg Assembly 6.3 mm x 25 mm Hex-Head Screw W-Frame Leg Brace Assembly M6 x 1 x 12 mm Hex Bolt M6 x 1 Nylock Cap Nut PARTS &... - Page 6 TOOLS AND HARDWARE REQUIRED FOR THIS PAGE NO HARDWARE REQUIRED FOR THIS PAGE PICNIC TABLE ASSEMBLY Lay the Table Top Assembly (BWM) upside down on the ground. Remove the five (5) screws connecting one of the Table Top channels to the Table Top, and remove the channel from the Table Top. Save Screws for later in the assembly.
- Page 7 TOOLS AND HARDWARE REQUIRED FOR THIS PAGE NO HARDWARE REQUIRED FOR THIS PAGE Insert a W-Frame Leg Assembly (BWO) and a W-Frame Leg Brace Assembly (BWP) into the two large holes along the Table Top channel that is still connected to the Table Top as shown. Ensure you orient the Brace in the direction shown (the locking mechanism must be visible).
- Page 8 TOOLS AND HARDWARE REQUIRED FOR THIS PAGE BWH (x5) All removed in Step 1.1 BWI (x2) 2 ADULTS REQUIRED FOR THIS STEP Set the Table Top Channel back in place. While another adult holds the Legs, reinsert the five (5) screws you removed in step 1.1 into the holes of the Table Top Channel to secure it in place.
- Page 9 TOOLS AND HARDWARE REQUIRED FOR THIS PAGE BWI (x6) 2 ADULTS REQUIRED FOR THESE STEPS Place a Bench Assembly (BWN) underneath one of the Legs and slide the Sliding End Caps under the glide rails of the Bench Assembly as shown. Glide Rail Attach two (2) Sliding End Caps (BWI) to the tube on the other Table Leg, and lift the Bench Assembly upward until the Sliding End Caps rest inside the underside of the Bench.
- Page 10 TOOLS AND HARDWARE REQUIRED FOR THIS PAGE 10mm (x2) BWG (x4) BWH (x8) AON (x4) 2 ADULTS REQUIRED FOR THESE STEPS Lift the Legs upright and, while another adult holes the Table Legs in place, rotate the diagonal supports of a Table Leg Brace until the locking pin snaps into the notches located at the ends of the diagonal supports as illustrated.
- Page 11 TOOLS AND HARDWARE REQUIRED FOR THIS PAGE NO HARDWARE REQUIRED FOR THIS PAGE 2 ADULTS REQUIRED FOR THIS STEP Turn the Table upright. If you have an umbrella, remove the Umbrella Hole Plug from the hole in the center of 1.11 the Table Top and insert your umbrella.
- Page 12 TABLE STORAGE To store the Picnic Table, tip the Table up on one side as shown. Slide the Locking Ring down the Leg Brace, and push down on the Locking Lever. Locking Ring Locking Lever...
- Page 13 TABLE STORAGE After pushing down on the Locking Lever, push the Table Leg towards the Table Top. Repeat steps 2.1 - 2.2 for the second Table Leg. Lock the Table Leg in place by wrapping the Locking Strap around the Cross Brace of the Table Leg and through Loop Locking Strap Loop...
-
Page 14: Cleaning And Care
CLEANING & CARE Congratulations on your Lifetime ® product purchase. By following the instructions below, your new Lifetime product should provide you with years of service and enjoyment. Cleaning and Care The polyethylene panels are stain- and solvent-resistant. Most stains can be removed, using a mild soap and a soft-bristled brush. - Page 15 5. This warranty is in lieu of all other warranties expressed or implied, including warranties of merchantability ® or fi tness for use to the extent permitted by Federal and state law. Neither Lifetime Products, Inc. nor any representative assumes any other liability in connection with this product. This warranty gives you specifi c legal rights, and you may also have other rights which vary from state to state.
- Page 16 ® ENHANCE YOUR LIFETIME PURCHASE BY ADDING ACCESSORIES OR OTHER GREAT PRODUCTS To purchase accessories or other Lifetime Products, visit us at: www.lifetime.com Or call: 1-800-424-3865...
Need help?
Do you have a question about the 60030 and is the answer not in the manual?
Questions and answers
How do I order the BWI end caps.