Table of Contents
Advertisement
Quick Links
Advertisement
Table of Contents

Related Manuals for Wenglor B50


Summary of Contents for Wenglor B50
- Page 1 Smart Camera / Vision Sensor / 1D- / 2D-Code Scanners / OCR Reader Operating Instructions Translation of the Original Operating Instruction Subject to change without notice Available as PDF version only Version: 2.1.0 Status: 18.06.19 www.wenglor.com...
-
Page 2: Table Of Contents
Table of Contents 1. General ...........................4 1.1 Information Concerning these Instructions ..................... 4 1.2 Explanations of Symbols ......................... 4 1.3 Limitation of Liability ..........................5 1.4 Copyrights ..............................5 2. For Your Safety ........................6 2.1 Use for Intended Purpose ........................6 2.2 Use for Other than the Intended Purpose .................... - Page 3 7. Settings ..........................24 7.1 Run ................................. 24 7.2 Teach-In ..............................24 7.3 Teach + ..............................25 7.4 Display ..............................26 7.4.1 Intensity ............................26 7.4.2 Mode ............................27 7.5 Assistant ..............................28 7.6 Projects ..............................29 7.6.1 Current Project ..........................29 7.6.2 Loading a Project ........................
-
Page 4: General
1. General 1.1 Information Concerning these Instructions • These instructions apply to the product with ID code B50/C50. • They make it possible to use the product safely and efficiently. • These instructions are an integral part of the product and must be kept on hand for the entire duration of its service life. -
Page 5: Limitation Of Liability
• wenglor assumes no liability for printing errors or other inaccuracies contained in these operating instruc- tions, unless wenglor was verifiably aware of such errors at the point in time at which the operating instruc- tions were prepared. -
Page 6: For Your Safety
• The product is not suitable for use in potentially explosive atmospheres. • The product may only be used with accessories supplied or approved by wenglor, or combined with approved products. A list of approved accessories and combination products can be accessed at www.wenglor.com on the product detail page. -
Page 7: Personnel Qualifications
• In the event of possible changes, the respectively current version of the operating instruc- tions can be accessed at www.wenglor.com in the product’s download area. • Read the operating instructions carefully before using the product. -
Page 8: Technical Data
3. Technical Data 3.1 List of Technical Data Optical Characteristics ≥ 20 mm (weQube with auto-focus) Working range Resolution 736 px × 480 px Field of vision See “Range of Vision Table” Image chip See section 3.2 on available sensor types Type of light See section 3.2 on available sensor types... -
Page 9: Sensors With Monochrome Image Chip
Range of vision Range of vision table (weQube with auto-focus): Working distance 20 mm 100 mm 200 mm 1000 mm 5000 mm Range of vision 16×12 mm 64×48 mm 120×90 mm 600×450 mm 3000×2250 mm Range of vision for C mount variant depends on the utilized lens. 3.2 Sensors with Monochrome Image Chip Light Sensor type... -
Page 10: Sensors With Monochrome Image Chip And C-Mount
3.3 Sensors with monochrome image chip and C-mount Sensor type Connection Monochrome B50S012 Ethernet B50S014 B50S111 weQube Vision Industrial Ethernet B50S113 Ethernet B50S014 Industrial Ethernet B50S113 Ethernet C50C011 weQube Decode Industrial Ethernet C50C110 Ethernet B50R011 weQube OCR Industrial Ethernet B50R110 Ethernet B50M012 weQube... -
Page 11: Sensors With Color Image Chip And C-Mount
3.5 Sensors with color image chip and C-mount Sensor type Connection Monochrome B50S011 Ethernet B50S013 B50S110 weQube Vision Industrial Ethernet B50S112 Ethernet B50S013 Industrial Ethernet B50S112 Ethernet B50M011 weQube Industrial Ethernet B50M110 The following table specifies plug tightening torques and mounting options in order to assure compliant, error-free operation: Connection Tightening Torque (Nm) -
Page 12: Connection Diagrams
Pink Ethernet Gigabit bidirect. data line (A-D) Input confirmation Green/Yellow Encoder 0-pulse 0-0 (TTL) Contactor Monitoring 3.8 Complementary Products wenglor can provide you with suitable connection technology for your product. Suitable mounting technology no. Suitable connection technology no. Technical Data... -
Page 13: Layout
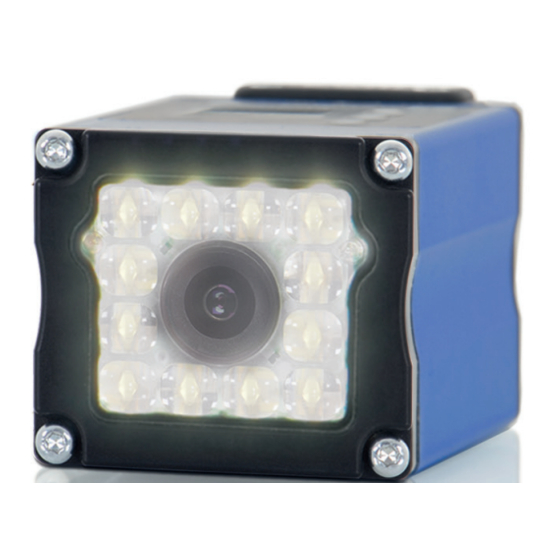
3.9 Layout 1 = image chip 2 = control keys 3 = display 4 = connector plug 3.10 Control Panel 60: display 20: enter key 22: up key 23: down key Image Processing and Smart Cameras... -
Page 14: Led Display
3.11 LED Display Profinet Function Communication status Module status Link/act LED Designation Status Function CS (communication status) Connection (AR) established with controller (only available with Profinet Green Protocol not initialized devices) No connection (AR) to controller MS (module status) Error (class: fatal) (only available with Profinet Blinking red Detection function, can be switched on via engineer-... -
Page 15: Scope Of Delivery
Device works Blinking green Standby Fatal error Blinking red Device error No Ethernet device connected green Link available Blinking green communication 3.12 Scope of Delivery • B50 / C50 • Quickstart • Initial start-up instructions Image Processing and Smart Cameras... -
Page 16: Transport And Storage
4. Transport and Storage 4.1 Transport Upon receipt of shipment, the goods must be inspected for damage in transit. In the case of damage, con- ditionally accept the package and notify the manufacturer of the damage. Then return the device, making reference to damage in transit. -
Page 17: Installation And Connection
5. Installation and Connection 5.1 System Overview Connector Cables Connection Cable Connection Cable M12, 12-pin to open end M12, 8-pin to RJ45 ZDCL001 (straight) ZC1V001 (straight) ZDCL002 (straight) ZAV50R502 (straight) ZDCL003 (straight) 10 m ZC1V002 (straight) 10 m ZDCL007 (straight) 30 m ZC1V013 (straight) 30 m... - Page 18 Connector Cables Connector Cables Connection Cable Connection Cable M12, 12-pin to open end M12, 8-pin to RJ45 ZDCL001 (straight) ZC1V001 (straight) ZDCL002 (straight) ZAV50R502 (straight) ZDCL003 (straight) 10 m ZC1V002 (straight) 10 m ZDCL007 (straight) 30 m ZC1V013 (straight) 30 m ZDCL004 (angled) ZC1V009 (angled) ZDCL005 (angled)
-
Page 19: Installation
5.2 Installation • Protect the product from contamination during installation. • Observe all applicable electrical and mechanical regulations, standards, and safety rules. • Protect the product against mechanical influences. • Make sure that the sensor is mounted in a mechanically secure fashion. •... -
Page 20: Operation At A Controller
• Install the respective device-specific electronic description file (or the GSDML file in the case of PROFINET) to the controller’s hardware manager. The required file can be downloaded from: www.wenglor.com Product World Product search (enter the product number) Download Device Description File. -
Page 21: Port Assignments
• Shut down the machine. • Analyze and eliminate the cause of error with the help of the diagnostics information. • If the error cannot be eliminated, please contact wenglor’s support department. • Do not operate in case of indeterminate malfunctioning. -
Page 22: Functions Overview
6. Functions Overview 6.1 Menu Structure The desired menu language must be selected after initial start-up, and after each reset (see “7.9 Language” on page 32). You can switch to the configuration menu by pressing any key. NOTE! If no settings are adjusted in the configuration menu for a period of 30 seconds, the sensor is automatically returned to the display mode. - Page 23 The sensor’s configuration menu is laid out as follows: Teach-In 1 Teach-In 2 Teach-In 3 <T> for teach-in Teach-In Teach-In 4 Teach-In 5 Teach-In 6 Image Count Number of frames: 0 - 1000 Teach+ Start Minimum Normal Maximum Rotate Power Save Display Intensity Screensaver...
-
Page 24: Settings
7. Settings The first time the sensor is started and after each reset, language selection and the assistant appear at first (see section 6.9). Language English Deutsch Français 7.1 Run The sensor is switched to the display mode. The text mode is the default setting for the display mode. The display mode can be changed to the network mode, the status mode, the numeric mode or the match code mode in the display menu (see section “7.4.2 Mode”... -
Page 25: Teach
7.3 Teach + In the case of Teach + , entire image sequences are saved to a compressed file, including all settings for the current project, for example interface settings etc. This file can be transferred to the PC with the help of soft- ware (see separate software instructions). -
Page 26: Display
7.4 Display Various changes can be made to the settings at the display in order to simplify operation of the sensor. Display Display settings Rotate Rotate: Rotate the display 180°. The display is rotated 180° by pressing Intensity the 8 key. The display can be returned to its original position by pressing the same key once again. -
Page 27: Mode
7.4.2 Mode The weQube display is equipped with various display modes which can be used as default settings for the run mode. Selection of the display for the “Run” mode Mode O Network Network: The statuses of the various networks are displayed in the “Run” O Text mode (TCP/IP, FTP, Industrial Ethernet). -
Page 28: Assistant
7.5 Assistant The assistant is started automatically when the sensor is switched on for the first time, and each time the sensor settings are reset. However, it can also be started manually in order to simplify project selection and sensor configuration. Starting the Assistant The assistant Start the assistant by pressing the “Y”... -
Page 29: Projects
Exiting the assistant You have com- If you want to run the assistant again, press the “Y” key. pleted all of the steps offered by After pressing the “N” key, the assistant is exited and the display is switched to the the assistant. -
Page 30: Selecting The Start Project
7.6.3 Selecting the Start Project Set start project Selecting the start project Project_1 You can select a project from the project list in the “Set start project” menu, which is then selected automatically when the sensor is started. Project_2 Project_3 ... -
Page 31: Ethernet
7.8.2 Ethernet Settings for the Ethernet connection Ethernet DHCP DHCP: Display: DHCP on or DHCP off IP address IP address: Display of the selected IP address Subnet mask Subnet mask: Display of the selected subnet mask Std. gateway Std. gateway: Display of the selected standard gateway MAC address MAC address:... -
Page 32: Language
7.8.2.3. MAC Address MAC Address Displaying the MAC Address The sensor’s unchangeable MAC address is displayed. After pressing the key, the display is returned to the Ethernet network menu. 54:4a:05:00:08:04 7.8.2.4. Network Reset Network reset Resetting the Network Configuration Press The network configuration can be reset by pressing “R”. -
Page 33: Restart
Be sure to make a note of the new password before exiting the “change password” function! If the password is forgotten, it must be overwritten with a master password. The master password can be requested by e-mail from support@wenglor.com. Image Processing and Smart Cameras... -
Page 34: Status Information
• Do not clean the sensor with solvents or cleansers which could damage the product. • The product must be protected against contamination during initial start-up. 10. Proper Disposal wenglor sensoric GmbH does not accept the return of unusable or irreparable products. Respectively valid national waste disposal regulations apply to product disposal. Software... -
Page 35: Appendix
Description of software in separate operating instructions 2.1.0 18.06.2019 Description of web-based configuration in software instructions 11.2 EU Declaration of Conformity The EU declaration of conformity can be found on our website at www.wenglor.com in the product’s down- load area. Image Processing and Smart Cameras...
Need help?
Do you have a question about the B50 and is the answer not in the manual?
Questions and answers