Daikin 2MXU40GV1B Service Manual Removal Procedure
Hide thumbs
Also See for 2MXU40GV1B:
- Service manual (175 pages) ,
- Service manual (274 pages) ,
- Installation manual (18 pages)

Related Manuals for Daikin 2MXU40GV1B


Summary of Contents for Daikin 2MXU40GV1B
- Page 1 Si121091 REMOVAL PROCEDURE S E R V I C E M A N U A L 4.0/5.0 kW Class Outdoor Unit Inverter Multi Type...
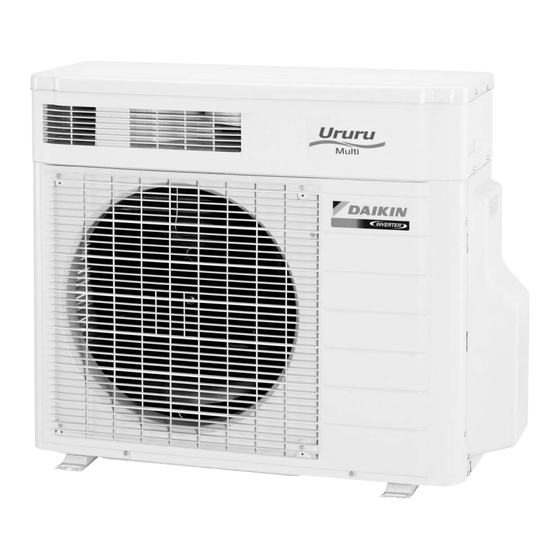
- Page 2 Service Manual Removal Procedure Outdoor Unit Heat Pump 2MXU40GV1B 2MXU50GV1B...
-
Page 3: Table Of Contents
Si121091 Table of Contents 1. Removal of Humidifier Unit ..............2 2. Removal of Heater ASSY / Humidifying Rotor (Moisture Adsorption Element) / Humidifying Rotor Motor......5 3. Removal of Damper Motor ..............9 4. Removal of Limit Switch / Humidifying Thermistor........11 5. Removal of Fan-valve-duct ASSY............14 6. -
Page 4: Removal Of Humidifier Unit
Removal of Humidifier Unit Si121091 1. Removal of Humidifier Unit Procedure Warning Be sure to wait 10 minutes or more after turning off all power supplies before disassembling work. Step Procedure Points 1. External appearance Humidifier unit Air outlet (R9880) Air inlet (R9881) 2. - Page 5 Si121091 Removal of Humidifier Unit Step Procedure Points Remove the screw, and the hose cover. Hose cover (R9883) Take out the humidifying hoses. Humidifying hose (R9884) The figure shows the Be sure to wait 10 minutes arrangement of the or more after turning off the relay harness.
- Page 6 Removal of Humidifier Unit Si121091 Step Procedure Points Disconnect the 4 relay Do not pull the harnesses connectors. from the outdoor unit strongly so as not to loose the hook of the mounting plate. (See the illustration below on this page for the mounting plate.) Relay connectors (R9886)
-
Page 7: Removal Of Heater Assy / Humidifying Rotor (Moisture Adsorption Element) / Humidifying Rotor Motor
Si121091 Removal of Heater ASSY / Humidifying Rotor (Moisture Adsorption Element) / Humidifying Rotor Motor 2. Removal of Heater ASSY / Humidifying Rotor (Moisture Adsorption Element) / Humidifying Rotor Motor Procedure Warning Be sure to wait 10 minutes or more after turning off all power supplies before disassembling work. - Page 8 Removal of Heater ASSY / Humidifying Rotor (Moisture Adsorption Element) / Humidifying Rotor Motor Si121091 Step Procedure Points Detach the harness for heater from the groove. (R9891) Remove the duct. Duct (adsorption side) (R9892) Release the lead wire for humidifying rotor motor from 2 hooks.
- Page 9 Si121091 Removal of Heater ASSY / Humidifying Rotor (Moisture Adsorption Element) / Humidifying Rotor Motor Step Procedure Points Remove the 2 screws Do not dismount the heater to remove the heater ASSY. ASSY. (R9894) 2. Removal of the humidifying rotor. Detach the lead wire for fan motor from the groove.
- Page 10 Removal of Heater ASSY / Humidifying Rotor (Moisture Adsorption Element) / Humidifying Rotor Motor Si121091 Step Procedure Points Lift the humidifying A heat catalyst (black) is rotor up to remove. applied on the upper side. Humidifying rotor (R9900) 3. Removal of the humidifying rotor motor Disconnect the connector for the...
-
Page 11: Removal Of Damper Motor
Si121091 Removal of Damper Motor 3. Removal of Damper Motor Procedure Warning Be sure to wait 10 minutes or more after turning off all power supplies before disassembling work. Step Procedure Points 1. Removal of the damper Disconnect the connector motor for the humidifying rotor motor. - Page 12 Removal of Damper Motor Si121091 Step Procedure Points Remove the 2 screws. (R0233) Remove the damper motor. (R0234) Removal Procedure...
-
Page 13: Removal Of Limit Switch / Humidifying Thermistor
Si121091 Removal of Limit Switch / Humidifying Thermistor 4. Removal of Limit Switch / Humidifying Thermistor Procedure Warning Be sure to wait 10 minutes or more after turning off all power supplies before disassembling work. Step Procedure Points 1. Removal of the limit switch Harness ASSY Limit switch (R10812) - Page 14 Removal of Limit Switch / Humidifying Thermistor Si121091 Step Procedure Points Push up the limit switch with a flat screwdriver. Limit switch (R0236) Disconnect the terminals. (R0237) Release the harness from the hooks and remove the harness ASSY. (R0238) (R0239) Removal Procedure...
- Page 15 Si121091 Removal of Limit Switch / Humidifying Thermistor Step Procedure Points 2. Removal of the When replacing the humidifying thermistor humidifying thermistor, order a seal material Peel off the seal together. material. (R0245) Pull out the humidifying thermistor. (R10548) When reassembling, put the harness through under the limit switch cover.
-
Page 16: Removal Of Fan-Valve-Duct Assy
Removal of Fan-valve-duct ASSY Si121091 5. Removal of Fan-valve-duct ASSY Procedure Warning Be sure to wait 10 minutes or more after turning off all power supplies before disassembling work. Step Procedure Points Preparation Remove the heater ASSY Duct (adsorption side) and the humidifying rotor. - Page 17 Si121091 Removal of Fan-valve-duct ASSY Step Procedure Points Release the 2 hooks on Release the hooks while the right side. bending the right side panel. (R0243) Lift up the fan-valve- duct ASSY to remove. Fan-valve-duct ASSY (R0244) Removal Procedure...
-
Page 18: Removal Of Hygroscopic Fan Rotor / Hygroscopic Fan Motor
Removal of Hygroscopic Fan Rotor / Hygroscopic Fan Motor Si121091 6. Removal of Hygroscopic Fan Rotor / Hygroscopic Fan Motor Procedure Warning Be sure to wait 10 minutes or more after turning off all power supplies before disassembling work. Step Procedure Points 1. -
Page 19: Removal Of Panels And Plates
Si121091 Removal of Panels and Plates 7. Removal of Panels and Plates Procedure Warning Be sure to wait 10 minutes or more after turning off all power supplies before disassembling work. Procedure Points Step External appearance. Remove the humidifying unit. Do not release the mounting plate at this point. - Page 20 Removal of Panels and Plates Si121091 Step Procedure Points Remove the 4 screws of the discharge grille. (R10345) Release the 4 hooks When reassembling, make and remove the sure to fit the 4 hooks. discharge grille. (R9932) Remove the 2 screws of the stop valve cover and remove it.
- Page 21 Si121091 Removal of Panels and Plates Step Procedure Points When reassembling the stop valve cover, make sure to fit the 4 hooks. (R9934) Removal Procedure...
-
Page 22: Removal Of Electrical Box
Removal of Electrical Box Si121091 8. Removal of Electrical Box Procedure Warning Be sure to wait 10 minutes or more after turning off all power supplies before disassembling work. Procedure Points Step 1. Disconnect the When reassembling, fasten connecting wires the wires with screws on the Room B terminal board. - Page 23 Si121091 Removal of Electrical Box Step Procedure Points Release the mounting When reassembling, make plate from the hook. sure to hook the mounting plate. Mounting plate (R9938) Disconnect the connector for the fan [S70] motor [S70]. (R9939) Release the lead wire for the fan motor from the hooks.
- Page 24 Removal of Electrical Box Si121091 Step Procedure Points Disconnect the [S40] : Overload protector connector for the [S40] overload protector [S40]. (R9942) Disconnect the [S20] : (white) Electronic connectors [S20], expansion valve coil for [S21] [S20] [S80] [S21], and [S80]. room A [S21] : (red) Electronic expansion valve coil for...
- Page 25 Si121091 Removal of Electrical Box Step Procedure Points Detach the discharge Meet the edge of the pipe thermistor. thermistor and the clip. Be careful not to lose the clip for the discharge pipe thermistor. Thermistor Discharge pipe Clip Cross section (R10346) Discharge pipe thermistor (R9946)
- Page 26 Removal of Electrical Box Si121091 Step Procedure Points Remove the screw on the right side of the electrical box. (R9949) Remove the grounding screws of earth wires. Earth wire (R9950) Remove the screw in front of the electrical box. (R9951) Lift up the electrical box to remove.
-
Page 27: Removal Of Pcb
Si121091 Removal of PCB 9. Removal of PCB Procedure Warning Be sure to wait 10 minutes or more after turning off all power supplies before disassembling work. Procedure Points Step 1. Removal of the control Preparation Remove the panels, plates, Electrical box (cover) and electrical box according Remove the screw of... - Page 28 Removal of PCB Si121091 Step Procedure Points Remove the 2 screws of the terminal boards. (R9958) Release the outdoor air thermistor from the hook. (R9959) Remove the 2 screws and detach the 1 clip to remove the radiation shield plate. Radiation shield plate (R9960) Removal Procedure...
- Page 29 Si121091 Removal of PCB Step Procedure Points Compressor harness Clip Hole (R9961) The clip is push mount type. (R9962) Cut off the clamps at 2 locations and disconnect the wire harnesses. (R9963) Removal Procedure...
- Page 30 Removal of PCB Si121091 Step Procedure Points Remove the 7 screws in total. (R9964) (R9965) Lift up the back side When reassembling, make slightly and release the sure that the hooks of the hooks of the front. electrical box are placed on the PCB.
- Page 31 Si121091 Removal of PCB Step Procedure Points (R9967) Lift up the control PCB Control PCB to remove. (R9968) Removal Procedure...
- Page 32 Removal of PCB Si121091 Step Procedure Points Control PCB [S91] [S40] [S92] [S20] [S72] [S90] [S70] [S80] [S21] [S23] [S22] (R9969) [S20] : Electronic expansion valve coil for room A [S21] : Electronic expansion valve coil for room B [S22] : Damper motor [S23] : Rotor motor [S40] : Overload protector [S70] : DC Fan motor...
-
Page 33: Removal Of Sound Blanket
Si121091 Removal of Sound Blanket 10.Removal of Sound Blanket Procedure Warning Be sure to wait 10 minutes or more after turning off all power supplies before disassembling work. Procedure Points Step 1. Removal of the right side Preparation panel Remove the electrical box beforehand. - Page 34 Removal of Sound Blanket Si121091 Step Procedure Points 3. Removal of the sound blanket Release the fixing strings, open the sound blanket (outside sleeve) and pull it out. Sound blanket (outside sleeve) (R7613) Lift up the sound Since the piping ports are blanket (top) to remove.
- Page 35 Si121091 Removal of Sound Blanket Step Procedure Points Open the sound blanket (inside sleeve) and pull it out. Sound blanket (inside sleeve) (R9975) Pull out the sound blanket (bottom). Sound blanket (bottom) (R9976) Removal Procedure...
-
Page 36: Removal Of Propeller Fan / Fan Motor
Removal of Propeller Fan / Fan Motor Si121091 11.Removal of Propeller Fan / Fan Motor Procedure Warning Be sure to wait 10 minutes or more after turning off all power supplies before disassembling work. Procedure Points Step 1. Removal of the propeller Spanner size: 10mm Unscrew the washer fitted nut (M6) by an... - Page 37 Si121091 Removal of Propeller Fan / Fan Motor Step Procedure Points The figure shows the arrangement of the fan motor lead wire. (R9980) Remove the 1 screw to When reassembling, make remove the fan motor sure the mark of the fan Fan motor fixing plate fixing plate.
- Page 38 Removal of Propeller Fan / Fan Motor Si121091 Step Procedure Points Turn the fan motor fixing plate backward and undo the 2 fixing hooks of the lead wire. (R9983) Release the fan motor When reassembling, put the lead wire. lead wire through the back of the motor (so as not to be entangled with the propeller fan).
-
Page 39: Removal Of Thermistors
Si121091 Removal of Thermistors 12.Removal of Thermistors Procedure Warning Be sure to wait 10 minutes or more after turning off all power supplies before disassembling work. Procedure Points Step 1. Removal of the assembly Be careful not to lose the clip of thermistor for the discharge pipe thermistor. - Page 40 Removal of Thermistors Si121091 Step Procedure Points Cut off the clamp. (R7634) Open the putty and remove the each Thermistor (Liquid) thermistor. Room A [S91] : Gas pipe Thermistor (Gas) thermistor Room A Room A (Black) Room B (Gray) [S92] : Liquid pipe thermistor Room A (Black) Room B (Gray)
-
Page 41: Removal Of Compressor
Si121091 Removal of Compressor 13.Removal of Compressor Procedure Warning Be sure to wait 10 minutes or more after turning off all power supplies before disassembling work. Procedure Points Step Remove the terminal Be careful so as not to burn Terminal cover cover. - Page 42 Removal of Compressor Si121091 Step Procedure Points Remove the 2 nuts with an open-end spanner. Warning Since it may happen that refrigerant oil in the compressor catches fire, prepare wet cloth so as to extinguish fire immediately. Warning Ventilate when refrigerant leaks during the work.
-
Page 43: Removal Of Four Way Valve / Electronic Expansion Valve
Si121091 Removal of Four Way Valve / Electronic Expansion Valve 14.Removal of Four Way Valve / Electronic Expansion Valve Procedure Warning Be sure to wait 10 minutes or more after turning off all power supplies before disassembling work. Step Procedure Points 1. - Page 44 Removal of Four Way Valve / Electronic Expansion Valve Si121091 Step Procedure Points Before working, make Reassembling precautions sure that the refrigerant is 1. Use non-oxidizing brazing empty in the circuit. method. If nitrogen gas is not Be sure to apply nitrogen available, braze the parts replacement when speedily.
- Page 45 Revision History Month / Year Version Revised contents First edition 01 / 2013 Si121091...
- Page 46 Improper installation can result in water or refrigerant leakage, electrical shock, fire or explosion. Use only those parts and accessories supplied or specified by Daikin. Ask a qualified installer or contractor to install those parts and accessories. Use of unauthorised parts and accessories or improper installation of parts and accessories can result in water or refrigerant leakage, electrical shock, fire or explosion.
Need help?
Do you have a question about the 2MXU40GV1B and is the answer not in the manual?
Questions and answers