Advertisement
Pre-Assembly:
•
Please read all instructions carefully before assembly.
•
For your safety and ease to assembly the products by two people is recommended.
•
Carefully lay out and identify all parts and hardware prior to assembly.
•
Save all packing materials until assembly is complete to avoid accidentally discarding small parts or hardware.
Parts Included:
BOX 1:
A. Headboard (1pc)
BOX 3:
D. Slat roll (1pc)
Hardware included:
•
(1) Allen Key (E and J)
•
(32)#8x30mm Phillips head screws (F)
Tools Needed:
•
Philips screwdriver (not provided)
:
Assembly Instructions
1. Determine the desired height of the side rail lips. The lips have been pre-attached to the lower position (box
spring level) on each side rail. Fig. 3. Note: Lips may be adjusted to the higher position (platform level –
makes box spring optional) by removing the Allen bolts and re-attaching lips to the higher set of pre-drilled
holes. Fig. 4. Tighten with Allen Key (J).
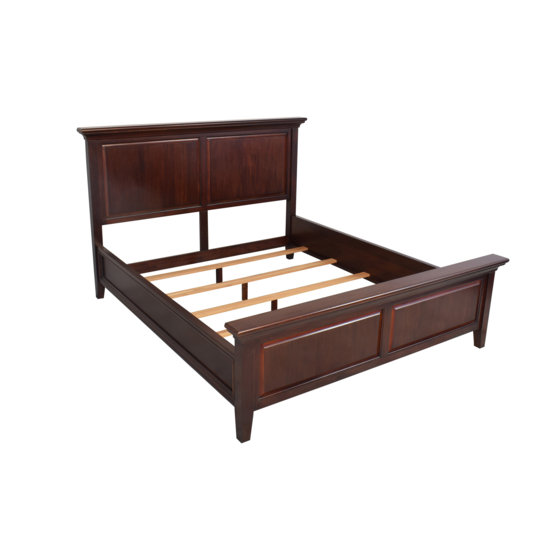
2. Attach each side rail hooked end to into the corresponding slots of the Headboard and Footboard. Be sure the
ledges of the side rails are facing inward. Fig. 1.
3. Place slat roll on side rail ledges and roll out so the pre-drilled holes on the end slat line up with the pre-drilled
holes on the side rail ledges. (Binding should face UP). Attach the cross-slats in place by inserting the 32
phillips wood screws (F) and tightening with Phillips screwdriver. Box spring level assembly is complete. Fig. 2.
Figure #1
Hudson Full Bed
Assembly Instructions
BOX 2:
B. Footboard (1pc)
BOX 3:
C. Siderails (2pcs)
Figure #2
Advertisement
Table of Contents

Related Manuals for Pottery Barn Hudson Full Bed


Summary of Contents for Pottery Barn Hudson Full Bed
- Page 1 Hudson Full Bed Assembly Instructions Pre-Assembly: • Please read all instructions carefully before assembly. • For your safety and ease to assembly the products by two people is recommended. • Carefully lay out and identify all parts and hardware prior to assembly.
- Page 2 For platform level: 1. Adjust side rail lips to the higher position (platform level) by removing the pre-attached Allen bolts (L) and re- attaching lips to the higher set of pre-drilled holes. Fig. 4. Tighten with Allen Key (E). 2. Attach each side rail hooked end to into the corresponding slots of the Headboard and Footboard. Be sure the ledges of the side rails are facing inward.
Need help?
Do you have a question about the Hudson Full Bed and is the answer not in the manual?
Questions and answers