
Related Manuals for Oneida Air Systems STZ210000


Summary of Contents for Oneida Air Systems STZ210000
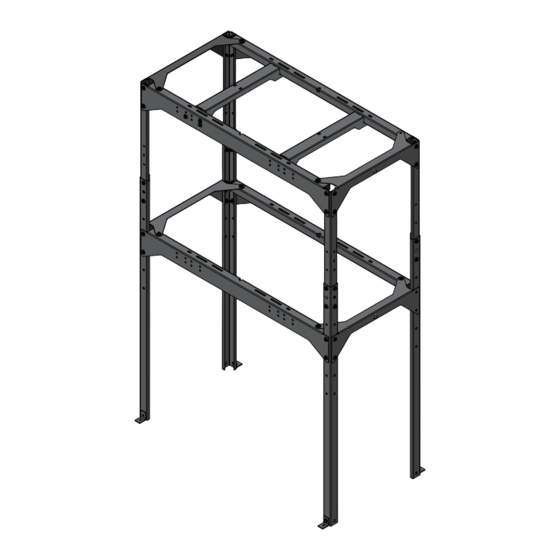
- Page 1 Rev: 05/18/2020 Doc. #ZBI282321 INSTRUCTION SHEET Telescoping Stand 21/23/28" Cyclone Separators #STZ210000 #STZ230000 #STZ280000 Actual appearance may vary to that shown above. 1-800-732-4065 oneida-air.com...
- Page 2 47-7/8" 1216 mm 51-7/8" 1318 mm 56-7/8" 1445 mm 61-7/8" 1572 mm Refer to table above if you are using a custom container solution as the clearance height may vary based on your waste container size. Oneida Air Systems, Inc.
- Page 3 47-7/8" 1216 mm 51-7/8" 1318 mm 56-7/8" 1445 mm 61-7/8" 1572 mm Refer to table above if you are using a custom container solution as the clearance height may vary based on your waste container size. Oneida Air Systems, Inc.
- Page 4 47-7/8" 1216 mm 51-7/8" 1318 mm 56-7/8" 1445 mm 61-7/8" 1572 mm Refer to table above if you are using a custom container solution as the clearance height may vary based on your waste container size. Oneida Air Systems, Inc.
-
Page 5: System Contents
Short Support Brace AFT000004 3/8-16" Whiz-Lock Nut STX280002 Cyclone Support Brace FPB280001 Filter Plenum Support Brace Please unpack the parts carefully and con rm you have received each item listed. ere may be le over hardware. Oneida Air Systems, Inc. - Page 6 Position 2 with/without Drum Dolly Airlock with Position 2 Position 2 Position 2 1 Cu. Yd. Hopper Airlock with Position 3 Position 3 Position 3 1-1/2 or 2 Cu. Yd. Hopper Airlock with Transfer Blower FIG. 1b Oneida Air Systems, Inc.
- Page 7 Positioning Hole and Visible Height Marker Note: e stand will adjust to three di erent heights to accommodate varying waste containers (dual-drum, airlock, etc.). You will use the same height marker for each Leg. FIG. 2a FIG. 2b Oneida Air Systems, Inc.
- Page 8 1445 mm 61-7/8" FIG. 3b 1572 mm Secure the Long Braces to the Leg Assemblies using four Bolts (D2), four Washers (D3), and four Whiz-Nuts (D4) [FIG. 3c]. Note: Finger tighten only at this time. FIG. 3c Oneida Air Systems, Inc.
- Page 9 If you are installing a 28" Cyclone, you will replace one of the top Short Braces with the Plenum Support Brace (G) on the side where your Filter Plenum will be located [FIG. 4b]. Note: Finger tighten only at this time. FIG. 4b Oneida Air Systems, Inc.
- Page 10 Short Braces (E) . Secure them in place using six Bolts (D2), six Washers (D3), and six Whiz- Nuts (D4) for each Long Brace [FIG. 6]. Note: Finger tighten only at this time. FIG. 6 Oneida Air Systems, Inc.
- Page 11 [FIG. 7c] before securing in place with eight Bolts (D2), eight Washers (D3), and eight Whiz-Nuts (D4) for each Cyclone Support. Note: For ease of installation, raise the top of Install Position the stand assembly with blocks to install the hardware. FIG. 7c Oneida Air Systems, Inc.
- Page 12 If desired, the Stand can be bolted down to the oor through the holes on the Stand Feet (D1). Note: You will need to supply your own hardware (e.g. screws, washers, lag bolts, etc.) for securing the system to the oor. FIG. 10 Oneida Air Systems, Inc.
- Page 13 Regardless of where you purchased your system, if you have any questions or issues with missing / damaged parts, please call Oneida Air Systems rst to let us help resolve your problem. We fully stand behind the quality of our product and place the utmost value on our customer’s satisfaction.
Need help?
Do you have a question about the STZ210000 and is the answer not in the manual?
Questions and answers