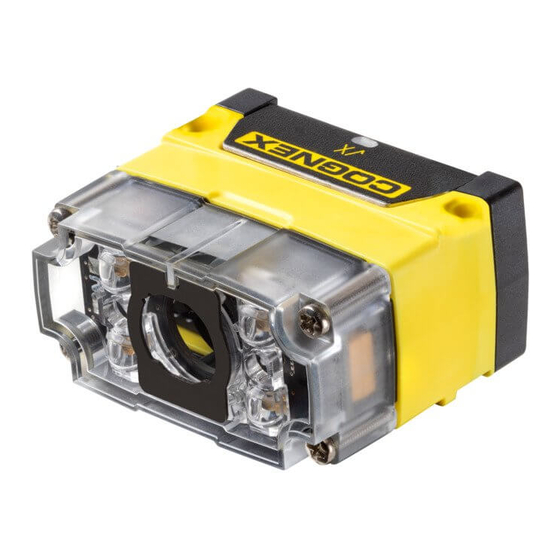
Cognex DataMan 70 Series Reference Manual

Cognex DataMan 70 Series Reference Manual

Hide thumbs Also See for DataMan 70 Series:

Advertisement

Quick Links

DataMan
Reference Manual
2020 June 24
Revision: 6.2.0.2
®
70 Series

Advertisement

Table of Contents
loading
Need help?

Need help?

Do you have a question about the DataMan 70 Series and is the answer not in the manual?

Questions and answers

Summary of Contents for Cognex DataMan 70 Series

  • Page 1 ® DataMan 70 Series Reference Manual 2020 June 24 Revision: 6.2.0.2...
  • Page 2: Legal Notices

    Copyright © 2020. Cognex Corporation. All Rights Reserved. Portions of the hardware and software provided by Cognex may be covered by one or more U.S. and foreign patents, as well as pending U.S. and foreign patents listed on the Cognex web site at: cognex.com/patents.
  • Page 3: Table Of Contents

    DataMan 70 Readers with a 16 mm Lens Connections, Optics and Lighting I/O Cable RS-232 Cable DataMan 70 Series Specifications DataMan 70 Series Imager Specifications LED Wavelengths Using Your DataMan 70 Installing the DataMan Software Setting the Focus Position Trigger Modes...
  • Page 4 Table of Contents Precautions Regulations/Conformity...
  • Page 5: Symbols

    Symbols Symbols The following symbols indicate safety precautions and supplemental information: WARNING: This symbol indicates a hazard that could cause death, serious personal injury or electrical shock. CAUTION: This symbol indicates a hazard that could result in property damage. Note: This symbol indicates additional information about a subject. Tip: This symbol indicates suggestions and shortcuts that might not otherwise be apparent.
  • Page 6: Getting Started

    About DataMan 70 The DataMan 70 series readers are best in class ID readers, offering superior performance with the latest ID tools, flexibility to configure the reader in terms of lighting and optics to optimize the application, and an ease-of-use giving the user the ability to setup and deploy an application quickly and efficiently all without the need for PC: Superior performance, 1-D and 2-D code reading, including HotBars™...
  • Page 7: Dataman 70 Accessories

    Cognex->DataMan Software v x.x.x->Documentation->English->Setup Tool Reference Manual The Release Notes list detailed system requirements and additional information about this DataMan software release. Cognex->DataMan Software v x.x.x->Documentation->DataMan v x.x.x Release Notes DataMan 70 Accessories ACCESSORIES FOR DM70 Sealed USB type C cable to USB type A DMA-STCBLE-IP65-25 straight 2.5m...
  • Page 8: Dataman 70 Systems

    Getting Started Logistics Bracket DMA-BKT-LGS Value Line Bracket DMA-BKT-70-VAL Industrial Ethernet connection module DMA-EZCCM-001 EZCCM to USB cable DMCB-EZCCM-USB-03 ACCESSORIES FOR DM70 USED WITH DMA-SERIAL-IP65-xx DM-USBIO-00 USB & Flying Leads I/O Cable, 2.0 m RS-232 & Flying Leads I/O Cable, 2.5 m DM-RS232IO-00 DM100-IOBOX-000 DataMan Basic I/O Module DataMan 70 Systems...
  • Page 9: Communication Module

    Getting Started 70QL 2-D Codes Algorithm 1DMax, HotBars 1DMax, IDQuick, 1DMax, IDQuick, 1DMax, IDQuick, HotBars HotBars HotBars Acquisition 2 fps 60 fps Max Decode Rate 2/sec 45/sec 45/sec 45/sec 72QL 2-D Codes Algorithm 1DMax, Hotbars 1DMax, IDQuick, 1DMax, IDQuick, 1DMax, IDQuick, HotBars HotBars HotBars Acquisition...
  • Page 10: Pin Adapter Cable

    Getting Started P1 Pin Number Signal Name External Trigger External Illumination 9 Pin Adapter Cable The following table shows the pinouts. Pin Number Signal Name Trigger TXD Output TTL Only RXD Input TTL Only Ground +5V Power CTS Input TTL Only RTS Output TTL Only Beeper/Download Serial I/O Adapter (DMA-SERIALREST-ST)
  • Page 11: Usb Connections

    Getting Started This is a male connector/plug. Pin Number Signal Name DC+ (system power, 5-24 VDC) Output-0 Input-0 Output-Common Reserved Reserved USB Connections When connected to a PC over USB, the DataMan 70 appears as a COM port. You can connect your device to the computer in the following ways:...
  • Page 12: Connecting To Ezccm

    Getting Started Connect directly to the PC: Connect to the PC through a basic I/O module: If the reader is configured as an HID device and you want to return to USB serial, scan the USB serial connection code: Note: The DataMan PC software must be installed for this connection type! Connecting to EZCCM To connect the DataMan 70 reader to the industrial Ethernet connection module (EZCCM), the following cable is required: DMCB-EZCCM-USB-03.
  • Page 13: Indicator Led

    Getting Started Illumination LEDs LED aimers Mounting holes Good/bad read indicator USB type-C port Indicator LED Type Color Meaning Status LED spot GREEN Good read Bad read Dimensional Drawings Observe the following reader dimensions when installing the DataMan 70 and DataMan 72 reader. Note: Dimensions are in millimeters [inches] and are for reference purposes only.
  • Page 14 Getting Started...
  • Page 15: Setting Up Your Dataman 70

    Setting Up Your DataMan 70 Setting Up Your DataMan 70 This section provides information on the physical appearance of the DataMan 70 reader, details the steps of mounting the reader, and gives information on the imager itself. Mounting Mounting the DataMan 70 at a slight angle (15°) can reduce reflections and improve reader performance. Having a recess for screw heads on the top and the bottom, DataMan 70 allows for upside down mounting.
  • Page 16: Field Of View And Reading Distances

    10 MIL 6 MIL The following map shows the FoV of the DataMan 70 series readers with a 6.2 mm lens. The horizontal and vertical field of view is shown for working distances of 40 mm, 65 mm and 105 mm.
  • Page 17: Dataman 70 Readers With A 16 Mm Lens

    30 MIL The following map shows the FoV of the DataMan 70 series readers with a 6.2 mm lens. The horizontal and vertical field of view is shown for working distances of 150 mm, 190 mm, 225 mm, 375 mm and 500 mm.
  • Page 18 Setting Up Your DataMan 70 Distances in mm 2D min. code 1D min. code 3 MIL 2 MIL 5 MIL 3 MIL 6 MIL 4 MIL 7 MIL 4 MIL 12 MIL 5 MIL 15 MIL 10 MIL 25 MIL 15 MIL DM72 Distances in mm...
  • Page 19: Connections, Optics And Lighting

    Setting Up Your DataMan 70 Connections, Optics and Lighting I/O Cable You can connect a cable with USB & flying leads (DM-USBIO-00) to the cable that is attached to the device. The following table shows the pinout and color description of the flying leads. Note: GND (Pin 4) is connected to the reader housing, cable shield, and DB15 shell.
  • Page 20: Dataman 70 Series Specifications

    External power supply: +5 — +24 VDC Supplied by limited-energy circuit according to IEC/ UL/ CSA 61010-1 5VDC, <2.5 W (powered over USB), average power max. 1.5 W Power Consumption DataMan 70 Series Imager Specifications Specification DataMan 70 Imager DataMan 72 Imager Image Sensor...
  • Page 21: Using Your Dataman 70

    3. Connect the DataMan 70 to your PC. 4. Choose Start > Programs > Cognex > DataMan Software vx.x.x > Setup Tool to launch the DataMan Setup Tool. Detected readers will appear under COM ports. 5. Click Refresh to update the list of connected devices.
  • Page 22 Using Your DataMan 70 1. Remove the screws and the front cover. DM70 with 6.2 mm lens DM70 with 16 mm lens 2. Using a flathead screwdriver, set the focus position from the front. Always turn clockwise to focus to a larger distance and counterclockwise to focus to a shorter distance.
  • Page 23: Trigger Modes

    Using Your DataMan 70 3. Remount the front cover. Observing the tightening sequence below, tighten all four screws to 9 Ncm using a torque wrench. DM70 with 6.2 mm lens DM70 with 16 mm lens Note: The rib in the front cover must be oriented to the top side. Trigger Modes DataMan 70 supports a variety of trigger modes: Single: Acquires a single image and attempts to decode any symbol it contains or more than one symbol in cases...
  • Page 24: Training

    Using Your DataMan 70 Single trigger Burst mode Self trigger Continuous mode Training Training your reader with the expected symbology may help increase decode yield. To train your reader, place a code in front of the reader and do one of the following: Click and hold the trigger button in the DataMan Setup Tool ( ) for at least 3 seconds and then release it.
  • Page 25: Wiring The Basic I/O Module

    Wiring the Basic I/O Module Wiring the Basic I/O Module 1. Power: 5-24 VDC, 2.5W peak. 2. Discrete output: Only Output 0 is supported, current sink or source depending on wiring of output common (C). Max current is 25 mA. 3.
  • Page 26: Input Wiring Example

    Wiring the Basic I/O Module Input Wiring Example...
  • Page 27: Multi-Port Connections

    Multi-port Connections Multi-port Connections You can connect multiple DataMan 70 readers to a single PC (or other device equipped with a serial port) using a multi- port connection. A multi-port connection creates a daisy-chain of readers. Each reader receives serial data from the previous reader and transmits it to the next reader.
  • Page 28 Multi-port Connections The maximum cable length between any two DataMan 70 readers or between the PC and any DataMan reader should be no greater than 15 meters. There is no fixed limit to the number of DataMan 70 readers that you can connect to a single PC. Each reader introduces a delay of about 100 ms when it retransmits received serial data.
  • Page 29: Cleaning And Maintenance

    Cleaning and Maintenance Cleaning and Maintenance Cleaning the Reader Housing To clean the outside of the reader housing, use a small amount of mild detergent cleaner or isopropyl alcohol on a cleaning cloth. Do not pour the cleaner directly onto the reader housing. CAUTION: Do not attempt to clean any DataMan product with harsh or corrosive solvents, including lye, methyl ethyl ketone (MEK) or gasoline.
  • Page 30 Precautions Precautions To reduce the risk of injury or equipment damage, observe the following precautions when you install the Cognex product: Route cables and wires away from high-current wiring or high-voltage power sources to reduce the risk of damage or malfunction from the following causes: over-voltage, line noise, electrostatic discharge (ESD), power surges, or other irregularities in the power supply.
  • Page 31 However, as with any electrical equipment, the best way to ensure safe operation is to operate them according to the agency guidelines that follow. Please read these guidelines carefully before using your device. Note: For the most current CE declaration and regulatory conformity information, see the Cognex support site: cognex.com/support. Safety and Regulatory...
  • Page 32 Regulations/Conformity For European Community Users Cognex complies with Directive 2012/19/EU OF THE EUROPEAN PARLIAMENT AND OF THE COUNCIL of 4 July 2012 on waste electrical and electronic equipment (WEEE). This product has required the extraction and use of natural resources for its production. It may contain hazardous substances that could impact health and the environment, if not properly disposed.
  • Page 33 Copyright © 2020 Cognex Corporation. All Rights Reserved.

Table of Contents