Atag CX4511C Instructions For Use Manual
Hide thumbs
Also See for CX4511C:
- Instructions for use manual (32 pages) ,
- Instructions for use manual (32 pages)
Table of Contents
Advertisement
Quick Links
Advertisement
Table of Contents

Related Manuals for Atag CX4511C


Summary of Contents for Atag CX4511C
- Page 1 Instructions for use Oven CX4511C CX4592C...
- Page 2 Instructions for use EN 3 - EN 26 Pictograms used Important information EN 2...
-
Page 3: Table Of Contents
CONTENTS Your oven Introduction Control panel Description Guide rails/Telescopic guide rails Accessories First use Oven settings Oven modes Defrosting Microwave Microwave function / Combi function Using the timer Selecting additional functions Cleaning Cleaning your oven The Aqua clean function Removing and cleaning the wire guides Replacing the oven light bulb Troubleshooting General... -
Page 4: Your Oven
YOUR OVEN Introduction Congratulations on your choice of this ATAG microwave oven. This product was designed with simple operation and optimum comfort in mind. With the extensive setting options, you can always select the right method of preparation. This manual describes the best way to work with this oven. In addition to information on operation, you will also find background information that may come in handy when using the appliance. -
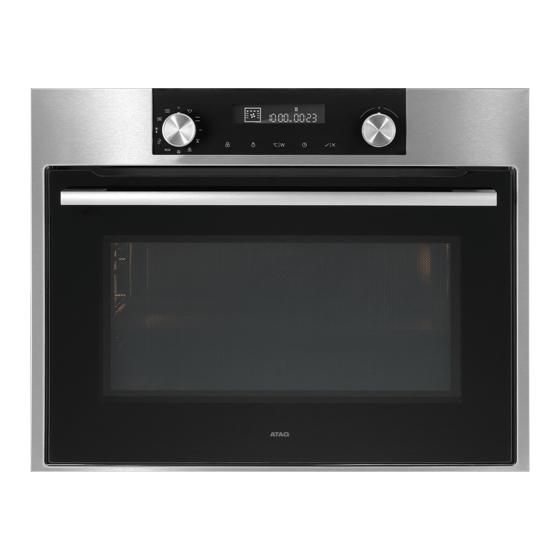
Page 5: Control Panel
YOUR OVEN Control panel 1. Off 2. Fast preheat 3. Top + bottom heat 4. Grill 5. Grill + fan 6. Hot air + bottom heat 7. Hot air 8. ECO baking and roasting 9. Aqua clean 10. Defrosting 11. Microwave + hot air 12. -
Page 6: Description
YOUR OVEN Description Level 4 Level 3 Level 2 Level 1 1. Control panel 2. Oven levels 3. Oven door 4. Door handle Guide rails/Telescopic guide rails • The oven has four or five guide rails (Level 1 to 4/5), depending on the model. -
Page 7: Accessories
YOUR OVEN Accessories Your appliance is accompanied by a range of accessories, depending on the model. Only use original accessories; they are specially suited to your appliance. Be sure that all the accessories that are being used are able to withstand the temperature settings of the chosen oven function. -
Page 8: Use
First use Setting the current time of day When the appliance is first plugged in, the ‘display’ lights up. After three seconds, the Clock symbol and “12:00” blink on the display. 1. Turn the ‘Multi-function selector’ to set the time of day. 2. -
Page 9: Oven Settings
Remarks • The temperature can be adjusted during preparation. • Cooking times are rough estimates and may vary subject to some conditions. • Some recipes should be preheated using the selected oven mode. • If you are using parchment paper, make sure it is highly temperature resistant. - Page 10 Hot Air + Bottom Heat Setting Hot air and the bottom heating element combine so food can be crisped and browned. Hot Air Setting Food is heated by hot air from the back of the oven. This setting provides uniform heating and is ideal for baking. ECO baking and roasting Optimize energy use during baking or roasting.
-
Page 11: Oven Modes
Changing the cooking temperature and microwave power Only set the power (W) in a microwave function (microwave or combi- microwave function). 1. Turn the ‘Mode selector’ and choose the cooking mode. The selected icon will appear on the display. 2. Touch the ‘Temperature / power key’. ▷... - Page 12 Grill Food is heated by the top heating elements. Grill • Place the oven rack in the upper part of the oven and the baking tray in the middle of the oven. • Supervise the cooking process at all times. The meat may burn quickly due to high temperature.
- Page 13 Hot air + bottom heat Setting Hot air and the bottom heating element combine to heat food. This is a useful setting for crisping and browning. Hot air and bottom heat • Place the baking tray or oven rack in the middle of the oven. •...
-
Page 14: Defrosting
ECO baking and roasting • Place the baking tray or oven rack in the middle of the oven. Defrosting Microwaves are an excellent way of defrosting frozen food. Microwaves gently defrost frozen food in a short period of time. 1. Turn the ‘Mode selector’ to defrosting. The icon and the program A1 will appear on the display unit (choose between five programs –... -
Page 15: Microwave
Microwave Microwaves are high - frequency electromagnetic waves; the energy released enables food to be cooked or reheated without changing either the form or the colour. Microwave is used in: • Microwave mode • Combi-function Cooking Principle 1. The microwaves generated by the microwave are distributed uniformly by using a stirrer distribution system. - Page 16 Microwave- Cookware Comments Safe Aluminium Foil Can be used in small quantities to protect areas against overcooking. Arcing can occur if the foil is too close to the oven wall or if too much foil is used. China and Earthenware Porcelain, pottery, earthenware and bone china are usually suitable, unless decorated with a metal trim.
-
Page 17: Microwave Function / Combi Function
Microwave function / combi function Microwave Microwave energy is used to cook and defrost foods. It provides fast efficient cooking without changing the colour or form of food. Power level and cooking time are manually set to suit various dishes. Microwave •... -
Page 18: Using The Timer
Microwave + hot air This mode combines hot air and microwave and is therefore reducing the cooking time while giving the food a brown and crispy surface. This fuction is suitable for all kind of meat and poultry as well as casseroles and gratin dishes, sponge cakes and light fruit cakes, pies and crumbles, roast beef and chicken. - Page 19 Example: • Current time: 12:00 • Cooking time: 2 hours • End of cooking: 6 pm 1. First, set the cooking time (cooking duration), i.e. 2 hours. The sum of the current time and cooking time is automatically displayed (2 pm). 2.
-
Page 20: Selecting Additional Functions
Selecting additional functions Some functions are not available with some systems; an acoustic signal will remind you of such cases. Child lock The oven’s Child Safety Lock allows you to lock the control panel to protect the oven against unintended use. •... - Page 21 Oven lighting • Oven lighting is switched on automatically when the door is opened or when the oven is switched on. • After the end of the cooking process, the light will remain on for a minute. Light key • The oven light can be switched off by pressing the ‘Light key’. Acoustic signal Loudness of the acoustic signal can be set when no timer function is activated (only the time of day is displayed).
-
Page 22: Cleaning
CLEANING Cleaning your oven Clean your oven regularly to prevent grease and food particles from building up, especially on inside and outside surfaces, door and door seals. • Clean outside surfaces with a soft cloth and warm soapy water. Rinse and dry. •... -
Page 23: Removing And Cleaning The Wire Guides
CLEANING Removing and cleaning the wire guides Only use conventional cleaners to clean the guides. • Remove the screw using a screwdriver. • Remove the guides from the holes in the back wall. Make sure the spacers fitted on the wire guides are not lost. Replace the spacers after cleaning;... -
Page 24: Troubleshooting
TROUBLESHOOTING General If you have problems with your oven, try the solutions suggested below. They may save you the time and inconvenience of an unnecessary service call. Food remains uncooked • Ensure timer has been set correctly and the ‘Start’ key is pressed. •... - Page 25 TROUBLESHOOTING Steam escapes from around the door or vents. • This is a normal occurrence. A clicking sound occurs while the oven is operating, especially in defrosting mode. • This is a normal occurrence. Storing and repairing your microwave oven Repairs should only be made by a qualified service technician.
-
Page 26: Your Oven And The Environment
YOUR OVEN AND THE ENVIRONMENT Disposing of the appliance and the packaging This product is made from sustainable materials. However, it must be disposed of in a responsible manner at the end of its useful life. The government can provide you with information about this. The packaging of the appliance can be recycled. - Page 27 EN 27...
- Page 28 The appliance rating label is located on the inside of the appliance. When contacting the service department, have the complete type number to hand. You will find the addresses and phone numbers of the service organisation on the guarantee card. *688878* 688878...
Need help?
Do you have a question about the CX4511C and is the answer not in the manual?
Questions and answers