Advertisement
Quick Links
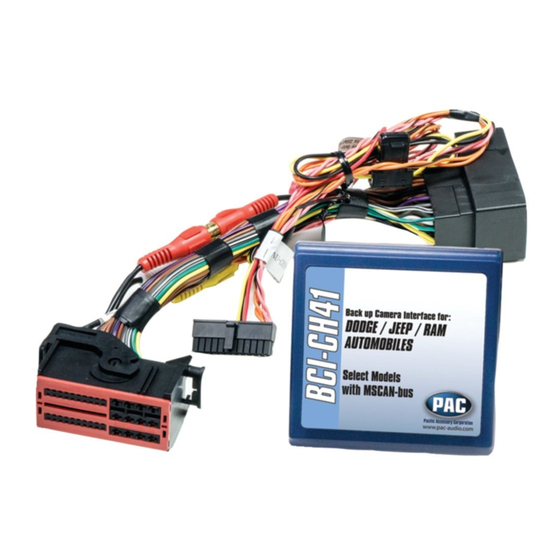
BCI-CH41 (R.2)
Introduction & Features
The BCI-CH41 will program your Chrysler / Dodge / Jeep / RAM radio to allow the addition of a reverse camera input
if the vehicle is not equipped with one from the factory (reverse camera sold separately). The BCI-CH41 will allow
the factory navigation features of your radio to be used by the passenger at anytime. The interface also offers extra
features such as: Blind Spot Cameras, Front Camera, Rear Media Mode, Eco Mode Memory, Auto Start / Stop Memory,
Sport Mode Memory, Remote Start Climate Restore, Steering Wheel Control (SWC) swap, EQ Presets and three
programmable 12v outputs.
Important Notes
1.
Vehicles without audio SWC, located on the back of the steering wheel, will not support the Navigation Unlock or SWC Swap features.
2.
RAM trucks equipped with a manual transmission will not support the forced Reverse Camera or Reverse Output Trigger features.
3.
The Jeep Cherokee and Chrysler 200 will not support the addition of Reverse Camera input or Rear Media Mode.
4.
Vehicles equipped with the 5" screen do not support the addition of Rear Media Mode.
Installation Steps
Set DIP switches to the ON position to activate the corresponding features.
Set DIP switches to the OFF position for any features that are not desired.
1.
Set DIP switches to the ON position that correspond with the features you
want to add. Feature DIP switches (1-3) must be set before connecting the
interface to the vehicle harness.
a.
DIP switch 4 - Turning ON DIP switch 4 will allow you to access the
Feature Settings Menu to turn additional features On / Off.
b.
Please see Page 6 titled "BCI Feature Menu Table" for a full list and
description of each of the BCI features.
2.
Remove the factory radio and disconnect the factory harness(es).
3.
Connect the factory harness into the female connector on the BCI-CH41
harness.
4.
Connect the aftermarket reverse camera's video output to the female
camera input located on the radio side of the BCI-CH41 harness. If you
are also adding blind spot and / or a front camera, the VS41 must be
used (sold separately). See page 4 for VS41 wiring. You can also use any
universal video switcher and utilize the programmable outputs to trigger as
necessary.
5.
Connect the trigger wire(s) as needed. Please see chart for trigger wire colors and functions.
6.
If you are adding an additional A/V input: Connect the A/V outputs from the source to the Rear Media inputs on the radio side of the
BCI-CH41 harness. If you have more than one source, the AVS21 must be used (sold separately).
7.
Connect the male connector on the BCI-CH41 harness to the factory radio.
8.
Turn the key to the ON position.
9.
Plug the interface connectors on the BCI-CH41 harness into the BCI-CH41.
10. Both LEDs will blink green while the module is initializing. Once initialized, one LED will begin to blink green. If the LED blinks red, there
is a problem with the data connection to the factory radio.
11. At this point you will need to turn the ignition off and wait one minute for the vehicle to go to sleep. After one minute, turn the ignition back
on and proceed to the next step.
12. Once the module has initialized you can access the Feature Settings Menu to turn on the features you want and set the programmable
outputs. Please note that DIP switch 4 must be turned on in order to access the Feature Settings menu.
See page 6 entitled "BCI Feature Menu Table" for a full list and description of each of the features and programmable outputs.
13. The module can be reset to factory default settings by pressing and holding the Programming button (on the side of the module) for 5
seconds. When pressing and holding the button, both LEDs will blink red while the module is resetting. Once reset, both LEDs will blink
green, this indicates the module is initializing, release the programming button.
Reverse Camera
1
PAC
| Ph. 866-931-8021 | support@pac-audio.com
®
©2016 Pacific Accessory Corporation
Reverse Camera Input and Navigation Unlock
Interface for Chrysler / Dodge / Jeep / RAM Vehicles
Rear Media
Navigation Unlock
2
Wire
Prog. Output 1
Prog. Output 2 Blue/White
Prog. Output 3
Left Camera
Left Camera
Right Camera
Right Camera
www.pac-audio.com
Feature Settings Menu
3
4
Trigger Wires
Color
Function
10 Amp positive output when user
Blue
12v+
programmed feature is activated
1 Amp positive output when user
12v+
programmed feature is activated
1 Amp positive output when user
Blue/Red
12v+
programmed feature is activated
1 Amp positive output when left
Red
12v+
blind spot camera is activated
Negative output when left
Black
Ground
blind spot camera is activated
1 Amp positive output when right
Red
12v+
blind spot camera is activated
Negative output when right
Black
Ground
blind spot camera is activated
Rev. 082616
Note
Page 1
Advertisement

Related Manuals for PAC BCI-CH41


Summary of Contents for PAC BCI-CH41
- Page 1 Introduction & Features The BCI-CH41 will program your Chrysler / Dodge / Jeep / RAM radio to allow the addition of a reverse camera input if the vehicle is not equipped with one from the factory (reverse camera sold separately). The BCI-CH41 will allow the factory navigation features of your radio to be used by the passenger at anytime.
-
Page 2: Operation
Place the Multi Function Display into the mode that displays radio text. Press and hold the Lock button on the driver door for approximately 5 seconds (see Fig. A). “BCI-CH41 Menu” followed by the product revision number will be displayed on the MFD in the gauge cluster. - Page 3 Audio > Equalizer and set it to the desired sound. Now press and hold the Mute Fig. K button (Fig I) until the MFD displays “Storing EQ”. | Ph. 866-931-8021 | support@pac-audio.com ® Page 3 Rev. 082616 ©2016 Pacific Accessory Corporation...
- Page 4 Connect the 10-pin harness from the VS41 harness into the Expansion Port on the BCI-CH41. Do not manually wire the trigger wires, or power and ground leads, when using the Expansion Port connector. See the illustration on the next page for an overview of the BCI-CH41 and VS41 connections. | Ph. 866-931-8021 | support@pac-audio.com ®...
- Page 5 DISCLAIMER: Under no circumstances shall the manufacture or the distributors of the BCI-CH41 be held liable for claims of any loss or damage, consequential, direct or indirect, arising from the sale, installation, or use of the BCI-CH41. The manufacture and its distributors will not, nor will they authorize any representative or any other individual, to assume obligation or liability in relation to the BCI-CH41 other than its replacement.
- Page 6 This will give you 3 user programmable presets for the factory EQ. See page 4 of instruction manual for operation. Only available in vehicles equipped with Auto Start/Stop system. This will force the vehicle to remember the Auto Start/Stop mode Auto Start/Stop Memory On/Off setting once the vehicles key has been cycled. Must turn Auto Start/Stop feature on/off before it will appear in the BCI menu. Only available in vehicles equipped with Sport Mode. This will force the vehicle to remember the Sport mode setting once Sport Mode Memory On/Off the vehicles key has been cycled. Must turn Sport Mode on/off before it will appear in the BCI menu. This will force the vehicle to remember the ECO mode setting once Only available in the 2014 Dodge Durango and Jeep Grand ECO Memory On/Off the vehicles key has been cycled. Cherokee. Exit & Save Saves settings and exits the menu. | Ph. 866-931-8021 | support@pac-audio.com ® Page 6 Rev. 082616 ©2016 Pacific Accessory Corporation www.pac-audio.com...
Need help?
Do you have a question about the BCI-CH41 and is the answer not in the manual?
Questions and answers