Table of Contents
Advertisement
Advertisement
Table of Contents

Related Manuals for Watchguard Transfer Station II


Summary of Contents for Watchguard Transfer Station II
- Page 2 Important Notices Copyright © 2020 WatchGuard, Inc. All rights reserved. This document and supporting data are the exclusive property of WatchGuard, Inc. and may not be copied and/or reproduced without permission. Firmware updates WatchGuard is committed to the continual testing and improvement of our firmware. As new revisions become available, these updates will be made available to your agency;...
-
Page 3: Table Of Contents
Contents Getting Started Setting up Transfer Station II hardware Transfer Station II Configuration Settings Admin Transfer Station II Settings Transfer Station II Configuration V300 Settings DHCP IP Config Upgrade Transfer Station II Administrative functions Change Username and Password Disable Transfer Station II... - Page 4 This page intentionally left blank. Transfer Station II Quick Start Guide WGD00172 Rev B...
-
Page 5: Getting Started
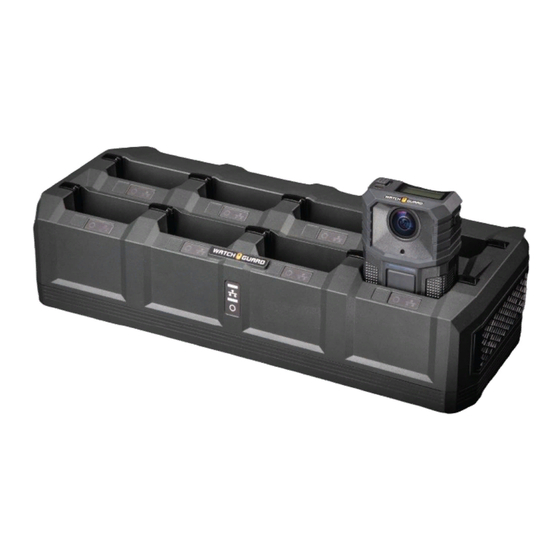
Cameras to the cloud. While uploading events, the Transfer Station II can charge up to eight cameras. When you set up the Transfer Station II, you connect it to power and to the Evidence Library network. Important! To use the V300 Transfer Station to upload events, your Evidence Library software must be EvidenceLibrary.com (EL) or Evidence Library on-premise (EL). -
Page 6: Setting Up Transfer Station Ii Hardware
2. Connect the Ethernet cable to the Ethernet connector on the back of the Transfer Station II. 3. Connect the power cable to the power connector on the bottom of the Transfer Station II and plug the power cable into an electrical outlet 4. - Page 7 Setting up Transfer Station II hardware configuration web page: https://192.168.2.20. The computer you use must have access to this network. To continue setting up the Transfer Station II, follow the instructions (page 8) to configure the Transfer Station II to work with your Evidence Library software.
-
Page 8: Transfer Station Ii Configuration Settings
Getting Started Transfer Station II Configuration Settings Configure each Transfer Station II individually using a web page specific to the Transfer Station II. You configure: Transfer Station II Settings V300 Camera Settings (page Important! To use the V300 Transfer Station to upload events, your Evidence Library software must be EvidenceLibrary.com (EL) or Evidence Library on-premise (EL). - Page 9 2. Enter the Location of the Transfer Station II. 3. Enter a unique IP address for each Transfer Station II. 4. Enter the Station ID that identifies the current Transfer Station II. Station ID fields each have a 32- character limit.
-
Page 10: V300 Settings
1. Enter the Tenant ID. (Optional. Call Customer Support to get the ID.) Note 1: You can get the Tenant ID when doing the initial setup of your system with technical support. Transfer Station II Quick Start Guide WGD00172 Rev B... -
Page 11: Upgrade Transfer Station Ii
2. Enter a new Password. 3. Click Save Changes. Because the login credentials changed, the server logs you out of the Transfer Station II then asks you to log in using the new credentials. Transfer Station II Quick Start Guide WGD00172... -
Page 12: Disable Transfer Station Ii
Station II after disabling, reset the Transfer Station II back to factory defaults. Note: To reset the Transfer Station II to factory defaults, use a pin or paper clip, press and hold the Reset button for at least 7 seconds. The button is on the bottom of the Transfer Station II. -
Page 13: Transfer Station Ii Lcd Workflow
Main Power LED red solid Backend server connected, transfer LED amber green station link detected Backend server not connected, transfer Link LED off station link not detected No MAC Address Main Power LED red blinks Transfer Station II Quick Start Guide WGD00172 Rev B... - Page 14 Getting Started This page intentionally left blank. Transfer Station II Quick Start Guide WGD00172 Rev B...
Need help?
Do you have a question about the Transfer Station II and is the answer not in the manual?
Questions and answers