
Subscribe to Our Youtube Channel
Related Manuals for OLIMEX A13-SOM-256


Summary of Contents for OLIMEX A13-SOM-256
- Page 1 A13-SOM-256 and A13-SOM-512 System-on-Module boards capable of Linux boot USER’S MANUAL Revision B, March 2015 Designed by OLIMEX Ltd, 2014 All boards produced by Olimex LTD are ROHS compliant...
-
Page 2: Disclaimer
This document is intended only to assist the reader in the use of the product. OLIMEX Ltd. shall not be liable for any loss or damage arising from the use of any information in this document or any error or omission in such information or any incorrect use of the product. -
Page 3: Table Of Contents
OLIMEX© 2015 A13-SOM user's manual Table of Contents DISCLAIMER ......................2 CHAPTER 1: OVERVIEW ..................5 1. Introduction to the chapter ....................... 5 1.1 Introduction to SOM (System-On-a-Module) ............... 5 1.2 Target market of the board ..................... 6 1.3 Features of A13-SOM boards ....................7 1.4 Board variants .......................... - Page 4 OLIMEX© 2015 A13-SOM user's manual 6.1.1 UART1 interface ............................24 6.2 MicroSD card connector ....................... 24 6.2.1 SD/MMC slot ..............................25 6.3 Power pins for external power supply .................. 25 6.4 GPIO connectors ........................26 6.4.1 GPIO-1 (General Purpose Input/Output) 40pin connector ..............27 6.4.2 GPIO-2 (General Purpose Input/Output) 10pin connector ..............
-
Page 5: Chapter 1: Overview
CHAPTER 1: OVERVIEW 1. Introduction to the chapter Thank you for choosing this single board computer from Olimex! This document provides a user’s guide for the A13-SOM boards. It covers both the -256 and the -512 version board. In the text below 'A13-SOM' is used to address both “A13-SOM-256”... -
Page 6: Target Market Of The Board
Both the main part and the peripheral part of the SOM system have support in the official Android and Debian images distributed by Olimex and maintained by Olimex and the Linux community. These images are typically available at the wiki articles of the boards. -
Page 7: Features Of A13-Som Boards
A13-OLinuXino – it would be easier to evaluate the capabilites of the A13 processor, due to the The other Olimex board with close characteristics is A20-SOM board. It is a bit bigger and a bit more expensive. However, has a generation newer dual-core processor that is better for heavy computations (for instance, high resolution video decoding and encoding). -
Page 8: Document Organization
OLIMEX© 2015 A13-SOM user's manual 1.6 Document organization Each section in this document covers a separate topic, organized as follows: – Chapter 1 is an overview of the board usage and features – Chapter 2 provides a guide for quickly setting up the board and software notes –... -
Page 9: Chapter 2: Setting Up The A13-Som Board
OLIMEX© 2015 A13-SOM user's manual CHAPTER 2: SETTING UP THE A13-SOM BOARD 2. Introduction to the chapter This section helps you set up the SOM development board for the first time. Please consider first the electrostatic warning to avoid damaging the board, then discover the hardware and software required to operate the board. -
Page 10: Powering The Board
USB-SERIAL-CABLE-F – female USB serial console cable – provides the easiest way of debugging A13-SOM-256-DEBIAN-SD – a tested, class 10 micro SD card with the latest (by the time of leaving the Olimex facilities) official Debian release, suitable for the 256MB version of the board A13-SOM-512-DEBIAN-SD –... -
Page 11: Mounted Powering
A13-SOM-WIFI board! The default username/password combination for the default Linux image on the SD card (if purchased) is: root/olimex. Note that it is normal that when the board is powered some integrated circuits might appear hotter than others. This is perfectly normal for some electronic components (for instance – the voltage regulators and the main processor). -
Page 12: Interacting With The Board
OLIMEX© 2015 A13-SOM user's manual automatic sleep It is recommended to always make a software “turn off” of the board. After that you can safely remove the power supply. If you disconnect the power supply (either the USB or the power supply) before turning off the board you may corrupt your SD card. - Page 13 Download locations to such images might be found at the wiki article for the A13-SOM board here: https://www.olimex.com/wiki/A13-SOM. For Linux Debian you would need to execute a shell script to be able to change the resolution. It is very good idea to use a serial cable for connection to the board from a personal computer since in this case you are dependent on a video resolution (a cable like USB-SERIAL-CABLE-F).
- Page 14 OLIMEX© 2015 A13-SOM user's manual For LCD: 1. 4.3" (480×272) 2. 7" (800×480) 3. 10" (1024×600) For VGA (A13-SOM lacks VGA support on hardware level): 0. 1680×1050 1. 1440×900 2. 1360×768 3. 1280×1024 4. 1024×768 5. 800×600 6. 640×480 7. 1920×1080 8.
-
Page 15: Connecting And Calibrating A Display
(the Olimex-made displays require 5V of voltage). You would need to power the display externally. Newer displays made by Olimex have both 0.1'' and 0.05'' step connectors. So if you are going to need only the display and a cable (sold separately). -
Page 16: Android Calibration
If the problem is under Debian Linux make sure you are properly logged in the LXDE interface! Else applying calibration would not happen for the current user – if you are calibrating from the X graphical interface make sure that you are logged as user “olimex” (if calibrating without the X, the user is “root”). - Page 17 OLIMEX© 2015 A13-SOM user's manual Linux or Android software support. We can share our experience. We can give you full details for things we have tried. We can point you to a resource or a guide. We can give you general directions to solving a specific problem or places to look for more information.
-
Page 18: Chapter 3: Board Description
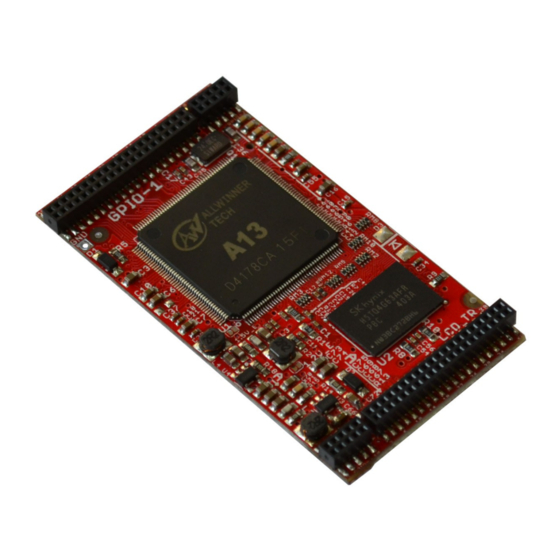
OLIMEX© 2015 A13-SOM user's manual CHAPTER 3: BOARD DESCRIPTION 3. Introduction to the chapter Here you get acquainted with the main parts of the board. Note the names used on the board might differ from the names used below to describe them. For the actual names check the A13-SOM board itself. -
Page 19: Layout (Bottom View)
OLIMEX© 2015 A13-SOM user's manual 3.2 Layout (bottom view) Page 19 of 36... -
Page 20: Chapter 4: The Allwinner A13 Microcontroller
OLIMEX© 2015 A13-SOM user's manual CHAPTER 4: THE ALLWINNER A13 MICROCONTROLLER 4. Introduction to the chapter In this chapter is located the information about the heart of A13-SOM – its microcontroller. The information is a modified version of the datasheet provided by its manufacturers. -
Page 21: Block Diagram
OLIMEX© 2015 A13-SOM user's manual SD Card USB Powerful Acceleration Graphic (3D, Mali400 MP) VPU (1080P) APU E-Reader Ultra-low System Power Consumption Smart Backlight: auto adjust backlight acc. to the image display ... -
Page 22: Chapter 5: Control Circuity
OLIMEX© 2015 A13-SOM user's manual CHAPTER 5: CONTROL CIRCUITY 5. Introduction to the chapter Here you can find information about reset circuit and quartz crystals locations, the power supply circuit is also briefly discussed. 5.1 Reset The board can be reset by the RST button. The reset circuit includes Microchip's MCP130T-300I, designed to keep a microcontroller in reset until the system voltage has reached the proper level and stabilized. -
Page 23: Chapter 6: Connectors And Pinout
OLIMEX© 2015 A13-SOM user's manual CHAPTER 6: CONNECTORS AND PINOUT 6. Introduction to the chapter In this chapter are presented the connectors that can be found on the board all together with their pinout and notes about them. Jumpers functions are described. Notes and info on specific peripherals are presented. -
Page 24: Uart1 Interface
When in doubt – try the same operation with another card from another brand. Olimex sells microSD cards prepared with Linux or Android images, that have been tested – please refer to chapter “2.2 Requirements”. Currently these are with either 4GB and 8GB of storage (depending on the purchase date). -
Page 25: Sd/Mmc Slot
OLIMEX© 2015 A13-SOM user's manual 6.2.1 SD/MMC slot The schematic related to the SD/MMC (microSD connector) is shown below: SD/MMC slot is a microSD card slot connector, located on the top of the board. This slot is typically used for booting the OS, due to the larger capacities of the microSD cards (compared to SD or MMC cards). -
Page 26: Gpio Connectors
OLIMEX© 2015 A13-SOM user's manual The recommended way of powering the board is via A13-SOM-WIFI. More information about the powering can be found in chapter “5.3 Power supply circuit” of this manual. 6.4 GPIO connectors There are 3 female GPIO connectors all located on the top side of A13-SOM. They ease the access to processors pins. -
Page 27: Gpio-1 (General Purpose Input/Output) 40Pin Connector
OLIMEX© 2015 A13-SOM user's manual OLIMEX sells additional and replacement male and female 0.05'' (50 mil) step connectors. We also have a female-female cable named CABLE-40-40-10CM, suitable for the 40-pin connectors. The only power line at the GPIO connectors that might be used as input is the '3.3V' one at GPIO1. -
Page 28: Gpio-3 (General Purpose Input/Output) 10Pin Connector
40PIN ribbon cables to connect an Olimex display and the LCD_CON. Please note that the smallest display (4.3'', 480×272) is not suitable for the official Android images we provide, however it can be used with Debian Linux. -
Page 29: Jumper Description
Reset button – used to reset the board Power button – used to reset the board A13-SOM-256 has 256MB RAM = 1×[2Gb(128M x 16)] DDR3 SDRAM – the exact memory used in the board revision mentioned is Hynix 5TQ2G63BFR A13-SOM-512 has 512MB RAM = 1×[4Gb(256M x 16b)] DDR3 SDRAM – the exact memory used currently in the board is SAMSUNG K4B4G1646D-BCK0 The DDR3 memory part name in the schematic might be outdated. -
Page 30: Chapter 7: Schematics
7.1 Eagle schematic OLinuXino schematics may be found it on the OLinuXino's GitHub repository: https://github.com/OLIMEX/SOM/tree/master/A13. You can download the whole repository as .zip without having a GitHub account. We mostly use Eagle by Cad Soft 4.16r2 for designing. However, the files should be compatible with the latest Eagle available. -
Page 31: Physical Dimensions
OLIMEX© 2015 A13-SOM user's manual 7.2 Physical dimensions Note that all dimensions are in mils. Page 31 of 36... -
Page 32: Chapter 8: Revision History And Support
OLIMEX© 2015 A13-SOM user's manual CHAPTER 8: REVISION HISTORY AND SUPPORT 8. Introduction to the chapter In this chapter you will find the current and the previous version of the document you are reading. Also the web-page for your device is listed. Be sure to check it after a purchase for the latest available updates and examples. -
Page 33: Useful Web Links And Purchase Codes
USB-SERIAL-CABLE-F – female USB serial console cable – provides the easiest way of debugging A13-SOM-256-DEBIAN-SD – a tested, class 10 micro SD card with the latest (by the time of leaving the Olimex facilities) official Debian release, suitable for the 256MB version of the board A13-SOM-512-DEBIAN-SD –... -
Page 34: Frequently Asked Questions
OLIMEX© 2015 A13-SOM user's manual 8.4 Frequently asked questions Q: I powered my board, it showed a logo and then nothing happened. What might be the problem? A: This might be due to a number of reasons but it is recommended to try the following: 1. - Page 35 OLIMEX© 2015 A13-SOM user's manual Q: How to generate boot-able SD-card Debian Linux image for A13-SOM-256? The building instructions might be found at the following link: google drive Official Wordpress post on Debian image release: Wordpress post Q: How to detect and enable the Ethernet controller (if it is disabled by default)? A: You can enable it by following these two steps: 1.
-
Page 36: Product Support
All goods are checked before they are sent out. In the unlikely event that goods are faulty, they must be returned, to OLIMEX at the address listed on your order invoice. OLIMEX will not accept goods that have clearly been used more than the amount needed to evaluate their functionality.
Need help?
Do you have a question about the A13-SOM-256 and is the answer not in the manual?
Questions and answers