Advertisement
Quick Links
r e
v
and Original Series Pickup Lift Mounting Instructions
Fullsize Ram Trucks-
3500 DRW 2013-present
Preparing the Gate
1. Remove the mounting hardware which is banded to the liftgate.
2. Verify mounting bracket kit (Figure 1 and Table 1).
18-1/2"
LEFT BRACKET
(RIGHT NOT SHOWN)
T-340 BOLT
KIT
1-3/16
Figure 1: Part Identification.
3. Support the liftgate; it will not stand upright without the angle irons-
4. Unbolt the two (2) angle irons attached to the liftgate uprights-
5. Unbolt the long angle iron from the bottom of the liftgate (if equipped).
6. Remove the two (2) bracket plates attached to the liftgate-
Note: The
Shipping hardware is not used for this application.
Installing the Bolt-on Gussets
1. Install the eight (8) 3/8" x 1" button head bolts, lock washers, and nuts in the position shown for your configuration (Figure 3).
Original Series bolt-on gussets and button head bolts go to the inside of the 1/4" x 1" strip.
dual drive
Note: The extra hole in the bolt-on gusset is always below the 1/4" x 1" strip (Figure 4).
Note: If gussets are already welded to the uprights, you will need a gusset extender kit (part number 6335).
Contact Tommy Gate for instructions (712-847-8000).
Original Series
Bolt-on Gusset
60.00"
Top View
3/8" x 1" Button Head Bolt
3/8" Lock Washer
3/8" Nut
Figure 3: Top view of liftgate bolt-on gussets.
DPN: 095139
BACKER
BOLT
PLATE
KIT
CIRCUIT
BREAKER KIT
bolt-on gussets and button head bolts go to the outside of the 1/4" x 1" strip.
dual drive
Bolt-on Gusset
59.94"
Top View
3/8" Nut
3/8" Lock Washer
3/8" x 1" Button Head Bolt
REINFORCEMENT
ANGLE
FILLER
STRIP
T-340
BOLT-ON
GUSSET
PART#13742
only.
only (Figure 2).
only (Figure 2).
Upright
1/4" x 1" strip
welded to uprights
Bolt-on Gusset
Extra hole below strip
Figure 4: Liftgate requiring bolt-on gussets (
Page 1 of 10
Table 1: Parts List.
QTY. PART NO.
DESCRIPTION
1
9094
Standard Pickup Bracket Bolt Bag Kit
1
13749
T-340 Bolt Bag Kit
1
6487
T-330 Left Corner Bracket
1
6488
T-330 Right Corner Bracket
2
5085
12GA.x3"x9" Ford Backer Plate
3
5451
12GA.x4.25"x19.5" T-330 Filler Strip
1
13738
T-340 Bolt-on Gusset (Right)
1
13739 T-340 Bolt-on Gusset (Left)
2
13741 T-340 Bracket Reinforcement Angle
1
14196 Circuit Breaker Bracket Kit
Angle Iron
Figure 2: Complete liftgate (
Upright
T-340
Angle Iron
Bracket Plates
shown).
shown).
Rev 4
12-14-16
Advertisement

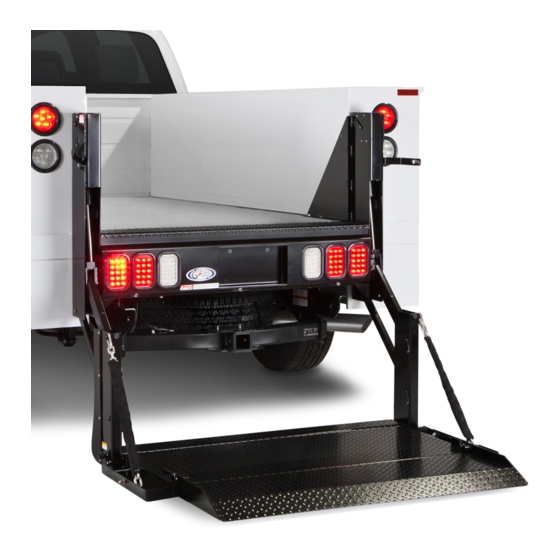
Summary of Contents for Tommy Gate G2 Dual Drive Original Series
- Page 1 Note: The extra hole in the bolt-on gusset is always below the 1/4" x 1" strip (Figure 4). Note: If gussets are already welded to the uprights, you will need a gusset extender kit (part number 6335). Contact Tommy Gate for instructions (712-847-8000). dual drive...
- Page 2 T-340 and Original Series Pickup Lift Mounting Instructions Preparing the Truck Tie Down Hook Tailgate Stay 1. Remove the tailgate. The tailgate hardware does not need to be removed. 2. Unbolt the tie down hooks (Figure 5). Tailgate If the tie down hooks are welded in, they need to be remove. Unbolt brackets from 3.
-
Page 3: Removing The Knockouts
2. Remove the 2-1/4" knockouts from the bottom of the mainframe using a screw driver and a pair of pliers (Figure 11). Note: If the liftgate you are mounting does not have the knockout holes, they must be added. Contact Tommy Gate for instructions (712-847-8000). Installing the Liftgate Knockouts 1. - Page 4 T-340 and Original Series Pickup Lift Mounting Instructions Adding Additional Support ( 1500 lb Application Only) Note: Liftgate not shown for clarity. Note: Additional bracket support is required at this capacity. Inner Box Side 3/8x1" Bolt 1. Locate the existing 3/8" hole in the mounting bracket (Figure 15). 3/8"...
- Page 5 T-340 r e and Original Series Pickup Lift Mounting Instructions Preparing the Gate for Wiring 1. Unscrew the solid plastic plug from the pump reservoir. The box cover should already be off. Note: The hydraulic system has already been filled with the proper amount of hydraulic oil so do not add any oil at this time. 2.
- Page 6 Be sure that the negative(-) ground lead is connected to the negative(-) terminal of the vehicle battery. 12. Install the copper lugs on all required ends. 13. Connect the circuit breaker and battery as outlined in the Tommy Gate Recommended Electrical Wiring Guidelines and wiring diagram (Figure 22).
- Page 7 4. Install the license plate light(s) into the holes provided. 3/8" Stud and Knob 5. Connect the license plate light(s) to the vehicle's wiring following the Tommy Gate Figure 25: Original Series platform latch knob. Recommended Electrical Wiring Guidelines. The license plate light wire(s) can be run through the strain relief in the back of the liftgate.
- Page 8 T-340 and Original Series Pickup Lift Mounting Instructions Testing the Operation of the Liftgate CAUTION : Keep all foreign objects (body parts, tools, load weights, etc) out of the liftgate mainframe and away from pinch points at all times when operating the liftgate. 1.
- Page 9 Painting the Liftgate (if needed) Your Tommy Gate has been primed with a gray polyurethane and painted with a black semi-gloss polyurethane topcoat to protect it from the environment. No additional paint is required unless shipping or installation damage or outdoor storage exposure has deteriorated the Tommy Gate paint.
- Page 10 Wires should be routed down rather than horizontally from the terminals with no sharp bends adjacent to the connections. (2) Battery power for your Tommy Gate should come directly from the battery through the supplied circuit breaker or fuse. The circuit breaker or fuse should be installed as close to the battery as possible.


Need help?
Do you have a question about the G2 Dual Drive Original Series and is the answer not in the manual?
Questions and answers