Table of Contents
Advertisement
Available languages
Available languages
Quick Links
Advertisement
Table of Contents

Related Manuals for Constructor CTSC90-406VS


Summary of Contents for Constructor CTSC90-406VS
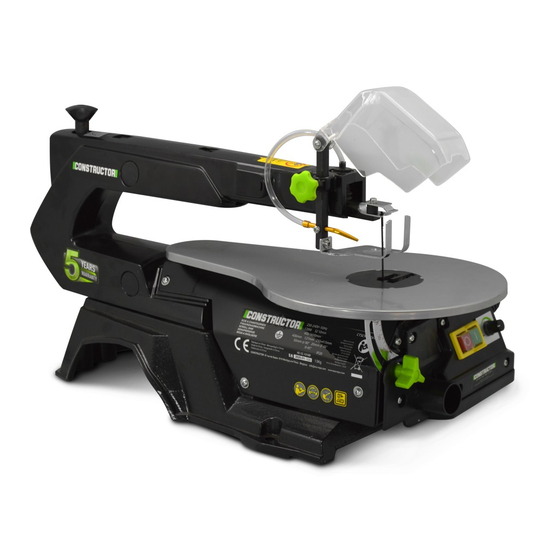
- Page 1 CTSC90-406VS SCIE A CHANTOURNER TRADUCTION DES INSTRUCTIONS D’ORIGINE FIGUURZAAGMACHINE VERTALING VAN DE ORIGINELE INSTRUCTIES GB SCROLL SAWS ORIGINAL INSTRUCTIONS S22 M05 Y19 Sous réserve de modifications / Technische wijzigingen voorbehouden / Subject to technical...
-
Page 2: Pour Votre Sécurité
SCIE A CHANTOURNER POUR VOTRE SÉCURITÉ CONDITIONS D’UTILISATION VEUILLEZ LIRE ET COMPRENDRE LA TOTALITÉ Cette scie à chantourner est conçue pour DU MANUEL fonctionner à une température ambiante AVANT DE FAIRE FONCTIONNER L’APPAREIL située entre +5° et +45°C et à une altitude ne dépassant pas 1000 m au-dessus du niveau de la mer. - Page 3 ATTENTION! Lorsque la recyclage pour une élimination respectueuse pression acoustique dépasse de l’environnement. la valeur de 85 dB(A), il est nécessaire de porter des dispositifs individuels de protection de l’ouïe. Pour en savoir plus : www.quefairedemesdechets.fr Valeur quadratique moyenne pondérée de l'accélération selon la norme applicable : <2.5m/s²...
-
Page 4: Règles Générales De Sécurité
SYMBOLES Tournez la vis de fixation vers «+ » pour resserrer la lame de la scie, et vers «-» pour la Des symboles peuvent figurer sur la plaque desserrer. signalétique de votre appareil. Ils Tournez le commutateur de représentent des informations importantes au vitesse vers «+ »... - Page 5 Sécurité personnelle Portez un dispositif de protection de l’audition approprié. Portez une protection respiratoire Ne permettez pas aux enfants, à aucun pour éviter le risque d’inhaler des poussières moment, de faire fonctionner cet appareil. toxiques. Maintenez les enfants, les animaux Veillez à...
- Page 6 sûr. Contrôlez régulièrement si les clés et Faites réparer votre appareil électrique par dispositifs d’ajustement ont été ôtés de électricien qualifié. Cet appareil électrique est l’appareil avant de le mettre en route : une clé conforme aux règles applicables en matière de ou un mécanisme de blocage qui est resté...
- Page 7 Contrôlez régulièrement si les clés et Règles spécifiques de sécurité dispositifs d’ajustement ont été ôtés de l’appareil avant de le mettre en route. Précautions en matière de sécurité Si l’appareil comporte des équipements Durant son fonctionnement, cet outil électrique génère un champ permettant de le raccorder à...
- Page 8 atelier de service après-vente. N’utilisez Entretien et réparation pas de câbles de raccordement défaillants Débranchez la prise de courant avant ou endommagés. N’utilisez pas d’outils d’effectuer une adaptation ou une réparation. électriques pour lesquels les fiches ne se branchent et ne se débranchent pas. Le bruit émis dépend de divers facteurs, notamment du type de lames de scie, de son Règles de sécurité...
- Page 9 Risques résiduels Cet appareil a été construit en utilisant la technologie la plus moderne conformément aux règles de sécurité reconnues. Toutefois, certains risques résiduels peuvent encore subsister. • Les cheveux et les vêtements longs présentent un danger lorsque l’appareil est en rotation. Veillez à porter des dispositifs de protection personnelle comme un filet pour les cheveux ainsi que des vêtements près du corps.
-
Page 10: Contenu Fourni
La scie à chantourner vous est fournie partiellement assemblée. Elle est expédiée dans des cartons emballés avec soin. Après avoir sorti toutes les pièces du carton, vous devriez avoir : #1 # 2 #3 #4 : NON DISPONIBLE SUR CTSC90-406VS 4. Adaptateur de la lame de scie et clef Allen 1. -
Page 11: Connaissez Votre Appareil
CONNAISSEZ VOTRE APPAREIL Caractéristiques et contrôles #1 #2, # 3, #4, #5 : (non disponible sur CTSC90-406VS) - Page 12 Double lampe Double Lamp (non disponible sur CTSC90-406VS) Lampe tuyau réglable Adjustable Hose Lamp (non disponible sur CTSC90-406VS) Lame de scie plate Flat Saw-blade (non disponible sur CTSC90-406VS) Adaptateur de lame de scie Saw-blade Adapter (non disponible sur CTSC90-406VS) Air Nozzle Buse d’aération...
- Page 13 FONCTIONNEMENT Commencez par percer des trous dans la surface portante et mettez ensuite Montage de l’appareil sur un établi les vis. Un établi en bois solide est préférable à L’appareil n’est pas livré avec un un établi en contreplaqué car les support en caoutchouc mousse vibrations et les bruits sont plus destiné...
- Page 14 Réglage de l’échelle angulaire • Desserrer la vis de fixation et mettez l’indicateur en position zéro. Serrez la vis. Veuillez noter que l’échelle angulaire est une pièce supplémentaire utile mais qu’elle ne devrait pas être utilisée pour des travaux de précision. Utilisez du bois de déchet pour quelques sciages d’essai et réajustez la position de la table si nécessaire...
- Page 15 • Montez la lame de scie à travers le • trou dans la pièce à usiner et à Si les panneaux que vous souhaitez travers de la fente de la lame de découper sont d’une épaisseur scie et fixez la lame aux fixations. supérieure à...
- Page 16 Commande au pied (non disponible sur CTSC90-406VS) Système d’éclairage (non disponible sur CTSC90-406VS) La machine peut fonctionner en continu ou être commandée à l’aide du commutateur au Le système d’éclairage peut être activé en pied supplémentaire. Le choix du mode de pressant sur le bouton rouge «...
-
Page 17: Entretien
la lame au niveau des supports. Serrez ENTRETIEN la lame au moyen du tendeur. Contrôlez le niveau de tension de la lame. Continuez à tourner dans le sens des aiguilles d’une montre pour Avertissement ! Dans l’intérêt de la serrer d’autant plus la lame. sécurité... - Page 18 Pour changer une lame de scie plate Placez ensuite la lame de scie avec les 2 adaptateurs dans le support inférieur, (non disponible sur CTSC90-406VS) l’autre bout se logeant dans le support supérieur. Retirez l’adaptateur. Fixez la lame de scie avec des vis Allen, en utilisant la clé...
-
Page 19: Garantie
Vous trouverez des vues éclatées ainsi que des informations concernant les pièces de rechange également sous : www.eco-repa.com Les conseillers techniques et assistants CONSTRUCTOR sont à votre disposition pour répondre à vos questions concernant nos produits et leurs accessoires : sav@eco- repa.com GARANTIE Joint d’étanchéité... -
Page 20: Résolution Des Pannes
RÉSOLUTION DES PANNES Pour des raisons de sécurité opérationnelle, veillez à toujours éteindre la scie et à débrancher le cordon d’alimentation avant d’effectuer des travaux d’entretien ou de réparation. Problème Cause Solution Les lames se cassent La tension est mal réglée Réglez correctement la tension Amenez plus lentement la pièce à... -
Page 21: Voor Uw Veiligheid
FIGUURZAAGMACHINE VOOR UW VEILIGHEID TOEPASSINGSVOORWAARDEN LEES EN BEGRIJP DE VOLLEDIGE Deze figuurzaag is ontworpen voor gebruik bij HANDLEIDING VOORALEER U DE MACHINE omgevingstemperaturen tussen +5°C en 40°C IN GEBRUIK NEEMT en voor installatie op een hoogte van niet meer dan 1000m boven zeeniveau. De luchtvochtigheid in de omgeving moet bij 40°C minder dan 50% bedragen. - Page 22 De aanduiding van het feit dat de aangegeven totale trillingenwaarde werd gemeten conform een genormaliseerde proefmethode en kan worden gebruikt om een instrument met een ander instrument te vergelijken; de aanduiding van het feit dat de aangegeven totale trillingenwaarde ook kan worden gebruikt voor een voorafgaande evaluatie van de blootstelling.
-
Page 23: Algemene Veiligheidsregels
SYMBOLEN Verdraai de klemschroef naar "+" om het zaagblad vast te zetten, naar "-" om het De kenplaat op uw werktuig kan symbolen zaagblad los te draaien. vertonen. Deze staan voor belangrijke Verdraai de informatie over het product of instructies voor snelheidsschakelaar naar "+"... - Page 24 Persoonlijke veiligheid Reik niet te ver tijdens het werken met de machine. Bedien de machine niet op blote Laat kinderen nooit werken met deze voeten of met sandalen aan, of gelijkaardig machine. lichtgewicht schoeisel. Draag beschermend schoeisel dat uw voetenpositie op gladde Houd kinderen, huisdieren en andere mensen oppervlakken verbetert.
- Page 25 Elektrische veiligheid Gebruik geen elektrisch gereedschap met gevaar voor brand of explosie. Ongebruikte Bescherm uzelf tegen elektrische schokken. elektrische gereedschappen moeten in een De motor niet in of uitschakelen terwijl u in of droge verhoogde of gesloten locatie worden rond vochtige of natte grond staat. Gebruik bewaard buiten het bereik van kinderen.
-
Page 26: Specifieke Veiligheidsregels
Voordat u het apparaat weer inschakelt, Specifieke veiligheidsregels moet u zich ervan vergewissen dat de sleutels en het afstelgereedschap Veiligheidsvoorzorgen verwijderd zijn. Sluit de stofafzuiging aan. Als er Dit elektrische apparaat genereert een aansluitingen voor stofafzuiging en een elektromagnetisch veld tijdens het opvangapparaat aanwezig zijn, controleer gebruik. - Page 27 een werkplaats van de klantenservice. Onderhoud en Herstelling Gebruik geen defecte of beschadigde Trek de netstekker uit het stopcontact voor aansluitkabels. Gebruik geen elektrisch eventuele aanpassings- of gereedschap waarop de schakelaar niet reparatiewerkzaamheden. kan worden in- en uitgeschakeld. De productie van geluid wordt beïnvloed door Bijkomende veiligheidsregels voor verschillende factoren, met inbegrip van de Figuurzagen...
- Page 28 Overige risico's De machine is gebouwd met behulp van moderne technologie in overeenstemming met erkende veiligheidsregels. Sommige resterende gevaren kunnen echter nog steeds bestaan. • Lang haar en losse kleding kunnen gevaarlijk zijn wanneer het werkstuk draait. Draag persoonlijke beschermingsmiddelen zoals een haarnet en goed passende werkkleding.
- Page 29 De figuurzaag wordt gedeeltelijk geassembleerd geleverd en wordt verzonden in zorgvuldig verpakte kartonnen doos. Nadat alle onderdelen uit het karton werden gehaald moet u bekomen: ELEMENT OPTIONNEL # 1 # 2 #3 #4 #5 : niet beschikbaar op CTSC90-406VS 4. Zaagbladadapter en inbussleutel 1.
-
Page 30: Ken Uw Machine
KEN UW MACHINE Kenmerken en bedieningselementen ELEMENT OPTIONNEL # 1 #2, # 3, #4, #5 : Niet beschikbaar op CTSC90-406VS... - Page 31 Dubbele Lamp Double Lamp (Niet beschikbaar op CTSC90-406VS) Verstelbare slanglamp Adjustable Hose Lamp (Niet beschikbaar op CTSC90-406VS) Plat zaagblad Flat Saw-blade (Niet beschikbaar op CTSC90-406VS) Zaagbladadapter Saw-blade Adapter (Niet beschikbaar op CTSC90-406VS) Air Nozzle Luchtmondstuk Star Button Sterknop Speed Switch...
- Page 32 Boor eerst gaten in de zitting en steek GEBRUIK vervolgens de schroeven erin. Montage van de machine op een werkbank Een schuimrubberen basis voor Een werkbank van massief hout is beter geluidsdemping wordt ook niet dan een werkbank van multiplex, omdat meegeleverd met de zaag.
- Page 33 Een figuurzaag is in principe een "curve cutting tool” (boogsnijgereedschap), maar kan Saw Bench Zaagbank ook rechte en schuine kanten snijden. Maak Lock Screw Borgschroef uzelf vertrouwd met de volgende belangrijke Angle Scale Hoekschaal punten voordat u de zaag in gebruik neemt. Star Button Sterknop •...
- Page 34 om te voorkomen dat het zaagblad Ononderbroken gebruik breekt, als u houten platen dikker dan 2,5 Het is mogelijk om de zaag in te cm wilt zagen. schakelen door op de groene "I"-knop te drukken voor continu gebruik. Om de •...
- Page 35 Verlichtingssysteem bedrijfsmodi te kiezen. De bedrijfsmodus moet altijd worden geselecteerd wanneer de (Niet beschikbaar op CTSC90-406VS) machine wordt uitgeschakeld. De machine De verlichting kan worden ingeschakeld staat in de voetschakelaarstand als de door op de rode "0"-knop te drukken. schakelaar in de stand "0" staat. De machine...
- Page 36 Controleer of het blad goed vastzit. Blijf ONDERHOUD rechtsom draaien om het blad nog meer aan te spannen Waarschuwing! Om de bedrijfsveiligheid te waarborgen , moet de zaag altijd vóór onderhoudswerkzaamheden worden uitgeschakeld en de stekker uit het stopcontact worden getrokken. Algemeen Veeg af en toe spanen en stof van de machine af met een doekje.
- Page 37 Het vlakke zaagblad vervangen 6. Druk de bovenarm licht naar beneden (Niet beschikbaar op CTSC90-406VS) voordat u hem vasthaakt. 1. Haal de adapter eruit. Bevestig het zaagblad met inbusschroeven met een 7. Draai het blad met de schroef vast inbussleutel.
- Page 38 Onze klantenservice beantwoordt uw vragen over reparatie en onderhoud van uw product en over vervangingsonderdelen. Explosietekeningen en informatie over vervangingsonderdelen vindt u ook op :www.eco-repa.com Het CONSTRUCTOR-team voor gebruiksadviezen helpt u graag bij vragen over onze producten en toebehoren : sav@eco- repa.com Oliedichting GARANTIE...
-
Page 39: Problemen Verhelpen
PROBLEMEN VERHELPEN Om de bedrijfsveiligheid te waarborgen, moet de zaag altijd vóór onderhoudswerkzaamheden worden uitgeschakeld en de stekker uit het stopcontact worden getrokken. Probleem Oorzaak Remedie Breuk van het zaagblad Spanning verkeerd ingesteld Stel de juiste spanning in Lading te groot Werkstuk langzamer invoeren Onjuiste zaagbladvariant Gebruik de juiste zaagbladen... -
Page 40: For Your Safety
GB SCROLL SAWS FOR YOUR SAFETY APPLICATION CONDITIONS READ AND UNDERSTAND THE This scroll saw is designed for operating under ambient temperatures between +5°C and ENTIRE MANUAL BEFORE 40°C and for installation at altitudes no more OPERATING MACHINE than 1000m above M.S.L. The surrounding humidity should less than 50% at 40°C. - Page 41 Weighted root mean square acceleration according to relevant standard. : < 2.5 m/s² The declared vibration total value has been measured in accordance with a standard test method and may be used for comparing one tool with another that the declared vibration total value may also be used in a preliminary assessment of exposure.
-
Page 42: General Safety Rules
SYMBOLS SAFETY The rating plate on your machine may General Safety Rules show symbols. These represent important Understand your Machine information about the product or instructions on its use. Read this manual and labels affixed to the machine to understand its limitations and potential hazards. - Page 43 Protect eyes, face, and head from objects that Be sure the motor switch is off before may be thrown from the unit. Always wear transporting the machine or performing any safety goggles or safety glasses with side maintenance or service on the unit. shields when operating.
-
Page 44: Specific Safety Rules
is well-illuminated. Do not use electric tools Switch off the machine to troubleshoot or where there is a risk of fire or explosion. remove jammed pieces of wood. Securely store unused electric tools. Unused Refitting, including adjusting and electric tools should be stored in a dry, measuring works, and cleaning must be elevated or closed location out of the reach of carried out only when the motor is... - Page 45 alll parts must be correctly mounted and Maintenance and Repair all conditions must be fulfilled to ensure Pull out the mains plug for any adjustment or faultfree operation of the electric tool. repair tasks. The moving protective hood may not be fixed in the open position.
- Page 46 Residual Risks The machine has been built using modern technology in accordance with recognized safety rules. Some remaining hazards, how ever, may still exist. • Long hair and loose clothing can be hazardous when the work piece is rotating. Wear personal protective gear such as a hair net and tight fitting work clothes.
-
Page 47: Contents Supplied
The scroll saw comes partially assembled and is shipped in carefully packed carton. After all the parts have been removed from the carton, you should have: #1 # 2 #3 #4 #5 : Not available on CTSC90-406VS 4. Saw-blade Adapter & Allen Wrench 1. -
Page 48: Know Your Machine
KNOW YOUR MACHINE Features and Controls #1 #2, # 3, #4, #5 : (Not available on CTSC90-406VS) -
Page 49: Operation
OPERATION Setting the Saw Bench Mounting the machine on a work bench • Release the star button and bring the saw bench to a right angle in A workbench made from solid wood is relation to the saw blade. Use a 90° better than one made of plywood, as angle L-square measure the right interfering vibrations and noise are more... - Page 50 Horizontal Saw Bench and Diagonal Cuts • All persons carrying out work with the saw require training. The saw blade may break The saw bench can be positioned into easily during this training time while the a 45° diagonal position or be left in operator is still unfamiliar with the saw.
- Page 51 Proceed as follows: Lighting System (Not available on CTSC90-406VS) • Drill a 6 mm hole in the work piece. The lighting system can be switched on by • Loosen the clamping screw (blade pressing the red "0"...
-
Page 52: Maintenance
Warning! In the interests of Foot Switch operational safety, always switch off the saw (Not available on CTSC90-406VS) and remove the mains plug before carrying out maintenance work. The machine can be operated in continuous operation or with the additional General foot switch. - Page 53 Tighten the blade by means of the Changing the flat saw-blade Clamping screw. Check the blade's (Not available on CTSC90-406VS) tightness. Keep on rotating clockwise in order to tighten the blade even more. 1. Take out the adapter. Fix the saw-blade with allen screws using allen wrench.
-
Page 54: Service Department
Exploded views and information on spare parts can also be found under:www.eco- repa.com CONSTRUCTOR application service team will gladly answer questions concerning our products and their accessories : sav@eco- repa.com STORAGE _ Thoroughly clean the whole machine and its... - Page 55 _ Store it out of the reach of children, in a stable and secure position, in a cool and dry place, avoid too high and too low temperatures. _ Protect it from exposure to direct sunlight. Keep it in the dark, if possible. _ Don’t keep it in plastic bags to avoid humidity build-up.
-
Page 56: Troubleshooting
TROUBLE SHOOTING In the interests of operational safety, always switch off the saw and remove the mains plug before carrying out maintenance work. Made in China 2019... - Page 57 PIÈCES DÉTACHÉES – ONDERDELENSCHEMA - PARTS SCHEDULE # 1 # 2 # 3 # 4 # 5 Non disponible sur CTSC90-406VS Niet beschikbaar op CTSC90-406VS Not available on CTSC90-406VS...
- Page 58 Déclaration CE de conformité EG-verklaring van overeenstemming CONSTRUCTOR verklaart dat de machines: CONSTRUCTOR certifie que les machines : FIGUURZAAGMACHINE « CTSC90-406VS » SCIE A CHANTOURNER « CTSC90-406VS » in overeenstemming zijn met de volgende sont en conformité avec les normes normen: suivantes :...
- Page 59 Declaración CE de conformidad CONSTRUCTOR dichiara che le macchine: CONSTRUCTOR declara que las máquinas: SEGA A SVOLGERE « CTSC90-406VS » SIERRA DE MARQUETERÍA « CTSC90-406VS » sono state concepite in conformità con i han sido diseñadas de acuerdo con las...
- Page 60 81, rue de Gozée 6110 Montigny-le-Tilleul Belgique Tél : 0032 71 29 70 70 Fax : 0032 71 29 70 86 S.A.V sav@eco-repa.com Service Parts separated 32 / 71 / 29 . 70 . 83 32 / 71 / 29 . 70 . 86 Fabriqué...
Need help?
Do you have a question about the CTSC90-406VS and is the answer not in the manual?
Questions and answers