Solax Maleta User Manual
Hide thumbs
Also See for Maleta:
- Owner's manual (18 pages) ,
- Owner's manual (18 pages) ,
- User manual (16 pages)
Table of Contents
Advertisement
Quick Links
Advertisement
Table of Contents

Related Manuals for Solax Maleta


Summary of Contents for Solax Maleta
- Page 1 Solax Maleta User Manual Proudly brought to you by...
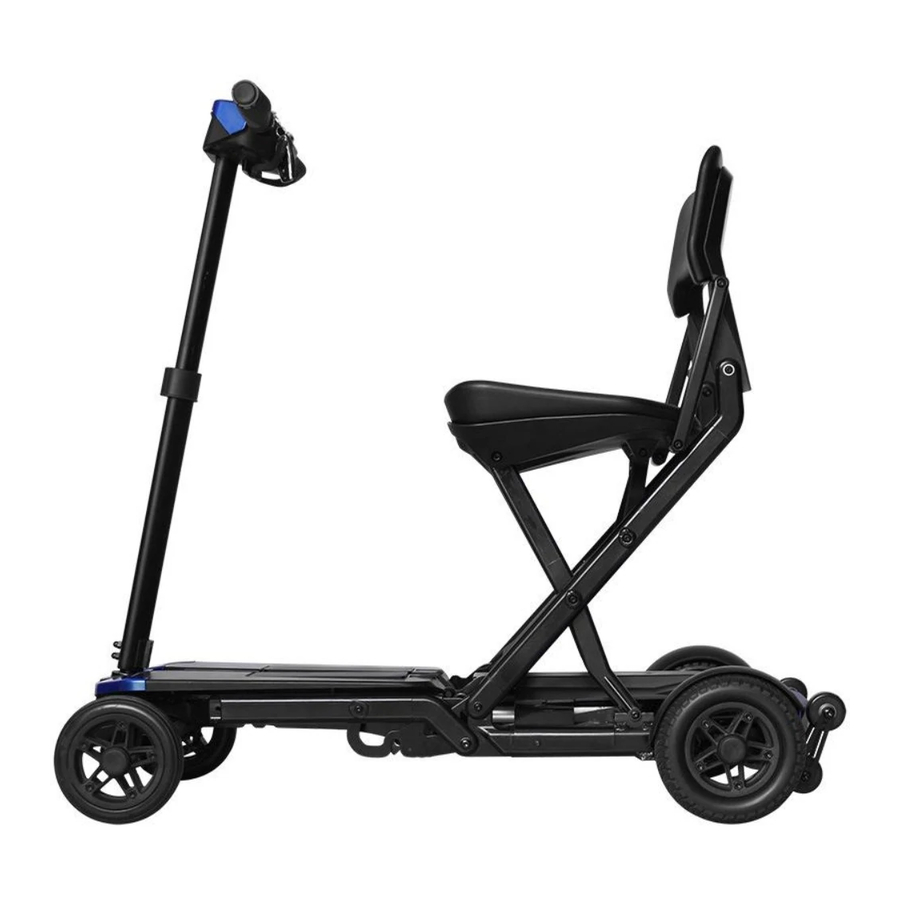
- Page 2 Fig.1 Solax Maleta Finally, we hope that your new Solax Maleta will help you enjoy a more comfortable, convenient, and wonderful life. All the information and pictures contained in this manual are subject to the factory's products and are to be used as a reference only.
-
Page 3: Table Of Contents
7.2.1 How does the charger work?............................12 7.2.2 How does the indicator light (LED) in charger display....................12 7.2.3 Can I use other chargers with my Solax scooter?......................12 7.2.4 How often should charge the battery?.........................12 7.2.5 How to achieve optimum operating distance?......................12 7.2.6 Why does the power of my new battery seem weak?....................13... -
Page 4: Features
1 Features Please refer to the diagram below to identify the different components of your scooter. Familiarise yourself with the terminology to better understand part references throughout the Owner’s Manual. -
Page 5: Main Characteristics
The tiller is adjustable in height to allow for additional user comfort In conclusion, The Solax Maleta is a unique scooter, that suits a large range of different users and will provide the user with the ability to access many places and enjoy more freedom in everyday life. -
Page 6: Main Parts And Relevant Function
3 Main Parts and Relevant Function 3.1 Control Panel/Dash - Fig.04 The Dash is the “control-center” of your Solax Maleta. It offers access to all the features and controls. It features Horn Key Ignition Charge Socket ... -
Page 7: Power Indicator
3.4 Power Indicator (Fig.07) When the scooter is turned to the “on” position, your battery charge will show on the LCD display. Fig. 07 3.5 Direction Control Lever The direction control lever is used to control the forward and backward. Move the lever with your right hand to drive forward. -
Page 8: Controller
3.9 Brake The Maleta is equipped with an electromagnetic brake. We recommend not to put the scooter into “freewheel mode” please see point 3.10. Instead to fold the scooter and use the tiller to wheel the scooter to the required position. -
Page 9: Automatic Folding And Unfolding Buttons On The Control Panel
Buttons push the buttons on the dash. Please see Fig.19 for fold/unfold reference Notice: Ensure your scooter is on level ground, before using the fold/unfold function of your Solax Charge 5 Manual Folding & Unfolding 5.1 Manual unfolding Place the scooter on a level ground and use your hand to lift the red bar located under the seat After manually lifting the bar you will notice the scooters front and rear wheels coming together. -
Page 10: Safety Requirements
Approach slope end, slopes, raised group and unprotected edge zone (such as curbside, vestibule and stairs ets.) with extra care. Do not change the scooters setting or modify your Solax Maleta in anyway. Any breeches of this may result in your warranty being void and your scooter not operating in a safe manner. ... -
Page 11: Battery And Battery Charging
25’C or under 10’C 7.1 Battery charging guide You can charge your Solax Maleta in the folded or unfolded position. The Charging Socket is in the center of your scooters dash. Please see image below. 1. Ensure your scooter is turned off (Set key to “off” position) – Fig.21 2. -
Page 12: Guide To A Safe And Long-Lasting Battery
26V. 7.2.3 Can I use other chargers with my Solax scooter? To charge safely and efficiently, we highly recommend using the charger supplied by the original manufacturer or registered dealer. -
Page 13: Why Does The Power Of My New Battery Seem Weak
7.2.6 Why does the power of my new battery seem weak? Deep-cycle battery use a unique chemical technology and design. It can be charged quickly and can be used for a long time after it has been fully charged. The battery is fully charged when it leaves the factory but may change its initial charge during transportation. -
Page 14: Basic Troubleshooting
9 Maintenance Given that the Solax scooter is a moving piece of equipment it is recommended to get it serviced by a trained service technician on a regular basis. The service technician will check the following. Please note we recommend an annual service of your scooter. Services should ONLY be carried out by trained... - Page 15 Warranty Registration Card Purchase by Contact No. Email Address Shipping Address Maleta S3121 Model Serial No. Purchasing Date Warranty Period 12 months warranty from purchasing date Manufacturer Solax Technology Limited Importer wholesale@motobility.com.au Name of re- seller / Purchasing Store Please complete your Warranty registration card and email through a copy to wholesale@motobility.com.au...
- Page 16 The following symbols are found on the Scooter: Warning of Microwave Radiation Manufacturer Do not drive in rain or snowy weather Date ofManufacture keep loose clothing clear of the scooter Refer to The InstructionManual Do not operate cell phones while the [:r;::ill] scooter is poweredon.
Need help?
Do you have a question about the Maleta and is the answer not in the manual?
Questions and answers