Advertisement
Quick Links
Advertisement

Related Manuals for Taipeng TPPER94033


Summary of Contents for Taipeng TPPER94033
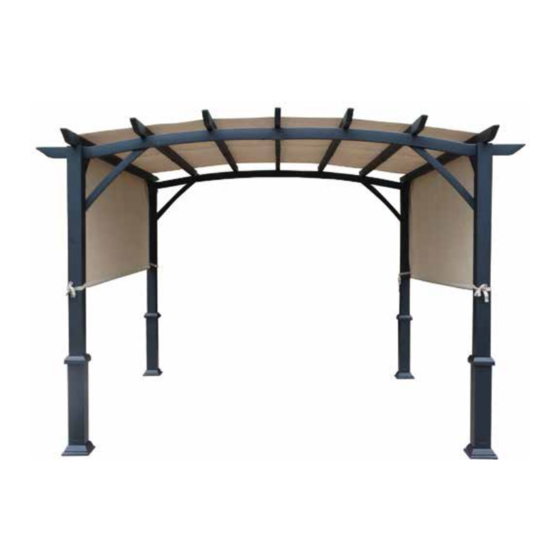
- Page 1 Model #TPPER94033 INSTALLATION GUIDE 10’x10’ Curved Roof Pergola...
-
Page 2: Operation
Operation □ Set aside all rafter pieces.Assemble the left rafter by inserting the left rafter,male (A1) into the left rafter,female (A2).Secure the top of the joined rafter with a plastic washer (DD) and M6*15 mm Pipe Skirt bolt (AA). Secure the bottom of the rafter with a washer (EE) and M6*15 mm bolt (AA). - Page 3 Oper ation (continued) □ Set aside all beam. Assemble the rear beam by inserting the rear beam, male (D1) into the rear beam, female (D2). Secure the of the joined beam with a plastic washer (DD) and M6*15 mm bolt (AA). Secure the bottom of the beam with a washer (EE) an M6*15 mm bolt (AA).
- Page 4 Oper ation (continued) □ Slide one post skirt (J) onto each post 1 (H) and post 2 (I). Attach one plate (K) to each post 1 (H) and post 2 (I). Secure each with washers (EE) and M6*15 mm bolt (AA).
- Page 5 Oper ation (continued) □ Attach rear beam (D1/D2) to post 1 (H) and post 2 (I). Secure with plastic washers (DD) and M6*95 mm bolts (BB). Repeat for front beam (E1/E2).
- Page 6 Oper ation (continued) □ Attach left rafter (A1/A2) to the top of the beam and post assembly. Secure on both sides with plastic washers (DD) and M6*95mm bolt (BB). Repeat for right rafter (C1/C2).
- Page 7 Oper ation (continued) D2/E2 □ Slide the pipe skirt on the center of the beam (D1D2/E1E2) as shown, then attach center rafter (B1/B2) to the top center of the beam. D1/E1 Secure with plastic washer (DD) and M6*95 mm bolt (BB). Repeat for four remaining center rafters (B1/B2).
- Page 8 Oper ation (continued) □ Attach a brace (L1/L2) to the pergola assembly as shown. Secure with washers (EE) and M6*15 mm bolt (AA). Repeat for remaining braces (L1/L2).
- Page 9 Oper ation (continued) □ Attach a brace (N/M) to the pergola assembly as shown. Secure with washers (EE) and M6*15 mm bolts (AA). Repeat for remaining brace (N/M).
- Page 10 Oper ation (continued) □ Insert rod, male (G1) into rod, female (G2). Insert rod assembly into canopy (F). Repeat for remaining rod assembly. G1/G2...
- Page 11 Oper ation (continued) □ Place canopy (F) over pergola. Tie corners of canopy (F) to each post.
- Page 12 Oper ation (continued) Insert stakes (FF) into plate (K). Place □ post skirt (J) over plate (K). Repeat for remaining stakes (FF) and post skirts (J).
Need help?
Do you have a question about the TPPER94033 and is the answer not in the manual?
Questions and answers