Flomec Q9 Product Owners Manual
Industrial grade computer electronics, non-agency
Hide thumbs
Also See for Q9:
- Owner's manual (60 pages) ,
- Product owners manual (36 pages) ,
- Quick start manual (2 pages)

Related Manuals for Flomec Q9


Summary of Contents for Flomec Q9
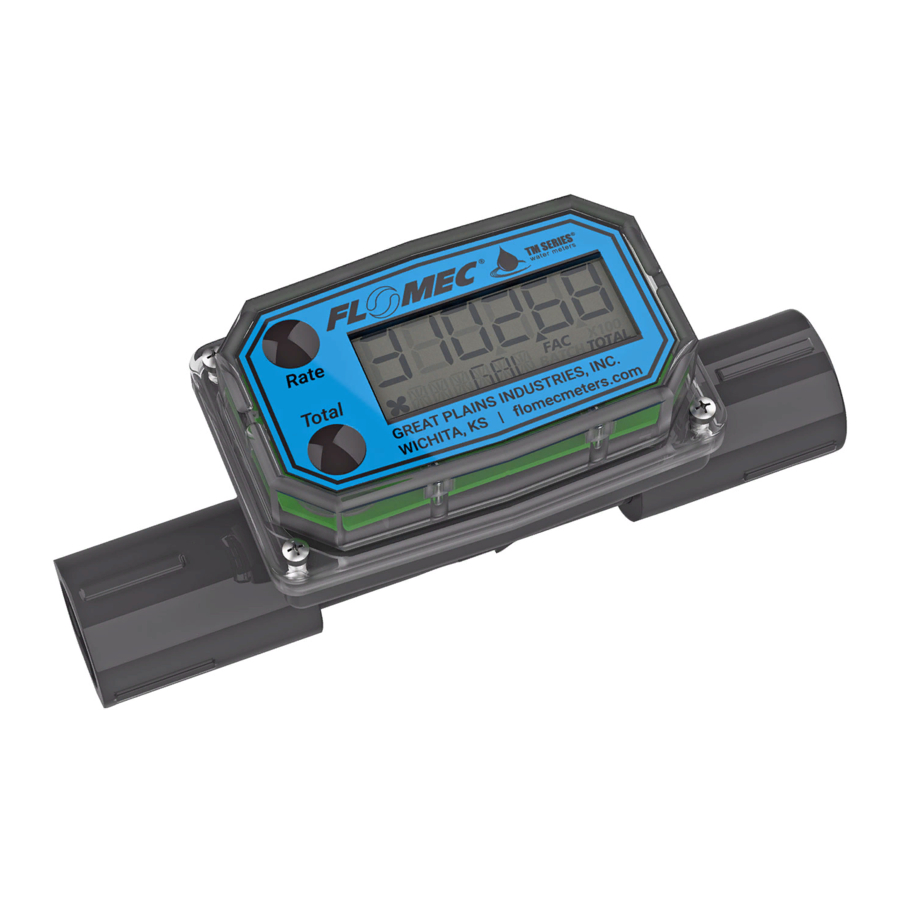
- Page 1 Product Owner’s Manual Product Owner’s Manual Industrial grade Q9 COMPUTER ELECTRONICS (Non-Agency) 08/03/2020 920896-07 Rev-...
- Page 2 Please save these instructions for future reference. Read carefully before attempting to assemble, install, operate or maintain the product described. Protect yourself and others by observing all safety information. Failure to comply with instructions could result in personal injury and/or property damage. Please refer to back cover for information regarding this product’s warranty and other important information.
-
Page 3: Table Of Contents
Non-Agency Approved Q9 Table of Contents Getting Started . . . . . . . . . . . . . . . . . . . . . . . . . . . . . . . . . . . . .4 General Safety Instructions . -
Page 4: Getting Started
Tools and Materials Needed • Phillips screwdriver. UNPACKING Contents Qty. 1 - Q9 Industrial Grade Computer Electronics w/Batteries Installed Qty. 1 - Owner’s Manual Inspect Upon receipt, examine your equipment for visible damage. The • computer is a precision measuring instrument and should be handled as such. -
Page 5: General Safety Instructions
General Safety Instructions GENERAL SAFETY INSTRUCTIONS IMPORTANT: It is your responsibility to: • Ensure that all equipment operators have access to adequate instructions concerning safe operating and maintenance procedures. The apparatus enclosure may contain aluminum and is considered to constitute a potential risk of ignition by impact or friction. -
Page 6: Electrical / Mechanical Specifications
Housing Transparent Amorphous Nylon Material +0°F to +140°F (-18°C to +60°C) Operating If wider operating temperature ranges are desired, reference Temperature information on FLOMEC® Remote Kits. Storage -40°F to +158°F (-40°C to +70°C) Temperature ELECTRICAL Input Pulse Frequency Range: 0.25 Hz – 3kHz... - Page 7 SPECIFICATIONS (CONTINUED) DIMENSIOINS Length Height Height Width (Widest Point) “A” “B” (Mounted) “D” “C” 3.40 in. 0.85 in. 0.72 in. 2.14 in. (8.6 cm) (2.1 cm) (1.8 cm) (5.4 cm) Figure 2 COMPUTER DISPLAY FEATURES Familiarize yourself with the computer features before installation and use. FLOATING DECIMAL FACTORY CALIBRATION POINT (3 PLACE)
-
Page 8: Approval Ratings
Approval Ratings SPECIFICATIONS (CONTINUED) AGENCY APPROVALS Q9 Computer Electronics: Q9 Industrial Grade Computer Electronics See InDesign File for ICONS... -
Page 9: Installation
If you ordered the computer with a turbine body and an accessory module, please review and thoroughly understand all installation instructions before proceeding. All FLOMEC turbine meters are designed to measure flow in only one direction. The direction is indicated by the arrow on the turbine outlet port. If the computer display is upside down in your installation, remove the four screws, turn the display 180 degrees and reinstall the screws. -
Page 10: Operation
Operation OPERATION COMPUTER DISPLAY All operations are revealed on the LCD using the large 6-characters in the top row and smaller characters and symbols in the second row. These characters and symbols indicate information regarding totals, flow, calibration, units of measure and operational messages. -
Page 11: Normal Operation Mode
Normal Operation Mode OPERATION NORMAL OPERATION MODE Button Usage Map – Normal Operation Mode BUTTON Batch Total Total Toggles Between Accumulative Total Hold for 3 Seconds When Batch Total Total to Reset Batch Total is Displayed Change Display from Rate Total to Rate See InDesign for Graphic Flowrate... - Page 12 OPERATION (continued) NORMAL OPERATION MODE (continued) Total Button: Batch total reset. When a batch total (see Figure 8-1) is displayed, press and continue to hold Total button for 3 seconds; the software will display a three second count down, then reset the batch total to zero.
-
Page 13: Diagnostic Mode
Diagnostic Mode OPERATION (continued) NORMAL OPERATION MODE (CONTINUED) Rate Button: Change display from total to rate. When a total is displayed, momentarily pressing the Rate button changes the top row of large display digits from a total to a rate display. The information row will change to the proper units and the corresponding icons will also be shown, i.e. - Page 14 OPERATION (continued) NORMAL OPERATION MODE (CONTINUED) Screen 1 – Input Frequency After button is released, the software will display the input frequency in Hz. The top row is used to indicate frequency. The information row will display messages. (See Figure 11-2) Figure 11-2 Screen 2 –...
-
Page 15: Configuration Mode
Configuration Mode OPERATION (continued) USER CONFIGURATION MODE General Notes for User Configuration Mode Menus 1. The term “focus” as used in this manual indicates an active editable item. Focused items will constantly flash ON/OFF. Advance focus: Toggle (momentarily press) the Total button. Advancing focus will move focus to the next editable item to the right. - Page 16 USER CONFIGURATION MODE General Notes for User Configuration Mode Menus Once in configuration mode the user can then proceed thru the configuration process menus as shown on the “configuration process map” on the following page. The software will retain your entries as you progress through the user configuration menus, however, there is no automatic “save”...
-
Page 17: Pin
OPERATION (continued) USER CONFIGURATION MODE (continued) PIN Menu The first menu in the configuration mode is for the user to enter a Personal Identification Number (PIN) to secure the configuration of the computer and continue with making changes. The default user PIN is 0000. Using this default PIN will unlock the meter unless the PIN has been reset by the user. -
Page 18: Volume Unit
Volume Unit OPERATION (continued) USER CONFIGURATION MODE (continued) If “Y” was selected, the previous PIN will be shown. The left most digit of PIN is in focus. Increment the value of each digit as desired as you advance focus through the digits. - Page 19 OPERATION (continued) USER CONFIGURATION MODE (continued) If the computer is new or has no previous custom volume unit label stored in memory, the screen will appear with three dashes. (See Figure 20) The left most of the dashes will be in focus and the user can select a letter from the list of upper case letters.
-
Page 20: Time Period
Time OPERATION (continued) USER CONFIGURATION MODE (continued) Flow Rate / Time Period Menu This menu is used to choose the period of time over which the flow rate is calculated. The options for this menu are: per day, hour, minute, or second. (See Figure 22-1) Time Base Abbreviati on Hour... -
Page 21: Advanced Options
Advanced Options Refresh Rate / Low Frequency Cutoff OPERATION (continued) USER CONFIGURATION MODE (Advanced Options) Advanced Options Menu This menu is used to access the Advanced Options. The Rate button is used to toggle between NO and YES selections. The Total button is used to select either NO or YES for the Advanced Options menu. - Page 22 OPERATION (continued) USER CONFIGURATION MODE (Advanced Options - continued) Calibration Method Selection Menu This menu is used to define which calibration method will be used in normal operation. The calibration method the user previously selected (if any) will be shown on the display first.
-
Page 23: Inner Pipe Diameter
Inner Pipe Diameter OPERATION (continued) USER CONFIGURATION MODE (Advanced Options - continued) K-Factor Entry method (see Figure 26-4) is a field calibration method by which the user can input either a single point or multipoint calibration table. From 1 to 5 unique K-factor and frequency values can be entered and will be stored in the custom K-factor table in the computer. -
Page 24: Daughter Board Options
4-20mA zero setting (see Figure 29-1). This setting will already be configured for the minimum flowrate of the meter this Q9 was attached to when shipped from the factory. Figure 29-1 The button presses required to change this... -
Page 25: Calibration Mode
Calibration Mode The button presses required to change this menu item are the same as in the Pipe Diameter Menu above (see Figure 29-4). Figure 29-4 OPERATION (continued) USER CONFIGURATION MODE (Advanced Options - continued) Field Calibration Method General The field calibration method may be set by the user, and can be changed or modified at any time using a field calibration method described in this section. -
Page 26: Dispense Display
Dispense Display OPERATION (continued) USER CONFIGURATION MODE (Field Calibration Mode) Field Calibration Method Entry At the beginning of the calibration method entry menu, the software will allow the user to start the calibration process or to exit back to normal operation. (See Figures 30-1 &... -
Page 27: Percent Adjust
Percent Adjust K-Factor Entry OPERATION (continued) USER CONFIGURATION MODE (Field Calibration Mode - continued) Begin dispensing into a container of known accurate volume. As soon as pulses are detected by the software, the screen will switch to display the volume being dispensed on the top row and the volume unit on the bottom row. - Page 28 OPERATION (continued) USER CONFIGURATION MODE (Field Calibration Mode - continued) Percent Adjust Method (Correction Factor) Percent adjust method is a field calibration method by which the user will enter a percentage amount to adjust K-factor values in the factory programmed K-factor table. Once the percentage is input by the user, the software will apply this percentage adjustment to all calculated and displayed values.
- Page 29 OPERATION (continued) USER CONFIGURATION MODE (Field Calibration Mode - continued) The software will read the existing K-factor table from the computer and will display the first frequency on the top row (see Figure 34-2) with the left most character in focus to indicate the user can change the value.
- Page 30 OPERATION (continued) USER CONFIGURATION MODE (Field Calibration Mode - continued) If the user chooses NO, the software will show the FLdCAL Exit screen (see Figure 32) for one second, and will then exit field calibration mode. The software will temporarily store the K-factor table values in the computer, and then display the “Save”...
-
Page 31: Troubleshooting
Troubleshooting TROUBLESHOOTING Symptom Probable Cause Corrective Action A. DISPLAY IS 1. Field Calibration not Field calibrate again or select performed properly. INACCURATE Factory Calibration. 2. Factory Calibration not Perform a Field Calibration suitable for liquid being according to Field Calibration measured. -
Page 32: Maintenance
The computer is shipped with (2) alkaline AAA size batteries (1.5-volts each) installed. Battery replacements are readily available as an off-the-shelf item. To maintain the FLOMEC® warranty, the batteries listed below are approved for use. Alkaline (AAA size, 1.5-volts each) - Page 33 PARTS The factory, when provided with model number and serial number, can replace your entire computer electronics assembly. Order replacement kits, parts, and accessories with the part numbers shown below. Item Description Reqd. Part No. 901002-52 Seal, Computer 116000-1 Large Calibration Container (5 Gallon) Optional SERVICE For warranty consideration, parts, or other service information, please contact your...
- Page 34 NOTES...
- Page 35 NOTES...
-
Page 36: Warranty
Note: In compliance with MAGNUSON MOSS CONSUMER WARRANTY ACT – Part 702 (governs the resale availability of the warranty terms). © 2020 Great Plains Industries, Inc., All Rights Reserved. Great Plains Industries, Inc. / 888-996-3837 / FLOMEC.net 08/03/2020 920896-07 Rev-...
Need help?
Do you have a question about the Q9 and is the answer not in the manual?
Questions and answers