Table of Contents
Advertisement
Advertisement
Table of Contents

Subscribe to Our Youtube Channel
Related Manuals for Welbilt CREM ONE Series


Summary of Contents for Welbilt CREM ONE Series
- Page 1 User Manual UM_EN Part No.: 1964195_06...
-
Page 2: Table Of Contents
CONTENTS CONTENTS MANUAL REVISIONS NOTIFICATIONS · Explanation of descriptions GENERAL · Introduction · General instructions · Warnings & Precautions · Warnings & Precautions (continued) · Warnings & Precautions (continued) · Precautions · Intended use · Packaging · Delivery inspection · Long-term storage requirements ·... - Page 3 CONTENTS · Electrical connection checklist (continued) · Initial starting procedure · Machine handling tips OPERATION · Inserting the portafilter in the group · Espresso brewing · Steaming and frothing milk · Dispensing hot water CLEANING AND CARE · Cleaning reminders ·...
- Page 4 CONTENTS · Manual mode: Run the shot · Manual mode: Save recipe · Recipe mode: Choose recipe · Recipe mode: Recipe graph information · Recipe mode: Run the shot MACHINE ALERTS · Alarms & Warnings TROUBLESHOOTING · Machine faults · Brewing faults ·...
-
Page 5: Manual Revisions
MANUAL REVISIONS Rev. # Date TSB# Description July 25, 2019 none Release first draft for technical review. Oct. 28, 2019 none Add programming information. Nov. 12, 2019 none Add compliance and certification notes. Combine EU and US version information into single user Nov. -
Page 6: Notifications
NOTIFICATIONS · Explanation of descriptions There are five different levels of notification intensity within this manual, as identified by the signal words DANGER, WARNING, IMPORTANT, NOTE and PRO TIP. The level of risk and importance of the notification is determined by the following definitions. Always observe the warnings to ensure safety and prevent potential injury and product damage. -
Page 7: General
GENERAL · Introduction Please read this user manual the machine. carefully before using the Do not discard this manual, machine. it will be useful for future This manual contains reference. If damaged or lost, important instructions request a new copy from the regarding safe intended use of manufacturer/distributor. -
Page 8: Warnings & Precautions
GENERAL · Warnings & Precautions Note: The manufacturer is not liable for damage to persons or property resulting from failure to follow the instructions and warnings listed below when installing and using this machine. Install the machine in a sets should not be reused. horizontal position and Use the inlet hose included away from heat sources and... -
Page 9: Warnings & Precautions (Continued)
GENERAL · Warnings & Precautions (continued) In case of emergency, (e.g., (The machine’s boiler and the machine catches fire or water system are empty when becomes unusually hot or delivered from the factory.). noisy), disconnect the power Never immerse the machine, immediately and turn off the plug or power cable in water, as water supply. -
Page 10: Warnings & Precautions (Continued)
GENERAL · Warnings & Precautions (continued) Do not use the machine if your hands or feet are wet. the power cable or plug is Do not operate the machine if damaged, or the machine any part except the dispensing has been dropped. Contact a equipment is wet. -
Page 11: Intended Use
GENERAL · Intended use To ensure optimal The coffee machine has been performance, install the designed and manufactured machine in a location where to make espresso coffee and these parameters will not be other hot drinks (e.g., steaming exceeded: and frothing milk). Do not use •... -
Page 12: Delivery Inspection
GENERAL · Delivery inspection Upon receipt and delivery ensure that the machine is in the exact condition described in the enclosed documentation, and that all accessories are included. Missing items should be reported to the manufacturer or dealer immediately. Damage caused during transport should be reported to the shipping agent and the machine’s distributor immediately. -
Page 13: Machine Disposal Requirements
GENERAL · Machine disposal requirements If the machine ever needs to be scrapped and disposed of be sure to: • Disconnect and roll up the power cord (this should be performed by a qualified person). • Disconnect the machine’s water inlet hose from the domestic water supply and drain the boilers (this should be performed by a qualified person). -
Page 14: Technical Specifications
TECHNICAL SPECIFICATIONS · Machine data ONE 1B ONE 2B ONE 2B ONE 2B RP-GSP RP-LFPP EU Compliance codes: EAEB-I91F-13AP EEEB-I91F-13AP EEEB-I91G-13AP EEEB-I94G-13AP US Compliance codes: EAJB-K91F-13BP EEJB-K91F-13BP EEJB-K91G-13BP EEJB-K94G-13BP Temperature control: PID control PID control PID control PID control Dispensing Manual Group lever Manual Group lever Manual Group lever... -
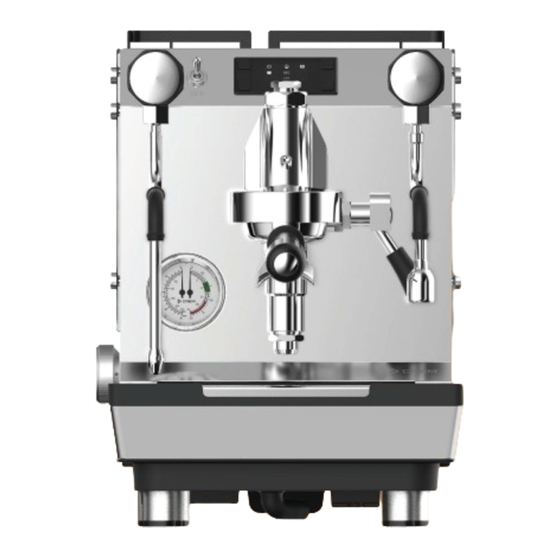
Page 15: Machine Description
TECHNICAL SPECIFICATIONS · Machine description 1B version 2B version Water tank lid Drain connection 13. OLED display Steam knob Brewing lever (2B versions) Power switch 10. Hot water tap 14. Water connection selector Steam wand 11. Hot water knob 15. Pressure profiling knob Brewing group 12. -
Page 16: Buttons And Controls
BUTTONS AND CONTROLS · 1B Version ONE 1B Dual is controlled by a combination of manual control knobs, buttons and a brewing lever for dispensing. Digital display 2 buttons This machine features a group display for monitoring off: 1. Tank empty/refill signal Shot timer Temperature 2. -
Page 17: Installation And Start Up
INSTALLATION AND START UP · Machine positioning Important: MIN. 30 cm / 12 in. Leave an air gap of at least 30cm / 12in. above the machine and 10cm / 4in. behind it to ensure easy cleaning and maintenance and adequate ventilation. The machine must be installed within 3º... -
Page 18: Filling The Water Tank
INSTALLATION AND START UP · Filling the water tank Note: DANGER: Avoid spills inside the machine, always turn the machine off when For water quality specs, refilling the tank. If spills occur, turn the machine off and unplug please refer to ’Water the power supply until the machine is completely dry to avoid filtration requirements’... -
Page 19: Water Filter Requirements
INSTALLATION AND START UP · Water filter requirements Only use safe drinking water with a hardness rating between 5ºfH and 8ºfH (French hardness degrees). If the hardness value is below this limit, corrosion of hydraulic components is likely. If the value is higher, lime-scaling inside the boiler will occur. -
Page 20: Drain Connection Checklist
INSTALLATION AND START UP · Drain connection checklist Connect one end of the flexible drain tube to the drain cup outlet. (It is located under the machine. Contact a service technician to do this task you are unsure how to access this area of the machine.) Connect the other end of the drain tube to the domestic plumbing drainage system in the... -
Page 21: Electrical Connection Checklist (Continued)
INSTALLATION AND START UP · Electrical connection checklist (continued) Ensure that a circuit breaker engineered for the power consumption of the machine is installed to protect the electrical supply, as specified on the ratings plate located under the drip tray. Never connect the machine to the power supply via extension cords, plug adapters, or shared outlets. -
Page 22: Operation
OPERATION · Inserting the portafilter in the group A: Align the portafilter's two flanges with the two slots in the group housing. B: Insert the portafilter and rotate it counterclockwise until the handle is approximately perpendicular to the face of the coffee machine. Group gasket is Portafilter is not Installed... -
Page 23: Steaming And Frothing Milk
OPERATION · Steaming and frothing milk Place the steam wand over the drip tray and open the steam knob/handle for a few seconds to allow condensed water to be ejected. Close the steam knob/handle when only steam is coming out. Immerse the steam wand into the milk, making sure the wand tip is submerged. -
Page 24: Cleaning And Care
CLEANING AND CARE · Cleaning reminders To keep the machine looking and working like new, always follow all the cleaning and care instructions provided in this manual. For safety always turn the machine off at the main power switch when cleaning the exterior surfaces. All exterior surfaces should be cleaned with a damp, lint-free cloth that will not scratch the machine, glass surfaces can be cleaned with a streak-free glass cleaner and a dry cloth. -
Page 25: Weekly Cleaning Or Periodical Cleaning And Care - Once Per Week Be Sure To
CLEANING AND CARE · Weekly cleaning or Periodical cleaning and care – Once per week be sure to: Group head Run the cleaning cycle for each group at the end of each week to thoroughly clean the group head, shower plate and portafilter to ensure great coffee taste. See Weekly cleaning with espresso machine detergent section for details. -
Page 26: User Programming 1B
USER PROGRAMMING 1B · User interface 1B The machine is equipped a programmable interface that allows users to set or adjust the following features and parameters with guidance from the digital display. Selection buttons K2 - K3 · Adjusting boiler temperature Use the following steps to adjust the boiler temperature: Press the K3 for 5 seconds untill ’t1’... -
Page 27: User Programming 2B
USER PROGRAMMING 2B · User Interface 2B The ONE 2B machines are equipped with a programmable ’Barista’ interface that allows users to set or adjust the following features and parameters with guidance from the digital display: Power off/on (without using the main switch). GSP (Gradual Soft Preinfusion) settings. -
Page 28: Temperature Adjustment
USER PROGRAMMING 2B · Temperature adjustment On Barista menu, access to Temperature ( ) settings. Use the following steps to adjust the main steam boiler and group boiler temperatures individually: Group boiler ( ): Set temperature of the group boiler Steam boiler ( ): Set temperature of the steam boiler Use the ▲/▼... -
Page 29: Clock Menu
USER PROGRAMMING 2B · Clock menu On Barista menu, access to clock ( ) settings. Use the following steps to adjust the time, weekday and date: Time: On 0-24H format Weekday: Mon-Sun Date: DD/MM/YY by default (this format can be modified on Date format settings on Barista menu) Use the ▲/▼... -
Page 30: Counters Menu
USER PROGRAMMING 2B · Counters menu On Barista menu, access to Counters ( ) settings. Use the following steps to access to the machine total counters and to the Cleaning/Service partial counters: Total counters ( ): Shows the total number of shots brewed on the group. Adds 1 per each shot (no difference between single or double shot) Cleaning/Service partial counters ( ): Shows the partial counters used to trigger the... -
Page 31: Usb Communication (Lfpp Version Only)
USER PROGRAMMING 2B · USB communication (LFPP version only) On Barista menu, access to USB communication ( ) settings. USB communication allows to import the welcome logo and to import/export LFPP recipes via USB: Import logo ( Copy the desired logo image onto an empy USB stick (NOTE: image must be in .bmp format, sized 128x64 pixels, black and white colour). -
Page 32: Pressure Profiling Menu
PRESSURE PROFILING MENU · Manual mode: Access From idle user display, Press the pressure profiling knob inward. Manual mode icon will be shown on display. · Manual mode: Initial PP pressure Settings explanation Choices / limits for adjustment Default initial setting Choose the initial pressure by rotating the PP knob 2-12 Bar 2 Bar... -
Page 33: Recipe Mode: Choose Recipe
PRESSURE PROFILING MENU · Recipe mode: Choose recipe From idle user display, rotate the PP knob to browse through the recipes. Select the recipe by pressing the PP knob. · Recipe mode: Recipe graph information · Recipe mode: Run the shot Original instructions. -
Page 34: Machine Alerts
MACHINE ALERTS · Alarms & Warnings To alert users that routine service of the machine is due or against a situation that could possibly cause damage to the machine, ONE has the following alerts programmed into its software: 1B versions Error Warning Alarm Name... -
Page 35: Troubleshooting
TROUBLESHOOTING · Machine faults Problem Possible cause Solution The plug is not correctly Check that the plug is correctly inserted into the power inserted and that the power socket socket is operational. The machine does not start The circuit breaker and/or up when turned on Check that they are connected. - Page 36 For the warranty to be valid the conditions for maintenance must have been followed according to our instructions, proper precaution has been made and warranty claim been issued without delay. The affected equipment may not be used during awaiting service if there is any risk that the damage or defect would worsen.
Need help?
Do you have a question about the CREM ONE Series and is the answer not in the manual?
Questions and answers