Table of Contents
Advertisement
The Good, Bad & Ugly VW T6 Campervan Manual
INTRODUCTION ......................................................................................................2
This Manual is in Two Parts:.............................................................................................2
Design Aims ........................................................................................................................2
General Description.............................................................................................................3
Selection of Equipment & Base Van ....................................................................................3
Part One - Use of Camper Equipment and Safety Considerations ....................7
Safety Considerations:......................................................................................................7
General Operating Instructions & Information ................................................................7
240V supply.........................................................................................................................7
240V Hook-Up.....................................................................................................................7
Gas Supply & Hob ...............................................................................................................8
Water Supply, Pump and Waste Pipe..................................................................................9
Leisure Battery, 12V Supply and Chargers ..........................................................................9
Turning On / Off and Using the 12V Leisure Electrics........................................................10
12V Fuse Box & Isolator Switch.........................................................................................10
12V Outlets & USB's Main Panel.......................................................................................11
'External' 12V Outlet & USB's (near sliding door) ..............................................................11
Van Battery (Replaced June 2020)....................................................................................12
Skyline Roof & Top Bed.....................................................................................................12
Bed, Furniture & Storage ...................................................................................................13
Passenger Double Swivel Seat (Kiravans Swivel) .............................................................14
Table with Sliding Function & Storage ...............................................................................14
General Storage areas ......................................................................................................14
The Van Jack, wheel brace & security wheel nut remover .................................................15
LED Lights & Switches ......................................................................................................15
Above sliding door LED switch: .........................................................................................16
Hafele Top Bed LED with USB's........................................................................................16
Part Two - Maintenance & Repair .......................................................................17
Furniture, Fixings & Panels ............................................................................................17
Main Seat / Bed Fixings.....................................................................................................19
Top Bed Strut Fixings ........................................................................................................19
Removing Side Panels ......................................................................................................19
ELECTRICS ......................................................................................................................20
The Basic Systems & Wiring .............................................................................................20
Cable Colours to and from fuse box:..................................................................................21
Cable Colours Rear LED's:................................................................................................21
Fuse box panel & 240V RCD unit panel positions..............................................................22
Underseat charging systems and leisure battery (under drivers seat)................................22
Underseat Drivers Seat Fuses (4) .....................................................................................23
Van Battery to (B to B) Charger Fuse ................................................................................25
Cut-Out Isolator Switch and Rear fuse box ........................................................................25
Main Switch Panel in Hob Area .........................................................................................25
Fridge Removal .................................................................................................................26
Water Pump ......................................................................................................................26
Rear LED switches ............................................................................................................26
LED Strip Lights.................................................................................................................29
Top Front Hafele Bed light.................................................................................................29
240V Double Pole RCD & MCB's ......................................................................................29
1
Advertisement
Table of Contents

Related Manuals for Volkswagen T6


Summary of Contents for Volkswagen T6
-
Page 1: Table Of Contents
The Good, Bad & Ugly VW T6 Campervan Manual INTRODUCTION ......................2 This Manual is in Two Parts:.....................2 Design Aims ........................2 General Description......................3 Selection of Equipment & Base Van ..................3 Part One – Use of Camper Equipment and Safety Considerations ....7 Safety Considerations:......................7... -
Page 2: Introduction
APPENDIX ......................30 *Refer also the attached manufacturers documents.............30 Other equipment information (not fitted currently) ............30 Gas & Carbon Monoxide Detectors ...................30 Awning systems.........................30 Toilet systems ........................30 Bike Rack systems ......................31 Other Equipment & Accessories ..................31 Electrical System - Background & Research info ............31 INTRODUCTION This Manual is in Two Parts: 1) Use of camper equipment and safety... -
Page 3: General Description
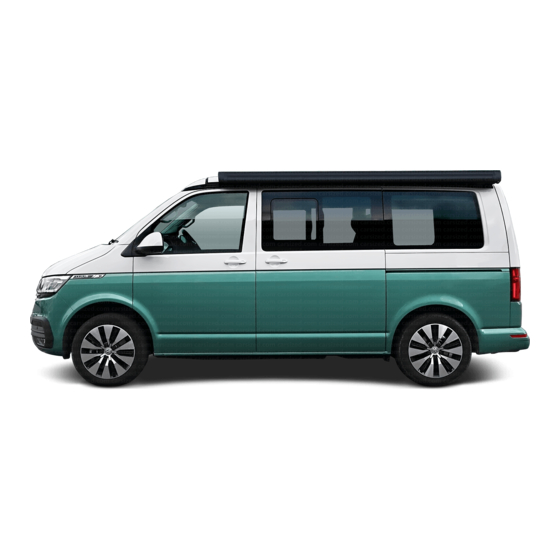
General Description VW T6 Transporter Highline model, 150 PS, Five Seats, Six Gears (Manual), Tailgate, AirCon, Cruise, Electric Windows, Bluetooth, Touch Display, Parking Sensors and Display, Electrical Door Mirrors, Colour Detailed Bumpers & Doors Mirrors, Euro 6 Start Stop in Starlight Blue Metallic, 8,500 miles. One owner, (before the conversion). - Page 4 Some converters seem to be attempting to create a motorhome environment, which is not the ideal prospect for the VW T6 due to the limitations of space, height, and the ‘tent’ effect of the pop top. If you are considering long-term staying away, then the research suggests that the better option would be either a full motorhome, a caravan or a larger full height Van conversion such as the Mercedes Sprinter.
- Page 5 green credentials. Bluetooth smart phone connection (for music and media) • Rear parking sensors and display • Electrically adjustable mirrors • Low mileage providing longevity and almost new use • Short wheelbase for manoeuvrability and easy parking • Most converters seem to find vans that are not ideal (eg no tailgate, lower power etc) as they are attempting to maximise their margins.
-
Page 7: Part One - Use Of Camper Equipment And Safety Considerations
Part One – Use of Camper Equipment and Safety Considerations Safety Considerations: There are three key areas for safety: 1) 240V supply and systems 2) Gas supply 3) 12V supply and systems These systems have been kept apart as far as possible and all have been designed for maximum safety. -
Page 8: Gas Supply & Hob
There are connectors that swap the polarity and also test units to make sure that you know what the polarity is on each site. Use the supplied cable in the UK, it will only fit one way around, and lift the magnetic cover on the rear OS to insert the blue cable socket. -
Page 9: Water Supply, Pump And Waste Pipe
time press down on the ‘ignition button’. This activates the ignition system and the burner lights, hold down the gas knob for several seconds to ensure the safety temperature system is activated. To use the water supply, first check the waste is in either the waste container or the •... -
Page 10: Turning On / Off And Using The 12V Leisure Electrics
Charging The charging system for a T6 Transporter is complex due to the stop start and regeneration system. The design ensures the leisure battery can charge properly from both the van engine running and the 240V hook up system. The engine can be run when stationary to charge the 12V leisure battery (via the B to B charger). -
Page 11: 12V Outlets & Usb's Main Panel
The 12V isolator switch, (not 240V), isolates ALL leisure electric equipment including the fridge. This isolator feeds the fuse box only. There are no other 12V feeds from the leisure battery. If you wish to leave the fridge running while driving leave the isolator switch ON and the fridge panel rocker switch on and turn off the other switches and the LED lights. -
Page 12: Van Battery (Replaced June 2020)
Van Battery (Replaced June 2020) It is important to note that the van battery never charges fully due to the allowance for the braking regeneration system. This means that the van battery is liable to go flat quicker than a vehicle without this new technology. There is a voltage display for the van battery on the top left of the control panel near the hob unit. -
Page 13: Bed, Furniture & Storage
(HPL). The design of both are a little compromised, but they work together quite well in the small space afforded to the VW T6. The bed / seat unit slides to provide more room and access to cupboards. The bed is tight to the furniture to provide room to reach the handles on the NS. -
Page 14: Passenger Double Swivel Seat (Kiravans Swivel)
Passenger Double Swivel Seat (Kiravans Swivel) This turns and moves to face the table area. There is a large storage space under this seat, pull the seat forward at the bottom and it will release and hing upwards. The operation of the swivel system is a bit of a knack.: Move the Drivers seat back until it touches the table support •... -
Page 15: The Van Jack, Wheel Brace & Security Wheel Nut Remover
The Van Jack, wheel brace & security wheel nut remover These are located under the passenger double seat. LED Lights & Switches The lights have been designed for a range of uses: Hob working – both day and night time (warm white & daylight) •... -
Page 16: Above Sliding Door Led Switch
battery The Rear switches operate 3 different LED’s Rear Unit Top Unit two LED strips – main touch switch (as above operation) • Coloured LED strip (rear NS) – turned off or on using the rocker switch next to touch •... -
Page 17: Part Two - Maintenance & Repair
Part Two – Maintenance & Repair Most VW campers seem to be built solely for their looks, with the access for maintenance or repair of systems requiring a complete tear-down and re-build of the van. The research showed no consideration to any type of repair and very scant information about how things worked or how to reach them. - Page 18 The front and rear furniture is connected at the front towards the bottom behind the • Gas bottle area.. The Rear above bed Top unit is screwed into the top in two places (left and right top) • and is bolted to the rear furniture at the top (see pics below) Above: Top ‘above bed unit’...
-
Page 19: Main Seat / Bed Fixings
Above: Bed board fixings using ties. Main Seat / Bed Fixings The sliding Rib seats / bed is bolted down into a heavy gauge steel strut that fits under the van and provide massive strength for the seats. There are five bolts in total, two through into the strut, three through the floor with large anchor points below. -
Page 20: Electrics
Note that there are two types of panel used: 4mm ply panels (rear NS whole panel, rear top OS, small panel above rear top shelf • unit) – FIXED by screws with access point in carpet 2mm panels (all the rest – behind front and rear lower furniture panels, fuse box panel, •... -
Page 21: Cable Colours To And From Fuse Box
(Access- under cab central floor in trunking) Van fuse box to drivers underseat (Access- under cab central floor • in trunking) Main Cable runs (12V and 240V in separate trunking): • Main leisure battery cable, and van voltage display cable •... -
Page 22: Fuse Box Panel & 240V Rcd Unit Panel Positions
Above: shows the front cab under rubber floor wiring routes, alongside the VW standard wiring Fuse box panel & 240V RCD unit panel positions This shows the arrangement of the main electric systems behind the furniture on the OS rear of the van, the hanging switch panel screws into the rear furniture. The right pic shows the connection to the hook up point. -
Page 23: Underseat Drivers Seat Fuses (4)
The main earth point for the Battery Negative is at the OS rear bolt of the seat support • unit. The chargers reside on a shelf which is bolted to the sides of the underseat housing. • The wires access from the floor area mid front, and from the trunking at the rear OS of •... - Page 24 240V Charger Van Voltage Display fuse (12V 5A) Sterling B to B Charger 240V Charger to Battery fuse ( 12V, 40A) B to B Charger to Battery fuse (12V, 50A) Main Leisure fuse Leisure Battery (12V, 60A) Supports Above: The Yellow connection on the Negative (earth) is a temperature sensor for the B to B charger 240V Charger to Battery fuse ( 12V, 40A)
-
Page 25: Van Battery To (B To B) Charger Fuse
Above: Fuse (5A) supplying the voltage display for the Van Battery Van Battery to (B to B) Charger Fuse This (50A) fuse is situated on top of the Van battery as close as possible to the Positive terminal for safety. Cut-Out Isolator Switch and Rear fuse box The main 100 amp red cable feeds this fuse box •... -
Page 26: Fridge Removal
Fridge Removal The fridge is screwed into the SIDES of the furniture (standard fitting, but not a good design, so care needed for removing and re-assemble, the screw lengths are different each side and it is easy to go through the ply by mistake). Left screw is in the lower position •... - Page 27 Above: Side door LED double pole switch This wiring is complex due to incorporating both the Van feed for the door opening light system and leisure battery fed LED’s (see diagram): (note that the terminals are ‘opposite’ side to the switch action, this switch has two supplies and allows the above slide door LED to work as a normal door open light from the Van electrics and as a leisure powered LED for additional light, or set as completely off for no disturbance at night time)
-
Page 28: External' Connector Point (Ns Mid Section Near Sliding Door 12V And Usb Sockets)
Access is behind the grey plastic cover in the rear top shelf, one screw Supply Cables run above this unit and drop down, to access the supply wiring requires removal of the rear top unit and the ply cover: Both the 12V positive and negative (earth) run along the top and down the OS pillar. -
Page 29: Led Strip Lights
LED Strip Lights These contain a single strip of 5050 LED’s. Simply put, these LED strips contain single chips called SMD 5050 or 3528 linked in parallel. The colour strip has 3 LED diodes in one housing (sometimes called tri-chips). In the unlikely event of needing to dismantle the lights, the following explains their construction: The housing has a long piece of diffuser plastic that covers the light –... - Page 30 APPENDIX Refer also the attached manufacturers documents Other equipment information (not fitted currently) Gas & Carbon Monoxide Detectors Twin Detectors Example: CBE Carbon Monoxide and propane / butane gas (aprox £60) https://www.grasshopperleisure.co.uk/trio-gas-alarm-black-or-ivory-3516-p.asp Separate Units: Alternatively, there are cost effective separate units available CBE Carbon Monoxide and a separate gas/butane, And they can be put in he best place, try eBay or Amazon expect to pay less than £20 each.
- Page 31 Charging Systems & Complexity One of the main issue is that the Blue motion vehicles (all T6 and some T5) require a B2B charger. The kits all seem to cater for a split charge system so that you are installing technology you cannot use.
- Page 32 The design needed to be: As simple as possible • Easily accessible (within the constraints of the cramped VW space) • Easily repaired • Easy to operate and understand • The Solution:- The main control panel was therefore designed from scratch and just requires a few standard 12V switches, display voltmeters, standard 12V sockets and USB ports.
- Page 33 In terms of maintenance, the design is partially effective. Due to the space issues within a T6 it is simply impossible to provide very easy access to components such as chargers and wiring. The furniture gets in the way whichever way the design is configured and the bed prevent easy access to the furniture.
- Page 34 of a wiring failure, the bed and furniture removal allows access to the easily removable panels and thus the wiring. This contrasts to most conversions that have no easy access to wiring and require almost a re-build of the whole camper in event of a major failure. The LED lighting is a complete success.
Need help?
Do you have a question about the T6 and is the answer not in the manual?
Questions and answers