
Related Manuals for ScentAir ScentDirect SDD4004


Summary of Contents for ScentAir ScentDirect SDD4004
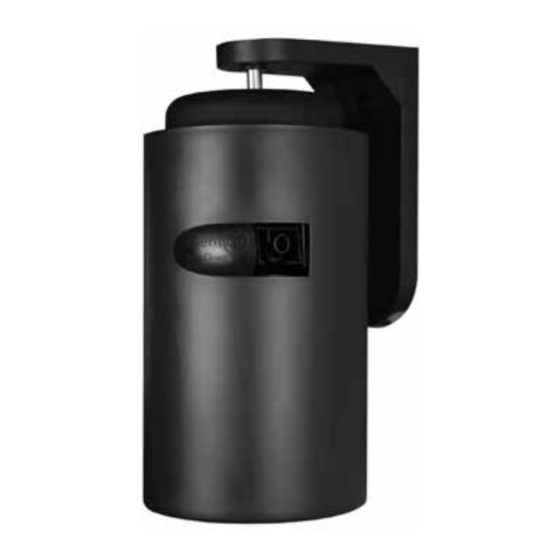
- Page 1 ScentDirect™ SDD4004 SCENT DELIVERY SYSTEM Installation and Operation Instructions...
-
Page 2: Table Of Contents
table of contentS Required Tools ......................2 About .......................... 2 System Overview ......................3 System Specifics ......................3 Installation........................4 Determine Mounting Locations .................. 4 Wall Mount Installation ..................... 4 Universal Track Mount Installation ................6 Cartridge Installation ....................7 Cartridge Replacement ..................... -
Page 3: System Overview
SyStem oveRvIew ScentDirect System Fragrance Cartridge Universal Power & Plug Kit Dust Shield Wall Mount 3x #8 Plastic Drywall Anchor 3x Masonry Screw 3x Wood / Machine Screw Mounting Pin 10. 2x Plastic Screw Cover SyStem SpecIfIcS 180° Adjustable Rotation with Lock Security Loop SD Card Slot Wire Wrap... -
Page 4: Installation
InStallatIon Determine proper mounting location Always review the air flow characteristics of the property before starting an installation. First identify the location to be scented and then locate the supply air vents near the area to be scented. The ScentDirect™ should be located between these two locations to ensure airflow will carry the fragrance to the desired location. - Page 5 Hang the ScentDirect™ fIG. b • Align the bracket mounting pin into the adjustable connection on top of the ScentDirect™. Insert the mouning pin once the holes are aligned. 1 • Adjust the angle of the system so the fragrance output is in the direction of the area to be fragranced.
-
Page 6: Universal Track Mount Installation
Universal track mount Installation Install the universal track mount bracket. fIG. D • Place the adapter around the track mount and tighten the thumb screws until the clamp is tight on the track. 1 Hang the ScentDirect™ • Align the bracket mounting pin into the adjustable connection on top of the ScentDirect™. -
Page 7: Cartridge Installation
cartridge Installation Locate the scent cartridge that was shipped with the system and remove the cartridge from the shipping container and inner bag. NOTE: Remove the shipping caps by unscrewing the caps from BOTH the white air inlet nozzle and black air outlet nozzle of the scent cartridge. Open the front door of the system by lifting the door latch. -
Page 8: System Control Unit
SyStem contRol UnIt lcD Display Pressing any button will turn the backlight on and GLOSSY activate the screen. The backlight must be on in order CLEAR to perform any of the operations described in this WINDOW manual. If left alone for two minutes, the backlight will turn off and the machine will return to the main screen. -
Page 9: System Set-Up
MODE (EXIT) - Moves through the six (6) setup screens. Each setup screen will have the word ”SET” illuminated in addition to other key words that help identify which screen you are in. This button is also used to exit a setting without saving changes. Below are the program options selected with each press of the MODE (EXIT) button: SET EVENT - Use this menu to schedule programmed events to operate the system during specific hours. -
Page 10: Set Daylight Savings Time
Set Daylight Savings time • Press any button to activate the screen if the backlight is off. • Press MENU four (4) times from the main screen, the words “Set” and “DSt” will be displayed along with the current DSt setting; either “off” if the feature is turned off or “on”... - Page 11 • Press NEXT to navigate to each of the four digits of the on time, the words “Set” and “on” will be shown on the screen. Press UP / DOWN to set the desired on time. This will be when the system will start to produce fragrance for this event. GLOSSY GLOSSY CLEAR...
-
Page 12: Scent Intensity Screen
Scent Intensity Screen The ScentDirect™ regulates the output of fragrance by cycling on and off. These adjustments are easily changeable to help obtain the right level of fragrance in your space. Below are in-depth descriptions of scent output options available for adjustment. •... -
Page 13: Review & Edit A Set Event
Review & edit a Set event • Press any button to activate the screen if the backlight is off. • Press MODE once from the main screen, the words “Set” and “event” will be shown on the screen. • Press UP / DOWN to cycle though the stored event numbers. The on time will be displayed for each of them in turn. -
Page 14: Event Rules
event Rules The ScentDirect™ allows combinations of events with different scent intensity, scent time and scent level. An event can occur inside another event, for instance, you could establish a low scent level for the entire workday MON - FRI from 08:00-17:30 hours as Event 1, then add Event 2 with a high scent level during your busiest hours on MON from 14:00-16:30 hours. -
Page 15: Lockcodes
When lockcode is displayed at the main screen pressing any key will bring up the enter lockcode screen described below. If you forget your lockcode please contact ScentAir. We recommend turning the lockcode feature off when it is not needed in case the code if forgotten. -
Page 16: System Override
SyStem oveRRIDe Pressing SELECT while the system is operating during a programmed event will temporarily stop the system, displaying auto, off and the current Day of the Week and Time. Pressing SELECT when the system is not running will turn it on using the last setting. Automatic operation will resume at the start of the next event. -
Page 17: Sd Card Programming
ScentAir. The initialization need be done only once for a given card as the 5 data positions on the card can be reused over and over again. -
Page 18: System Programming Tree
SyStem pRoGRammInG GUIDe eXIt wItHoUt aDJUSt cURRent event Save any SavInG Scent optIonS cHanGeS MODE PREVIOUS NEXT DOWN SELECT pRoGRammeD eventS maIn MODE ScReen WT hF SS u cReate toGGle RevIew pRoGRammeD cURRent moDe SELECT eventS (1-14) event on / off SELECT UP / DOWN 24 HoUR clocK... -
Page 19: Troubleshooting
Remove cartridge and check that there is air coming out of the metal cartridge connection when pump is running • Call technical services Fan doesn’t run • Call or email ScentAir Technical Service Replacement Item Numbers • Filter - #30400029 • Levers - #30800004 •... - Page 20 For further assistance please contact Technical Services at: US & CANADA: 1.704.504.2320 EMEA: +33 (0) 5 62 57 63 20 APAC: +852 356 378 42 techservices@scentair.com...
Need help?
Do you have a question about the ScentDirect SDD4004 and is the answer not in the manual?
Questions and answers
Stuck in lock mode
I need to reset a model SDD4004B. I’d like to clear the memory and start over.