
Related Manuals for HBX THM-0500


Summary of Contents for HBX THM-0500
- Page 1 Installation Manual THM-0500 Touch Screen Programmable Thermostat Version 2.06 THM-0500 HBX Control Systems Inc.
-
Page 2: Table Of Contents
The HBX THM-0500 is a microprocessor based controller and as such is not to be regarded as a safety (limit) control. Please consult and install the heating or cooling appliance in accordance with the manufacturer’s recommendations. -
Page 3: Receipt And Inspection
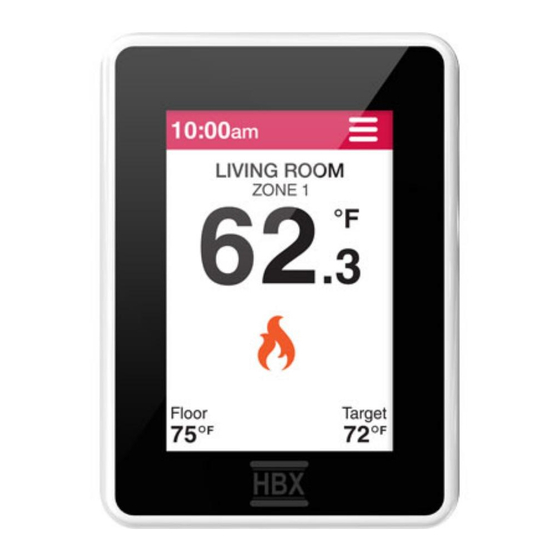
ThermoLinx mobile app. The thermostat has four daily, automatic settings (wake, day, evening, sleep) and weekend settings. It is normal for the tHm-0500 screen to remain off up to 120 seconds upon start-up. The THM-0500 has two external sensor inputs, multiple heating/cooling modes and can function as a digital setpoint/aquastat. -
Page 4: Programming Thm-0500
Current Demands Fancoil Heat connected to a WiFi network. Additionally, you must also Floor Target Floor Target 75° 74° 75° 74° set a location for your system on the ThermoLinx app in settings. © 2019 HBX Controls... -
Page 5: Special Functions
etting the hermostat Special Functions Enter the “Special functions” screen by touching and holding down the menu icon for 5 seconds (from the status screen). To select the desired option, simply touch any item to adjust it’s setting. lockout thermostat In the special functions menu, press and hold the lock icon on the top right corner for 20 seconds. - Page 6 Type Type 2 Heat with Cool 2 Heat with Cool Type Type 2 Heat with Cool Type 2 Heat with Cool 2 Heat with Cool © 2019 HBX Controls Backlight Backlight Backlight Backlight Backlight View Auto View Auto View Auto...
- Page 7 Setbacks Geo Mode Geo Mode Geo Mode Functions Functions 2 Heat with cool function Functions Type 2 Heat with Cool Type Select the “2 Heat with Cool Function” for applications 2 Heat with Cool Type 2 Heat with Cool Backlight using 2 stage heating and 1 stage cooling.
- Page 8 Room Offset °F Geo Mode 0500 thermostat connected to the ZON-0550 Controller. Setbacks (THM1) Setbacks Geo Mode Geo Mode Default: 2 pipe system. To change to a 4 pipe system, go to zone setup options (page 12). © 2019 HBX Controls...
-
Page 9: Setup Menu
Setup Menu Pressing the menu icon on the top right corner allows you to view the main “Setup Menu” options. Pressing the back icon allows you to return to the home screen or setup menu. Once you are in the setup menu, to select the desired option, simply touch any item to adjust its setting. - Page 10 Changeover AUTO This setting only applies to heating/cooling modes. Mode Mode Mode System Setup System Setup System Setup Time Time Time Setup Menu Setup Menu Setup Menu Schedule Schedule © 2019 HBX Controls Schedule Changeover AUTO Changeover AUTO Changeover AUTO...
- Page 11 Zone Valve Mode Time Mode Floor System Setup changeover Setup Menu Floor Max °F Time Auto: this option allows you to change automatically from Schedule Sensor 1 heat mode to cool mode or vice versa Floor Setup Menu Changeover AUTO Heat: Allows the user to be only in heat mode Schedule Mode...
- Page 12 Floor Mode Dual Mode Dual Mode Setup Mode Setup Floor Max Floor Max °F Thermostat °F Thermostat © 2019 HBX Controls Floor Min Floor Min °F Zone Valve °F Zone Valve Sensor 1 Sensor 1 Floor Mode Dual Floor Mode...
- Page 13 Mode Dual Floor Min Floor Min °F °F Floor Max °F Floor Max °F Floor Max Sensor 1 Sensor 1 °F Floor Floor Floor Min °F Floor Min °F Floor Min °F dual mode: floor minimum Mode Setup Mode Setup Sensor 1 Floor Sensor 1...
- Page 14 5 Sequence 1 - 4 Master ID: Master ID: Demand Damper Zone Damper Zone Priority None Zone Setup Zone Setup Password AB12 Sequence 1 - 4 © 2019 HBX Controls Sequence 1 - 4 Master ID: Demand Demand Damper Zone...
- Page 15 Master ID: Demand Demand Damper Zone Priority None Priority None Password AB12 Zone Setup: Priority Zone Setup Password AB12 This option allows the user to set a priority on a zone(s) Sequence 1 - 4 Master ID: Master ID: over other zone(s). Priorities range from 1 (highest) to 7 Demand Damper Zone Damper Zone...
- Page 16 Stage Delay Fan Mode 15 Mins Sync-Code: AAAA-1234 Fancoil Setup Fan on demand Fancoil Setup Fan on demand Zone on demand Zone on demand Temp Average None © 2019 HBX Controls Temp Average 1 - 4 Fan Mode Fan Mode...
- Page 17 Password AB12 Password Password AB12 AB12 Password Password AB12 AB12 Master ID: Master ID: Master ID: Master ID: Master ID: ancoil etuP Ptions 4 Pipe Zone 4 Pipe Zone 4 Pipe Zone 4 Pipe Zone 4 Pipe Zone fancoil Setup System Setup System Setup System Setup...
- Page 18 Sync-Code: AAAA-1234 Sync-Code: AAAA-1234 Stage Delay 15 Mins System Setup System Setup Sync-Code: AAAA-1234 Zone Setup Zone Setup System Setup Fancoil Setup Humidity Setup Fancoil Setup © 2019 HBX Controls Zone Setup Use Humidity Humidity Setup Humidity Setup Fancoil Setup...
- Page 19 Humidity Setup Humidity Setup Humidity Setup: target Humidity Setup Use Humidity When humidity is set to ON, use this setting to manually Use Humidity Use Humidity adjust your humidity target. Target Target Target Type Humidify Type Humidify Type Humidify Fan ON Humidity Fan ON Humidity Fan ON Humidity Humidity Setup...
- Page 20 Zone Setup Sync-Code: AAAA-1234 Humidity Setup Fancoil Setup Sync code Degrees °F System Setup This number is the identifier used in the HBX ThermoLinx App Humidity Setup Stage Delay Zone Setup 15 Mins to connect to your thermostat. Degrees °F...
- Page 21 Time tIme oPtIonS Setup Menu This selection allows you to access the System Setup menu. Schedule Changeover AUTO Mode System Setup Time Time Setup Time Setup Time Setup time Setup: time Time Setup Time 10:00am Time 10:00am Set the time for your appropriate time zone. Time 10:00am Time...
-
Page 22: Installation And Wiring
Toggling this switch will allow the user to alternate between the built in room thermistor on the THM-0500, or an external room thermistor connected to pins 1 and 2 on the THM-0500. © 2019 HBX Controls... - Page 23 THM-0500 using Internal Sensor THM-0500 using DHW Sensor as a Digital Aquastat Thermostat Thermostat THM-0500 THM-0500 THM-0500 INT. ROOM INT. ROOM INT. ROOM DO NOT DO NOT DO N Thermostat Thermostat THM-0500 THM-0500 THM-0 CONNECT CONNECT CONN POWER POWER INT.
- Page 24 To ZON-0550 0550 To ZON-0550 Floor Outdoor Sensor Sensor Floor Sensor THM-0500 Dual Mode using External Room Sensor and Floor Sensor mistor, To use external room thermistor, mistor, To use external room thermistor, ternal toggle dispswitch from Internal ternal toggle dispswitch from Internal...
-
Page 25: Troubleshooting Guide
PoSSIble cauSeS & reSolutIonS blank Screen • Check the ZON-0550 power • Check wiring polarity between the THM- 0300/THM-0500 and ZON-0550 module. • Ensure zones 1 and 3 damper/4-pipe is set correctly. Stage 2 won’t • Check stage delay in system setup for come on proper time. - Page 26 • Contact HBX Technical support for contactor settings not code to unlock advanced settings. displayed on the thermolinx for additional assistance with the tHm-0500, please contact our technical Support department toll free at: +1 (855) 410-2341 © 2019 HBX Controls...
-
Page 27: Limited Warranty
In no event will HBX be liable for any damages, including loss of data, loss of profits, costs of cover or other incidental, consequential or indirect damages arising out of the installation, maintenance, commissioning, performance, failure or interruption of an HBX product, however caused and on any theory of liability. - Page 28 V1.02 Toll Free Technical Support: +1 (855) 410 2341...
Need help?
Do you have a question about the THM-0500 and is the answer not in the manual?
Questions and answers