Table of Contents
Advertisement
Quick Links
Owner's Manual
Copyright © All rights reserved. No part of this publication may be reproduced or transmitted in any form or
by any means, electronic or mechanical, including photocopy, recording, or any information storage and
retrieval system, without permission in writing from the publisher. Requests should be mailed to RAVE
Sports, 985 Aldrin Drive #301, Eagan, MN 55121.
Nautilus
(Item #02810)
www.ravesports.com
Read this Owner's Manual
before using the Nautilus.
Failure to follow operating
instructions can result in
serious injury or death.
™
Advertisement
Table of Contents

Related Manuals for Rave Sports Nautilus 02810


Summary of Contents for Rave Sports Nautilus 02810
- Page 1 Nautilus ™ Owner’s Manual (Item #02810) www.ravesports.com Copyright © All rights reserved. No part of this publication may be reproduced or transmitted in any form or by any means, electronic or mechanical, including photocopy, recording, or any information storage and retrieval system, without permission in writing from the publisher.
-
Page 2: Table Of Contents
Table of Contents Parts ..................... 2 Introduction ..................3 Safety rules and liability ..............4 EN-Warnings and maximum capacity ..........6 Overview ....................7 Assembly ..................... 8 Anchoring ..................19 Use ..................... 23 Additional attachment options ............24 Cleaning, deflation and storage ............29 Repair .................... -
Page 3: Introduction
Introduction Thank you for purchasing a RAVE Sports® Nautilus. The Nautilus is an inflatable water slide and climbing apparatus intended for use by up to 10 adults or 15 children at one time while it is securely anchored in at least 10 feet of water. -
Page 4: Safety Rules And Liability
Safety Rules and Information • Read and understand the information contained in this owner’s manual before assembling and using your product. • Ensure that users are aware of and understand these safety rules and warnings. • The Nautilus is designed to be used on large bodies of water with water depth of at least 10 feet. - Page 5 • Always inspect the areas around and under the product before each use to ensure the water is deep enough and free of all rocks, logs, sand bars, and underwater obstructions. • Inspect your product for any worn, defective, or missing parts. Do not use if there are any signs of damage, wear or deterioration.
-
Page 6: Warnings And Maximum Capacity
Nautilus Product Minimum Maximum Maximum Weight Working Pressure Water Depth Capacity Capacity 10 ft (3.0m) 10 Adults 1980 lb (898kg) Main Volume 0.5psi (0.03bar) Nautilus 15 Children Speed Slide 1.5psi (0.10bar) Drop Slide 1.5psi (0.10bar) Boarding 1.5psi (0.10bar) -
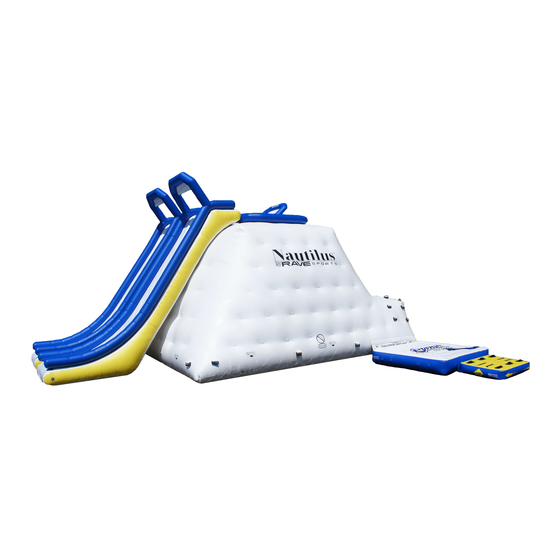
Page 7: Overview
Overview of Nautilus Speed Slides Main Body Guard Rail Climbing Wall Speed Slide Connection Rings (6) Top Deck Drop Slide Connection Rings (3) Additional 54” Boarding Platform can be added (additional purchase) Inflation Valves 54” Boarding Platform Lower Deck Drop Slide... -
Page 8: Assembly
Assembly of the Nautilus : CAUTION: Read completely before starting! SET UP Step 1 - Prepare site, unpack, & orient product Prepare a relatively flat location near the water’s edge by removing rocks, sticks or other sharp objects that could puncture or damage the product. Unpack all product pieces which include: •... - Page 9 (2) RAVE High Speed Inflator/Deflators for rapid inflation. (Item #01083 or #01090 (Europe)). If using the RAVE Sports High Speed Inflator, simply lock the adaptor onto the end of the inflation hose and insert into the valve body. Turn ¼ turn to lock in place.
- Page 10 This inflation adaptor will automatically open the valve when inserted and will close the valve when removed. The valve will not need to be manually opened /closed when using this special adaptor. NOTE: If needing to inflate the Nautilus while it is in the water, use RAVE’s 20ft Extended Hose Kit (#20900).
- Page 11 2.2 Begin inflating the Main Body until the inflation valve for the guard rail (blue rectangular tube located on top of Main Body) is fully exposed. Once exposed, stop inflating the main body and fully inflate the guard rail to very firm (approximately 1.5 psi) (see photos below). 2.3 Continue inflating the Main Body.
- Page 12 2.5 Inflate the Main Body until it is standing upright, but is still soft enough to allow access to the Drop Slide straps. Loosely connect the lower straps on the Drop Slide first. • Hook the strap to the ring attached to the Nautilus. •...
- Page 13 2.7 Finish inflating the Main Body to 0.5 psi. NOTE: To ensure the proper pressure, we recommend using a RAVE 0-15 PSI Digital Pressure Gauge (#02809) to measure the exact psi. NOTE: The Nautilus has an overflow valve near the inflation valves to prevent over-inflation and regulate normal changes in pressure due to temperature changes.
- Page 14 3.1 Inflate the main chamber of the slides, secure the slip sheets, and then inflate the blue safety rails on all three slides. Use long extension hose if necessary to inflate speed slides.
- Page 15 3.2 When all slides are firmly inflated to 1.5 psi, double check the rings on top and then tighten the Kwik Lok ® straps on the bottoms of all slides. Check for back and fourth movement on the slides to ensure they are secured.
- Page 16 Step 4 – Move the Nautilus into shallow water and attach the 54” Boarding Platform NOTE: Do not drag the Nautilus! Avoid puncturing the bottom. Use minimum of 8 people to lift and carry the Nautilus to shallow water. The 54” boarding platform can be installed at either side of the corner next to the lower deck.
- Page 17 4.2 Feed the end of the short VELCRO strap through the upper ring (ring just below the hook and loop flap) on the Nautilus. Fold strap back down onto itself and fold side wings on top to secure it in place. Repeat with the second strap.
- Page 18 4.4 Repeat for second strap, then tighten both straps to draw the boarding platform tightly against the Nautilus. 4.4 Secure the boarding platform extender. To prevent people from getting trapped between the Nautilus and the boarding platform, install the boarding platform extender.
-
Page 19: Anchoring
Anchoring the Nautilus Overview Due to extreme varieties of conditions, anchor line and anchors are not included with the Nautilus and must be purchased separately. Attach the anchor line (not included) securely to the Anchor Rings on the bottom of the product. A set of loops is attached to an Anchor Ring on each corner of the Nautilus for a total of four anchor rings. - Page 20 RAVE Sports and includes this heavy duty shock cord. • Adjust length of anchor line so that it is approximately 1-2 ft. longer than the depth of the water. The RAVE Sports anchor connector shock cord will provide 2-3 ft. of stretch to absorb waves and any vertical motion.
- Page 21 Anchoring plates beneath the Nautilus The Nautilus has four anchor points on the bottom of the main body constructed of three D- rings for each corner. The D-rings are connected with a durable nylon rope with a ring at the mid-point for connecting the anchor line.
- Page 22 5.2 From a boat, slowly tow the Nautilus into position using a tow rope attached to one of the bottom handles or anchor rings. 5.3 When the Nautilus is in position, attach the anchor point on the Nautilus to the preset anchor line already in the water. This should be the upwind corner of the Nautilus, as it will make it easier to install the other three anchor positions if they are downwind.
-
Page 23: Use
Use of the Nautilus DROWNING HAZARD Never attempt to swim under the Nautilus. The Nautilus is a large object on the water with no place to come up for air if you are beneath it. CAUTION! The surface of the Nautilus can become wet and slippery. Refrain from horseplay or other activity that could cause collisions and falls, resulting in injury. -
Page 24: Additional Attachment Options
Additional Options for Attachments Additional RAVE Sports products may be attached directly to the corner of the Nautilus in place of a boarding platform. In addition, the Nautilus can be installed as a signature piece within a Splash Trax obstacle course configuration. - Page 25 Universal Platform & Other Splash Trax Components Flap for gap caps CAUTION: To avoid risk of puncture or damage to the product, DO NOT DRAG the attachment from shore. Always carry it to the water, using at least two people on opposite sides of the product.
- Page 26 NOTE: Ensure there is no slack anywhere in the strapping. Pull tight to ensure straps are tight and secure. Step 3 Attach protective Gap Cap cover to the Velcro flaps on both modules. Final installation should look like photo below: Attaching Water Whoosh to Speed Slide Instead of users sliding directly into the water, a Water Whoosh can be...
- Page 27 Locate two rings underneath the Speed Slide. These rings will connect to the straps that are located underneath the Water Whoosh 20 (Grey #02464, White #02829) and Whoosh 15 (Grey #02603, #02828 White). Step 1 Set the Speed Slide on top of the Water Whoosh and align the straps connected to the Water Whoosh.
- Page 28 (Step 2) Speed Slide Water Whoosh Step 3 Double check to make sure the connection is secure. There will still be movement, but the Water Whoosh should not move side to side excessively. Once the straps are secure, the Water Whoosh is installed and ready for sliding.
-
Page 29: Cleaning, Deflation And Storage
Continue to deflate the Main Body, the slides, and the guard rail as well as any attachments. NOTE: RAVE Sports recommend using TWO (2) RAVE High Speed Inflator/Deflators for rapid deflation. (Item #01083 or #01090 (Europe). -
Page 30: Repair
Repairs For large holes, tears or seam failures, contact RAVE Sports at 1-800-659- 0790. Additional repair patches can be purchased online at www.ravesports.com. For minor holes and tears: • Inflate the product and locate the leak by spraying the area with mild soapy water. - Page 32 RAVE Sports A Revel Match, LLC Company 985 Aldrin Drive #301 Eagan, Minnesota 55121 December 2017...
Need help?
Do you have a question about the Nautilus 02810 and is the answer not in the manual?
Questions and answers