Table of Contents
Advertisement
Advertisement
Table of Contents

Related Manuals for BIQU Magician


Summary of Contents for BIQU Magician
-
Page 3: Table Of Contents
WWW.BIQU.EQUIPMENT Content 1. Unpacking……………………………………………………1 2. Component Description…………………………………….2 3. Hardware Installation……………………………………..3 4. Software Application……………………………………..5 (1) Software Installation…………………………………….5 (2) Slicing Operation……………………………………..7 Appendix…………………………………..……..……..……8 5. Automatic Leveling……………………..……..……..…….16 6. Platform Handling……………………..……..……..……..19 7. First Printing……………………..……..……..……...20 8. Replacing Filament……………………..……..……..……22 9. Problem Analysis(FAQ)……………………..……..……...24 Shenzhen Bigtree Technology Co.,Ltd... -
Page 4: Unpacking
WWW.BIQU.EQUIPMENT 1. Unpacking When receiving the machine, please check the randomly presented items for better printing experience. Shenzhen Bigtree Technology Co.,Ltd... -
Page 5: Component Description
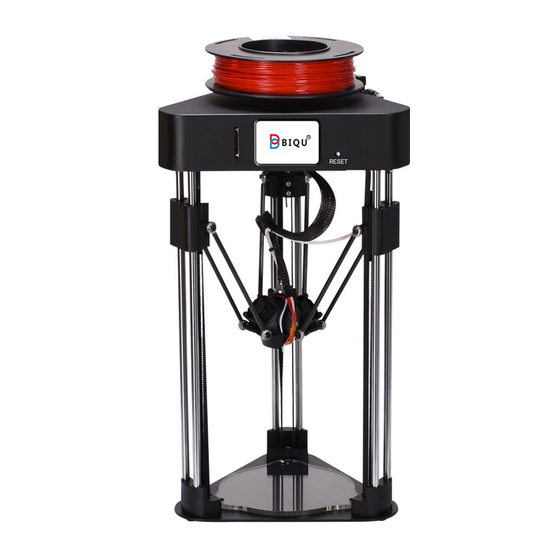
WWW.BIQU.EQUIPMENT 2. Component Description User can get the relevant accessories informations from the below photo to know the basic components of 3D Printer. Shenzhen Bigtree Technology Co.,Ltd... -
Page 6: Hardware Installation
WWW.BIQU.EQUIPMENT 3. Hardware Installation The printer is strictly tested before delivery for maintaining the regular printing operation. You can enjoy 3D printing for the first time after installing the filament and complete Auto leveling. ① Please fix the filament holder at the top of printer. - Page 7 WWW.BIQU.EQUIPMENT ③ After that, insert the filament into the extruder. ④ Finally, insert the power plug and press the power switch. Shenzhen Bigtree Technology Co.,Ltd...
-
Page 8: Software Application
Cura. Then, double click the file, go on by default and select installation. After the installation, open Cura and a window will pop up. Just click "Add Printer" at the lower right corner and the machine settings of BIQU-Magician will be completed. Shenzhen Bigtree Technology Co.,Ltd... - Page 9 WWW.BIQU.EQUIPMENT The above figure is the default printing configuration diagram of BIQU-Magician. You may view, use and modify on basic of actual conditions. Shenzhen Bigtree Technology Co.,Ltd...
-
Page 10: Slicing Operation
WWW.BIQU.EQUIPMENT (2) Slicing Operation When the installation is completed, you can import a model to attempt processing and slicing, and generate a printable Gcode file. Find out the model file and open it. The red zone above the model reminds you to add support. - Page 12 WWW.BIQU.EQUIPMENT Zooming Tool If the model dimensions are too large or too small, we can choose to zoom out or zoom in the model. First select the model and then click the Scale icon (1) : ● The model may be zoomed out/in along three different axes by pulling the ends (7) .
- Page 13 WWW.BIQU.EQUIPMENT ● Reset to the original dimensions (4) . ● Check Snap Scaling for fixed amount zooming-out/in (5) . ● Check Uniform Scaling to zoom out/in X, Y or Z axis independently (6) . Rotating Tool Lay the largest plane of the model horizontally on the platform to ensure smooth printing to a greater extent.
- Page 14 WWW.BIQU.EQUIPMENT Select the rotating tool (1) and a circular ring (5) will occur along each of the three model axes; the rotation modes are as follows: ● Drag the ring of one axis to rotate the model (5) and the angle size (6) will be displayed in rotation.
- Page 15 WWW.BIQU.EQUIPMENT Mirroring Tool Use the mirroring tool to mirror the model (1) ; when the model is clicked, two triangle ends will occur on each axis. ● Click one of the triangle ends to decide the mirroring direction. Shenzhen Bigtree Technology Co.,Ltd...
- Page 16 WWW.BIQU.EQUIPMENT Per Model Setting This function will enable you to customize printing settings for a single model. First select the model for which printing conditions will be customized (1) , and then click Per Modle Settings tool (2) ; ● Click Select Settings (3) to enter the Per Object Setting Selection interface;...
- Page 17 WWW.BIQU.EQUIPMENT View Selection Soild view mode You may view if the model archive is completely read. 1.Soild view mode 2.Yellow model repersents correctness 3.Grey model represents error. X-Ray Mode X-ray mode assists in determing whether the model has any broken plane and the red zone is where printing problem may occur.
- Page 18 WWW.BIQU.EQUIPMENT Layering Mode In the layers mode, use the left sliding block to view every layer after slicing so as to inspect if there is any problem after model slicing. 1. Hierarchical view mode 2. Layer display/hide 3. Layer number adjusting slider 4.
-
Page 19: Automatic Leveling
WWW.BIQU.EQUIPMENT 5. Automatic Leveling Before printing, the machine should be leveled. The machine has completed the leveling by default! You are required to paste EVA cotton on the film pressure sensor for its normal use. Then, connect the wire of film pressrue sensor and put it on the nozzel. - Page 20 WWW.BIQU.EQUIPMENT After that, directly click "Leveling" on the touch screen and the automatic leveling of the printer will start. When automatic leveling is completed, be sure to take down the film pressure sensor. Shenzhen Bigtree Technology Co.,Ltd...
- Page 21 WWW.BIQU.EQUIPMENT ★ Tips (important): During the printing, if the first layer is too high or too low, please cool the nozzle and modify the Z-offset parameter. Please do leveling operation again after modifying the parameter!!! Shenzhen Bigtree Technology Co.,Ltd...
-
Page 22: Platform Handling
WWW.BIQU.EQUIPMENT 6. Platform Handling Automatic leveling aims to ensure smooth printing of the first layer but may not prevent edge warping. Therefore, it is recommended that the printing platform should be coated with a layer of PVP solid gum so as to control edge warping. -
Page 23: First Printing
WWW.BIQU.EQUIPMENT 7. First Printing 1) Follow the previous tutorial to complete the model slicing and store the model in the SD card, then insert the SD card into the touch screen. Click "Print" on the touch screen and select a file for printing. - Page 24 WWW.BIQU.EQUIPMENT Confirm before printing : (1) The printer has been laid on a steady horizontal plane. (2) Model slicing has been correctly completed and printable Gcode file has been generated. (3) The printer has been automatically leveled. (4) Filament has been correctly installed without being knotted or stuck.
-
Page 25: Replacing Filament
WWW.BIQU.EQUIPMENT 8. Replacing Filament When replacing the filament, please do not pull out the cooled filament brutally, otherwise the nozzle may get blocked. Refer to the following instructions for more information: On the main interface, click "Heat" and "Heat PLA", wait for the nozzle temperature rise. - Page 26 WWW.BIQU.EQUIPMENT When the temperature reaches the target value, return to the main interface, click "Move", "E-Axis" and "+" to enable the extrusion of a section of filament from the extruder. Next, click "50mm" and "100mm/s" and continuously " - "...
-
Page 27: Problem Analysis(Faq)
WWW.BIQU.EQUIPMENT 9. Problem Analysis(FAQ) Question 1 Dislocation of Printing Model Too quick printing speed. Please control the speed at 30-60mm/s. Loose synchronous belt/wheel. Please re- tighten. Out-of-step stepping motor, inadequately large set current of motor and insufficient output Answer 1 torque of motor. - Page 28 WWW.BIQU.EQUIPMENT Question 4 Edge Warping of Printed Object The nozzle is too far from the platform. Adjust the Z-axis offse to ffirmware. #define Z_ PROBE_OFFSET {0, 0, 0, 0} and alter the third value. (If the third value is positive, the larger the value is, the farther the nozzle will be from the platform;...
- Page 29 WWW.BIQU.EQUIPMENT Question 7 Abnormal Noise of Extruder in Printing B l o c k a g e o f e x t r u d e r h e a d . U s e a n acupunctural needle or similar tool to get it through.
- Page 30 WWW.BIQU.EQUIPMENT Computer fails to identify the mainboard. Question 10 The computer should install a USB chip- Answer 10 related driver. Shenzhen Bigtree Technology Co.,Ltd...
- Page 31 Caution 1.Coz the Printer is sort of mechanical precision machine, Pls often keep Good and Protective Maintenance. 2.We strongly suggest the user use the default factory settings for firmware and software as well. 3.After complete Auto Leveling. Pls remember to remove the Film pressure sensor before you start to print.It’s very important.Otherwise the Film pressure sensor will easily get burned or damaged.
Need help?
Do you have a question about the Magician and is the answer not in the manual?
Questions and answers