Table of Contents
Advertisement
Advertisement
Table of Contents

Related Manuals for BIQU B1


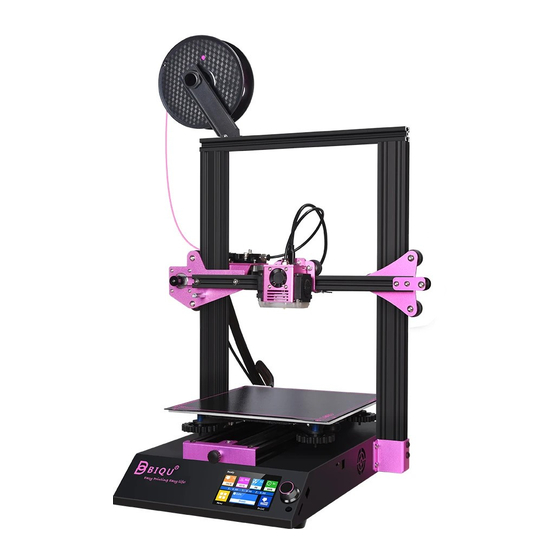
Summary of Contents for BIQU B1
- Page 2 Catalogue 1. Packing List ....................1 2. Equipment parameters ................2 3. Installation equipment ................3 4. Platform Calibration ................. 17 4-1 Platform Calibration..............17 4-2 Fill in filament ................21 5. Ready to print..................22 5-1 Introduction to working mode ............22 5-2 Installing Driver software ..............
- Page 3 BIQU-B1 USER MANUAL 1. Packing List Wrench and screw Diagonal pliers (1pcs) (1set) BIQU-B1 TF card and card Nozzle reader (1set) (1pcs) (2pcs) Power cable Rack BLtouch stand (1pcs) (1pcs) (1pcs) Data cable Filament for test Cable tie (1pcs) (45g)...
- Page 4 2. Equipment parameters The basic parameters Printer Name BIQU-B1 Printing Size 235 x 235 x 270mm Molding Tech Nozzle Quantity 1 PCS Layer Thickness 0.1mm - 0.3mm Nozzle Diameter Standard 0.4mm Printing Accuracy ±0.05mm Filament Slicing Format STL / OBJ/ AMF...
- Page 5 BIQU-B1 USER MANUAL 3. Installation equipment Step 1 Connecting the terminal wire to the socket of the hot bed. Step 2 There are two M5 threaded holes on the end of the 2040 aluminum profile,which is used for mounting the M5×16 hex socket head screws.
- Page 6 1.2040 aluminum profile—length 456mm (1pcs) 2. M5×16 hexagon round-head screws (2pcs) 3. M5×10 hexagon round-head screws (2pcs) 4. M4×8 hexagon cup-head screws (4pcs) WWW.BIQU.EQUIPMENT...
- Page 7 BIQU-B1 USER MANUAL Step 3 There is a M4 threaded holes on another 2040 aluminum profile. When installation, users make the threaded hole face the metal sheet part. 1. 2040 aluminum profile--length 456mm (1pcs) 2. M5×16 hexagon round-head screws (2pcs) 3.
- Page 8 There are machine screws inside the coupling device, which is used to tighten the motor shaft and screw rod. The set screw is aligned with the plane of the motor shaft when installing. Step 5 1. M3×6 hexagon round-head screws (4pcs) 2. Hexagonal isolation column (1pcs) WWW.BIQU.EQUIPMENT...
- Page 9 BIQU-B1 USER MANUAL Step 6 4 in 1 terminal wire...
- Page 10 As shown above, installing the 4 in 1 terminal wire to its corresponding position. Then there are two key slots on the metal sheet part. Users can use a cable tie to fix the terminal wire through them. WWW.BIQU.EQUIPMENT...
- Page 11 BIQU-B1 USER MANUAL 1. Eccentric nut Awareness: As the picture, please check whether the interfaces are loose. If they are loose, please tight the eccentric nut with wrench and make the groove of eccentric nut approach the aluminum profile. Pulley on eccentric nut will preload aluminum profile.
- Page 12 Step 8 、 1. M5×25 hexagon cup-head screws(4pcs) 2. 2020 aluminum profile—length 323mm(1pcs) Step 9 1. X slider sheet(1pcs) 2. Belt(1pcs) WWW.BIQU.EQUIPMENT...
- Page 13 BIQU-B1 USER MANUAL Step 10 1. M4×8 hexagon cup-head screws(2pcs) 2. M4 boat-shape nut(2pcs) 3. 2020 aluminum profile—length 338mm(1pcs) 4. M5×18 hexagon cup-head screws(2pcs) The boat-shape nut may rotate during installation. Users could use the screws to fix it on the aluminum profile.
- Page 14 Notice: The boat-shape nut may rotate during installation. Users could use the screws to fix it on the aluminum profile. When installation, in order to tighten the pulley and the belt, users could push the parts slowly in the X direction. WWW.BIQU.EQUIPMENT...
- Page 15 BIQU-B1 USER MANUAL Step 13 1. M3×8 hexagon cup-head screws(2pcs) Step 14 1. Feed tube(1pcs) 2. Quick connector(2pcs)...
- Page 16 Step 15 Step 16 1. M4×8 hexagon round-head screws(2pcs) 2. M4 boat-shape nut(2pcs) The boat-shape nut may rotate during installation. Users could use the screws to fix it on the aluminum profile. WWW.BIQU.EQUIPMENT...
- Page 17 BIQU-B1 USER MANUAL Step 17 1. Type-C data cable(1pcs) 2. Cable tie(1pcs) As shown above, there are two key slots on the metal sheet part. Users can use a cable tie to fix the Type-C cable through them. But before fixing the data cable, users would better leave a certain length at the Type-C cable's end which closes to the nozzle.
- Page 18 2. Z axis limit module Fixing the Z-axis limit module on the aluminum profile by using the M4 threaded holes and the above screws. Awareness: Please check all the screws and make sure that they are properly installed. Installation Finished! WWW.BIQU.EQUIPMENT...
- Page 19 BIQU-B1 USER MANUAL 4. Platform Calibration 4-1 Platform Calibration After the installation of BIQU B1, users need to perform a platform calibration on BIQU B1. The steps are as follows: Step 1 1. Power switch 2. Power cord socket Awareness: Before turning on, please check whether the voltage mode matches your household power supply.
- Page 20 The nozzle moves back to the zero point of the Z axis, which is above the platform. Twist the 4 hand-tight nuts counterclockwise under the hot bed so that there is a distance of 3 ~ 6mm between the hot bed and the nozzle. 1. Hand-screw nut(4pcs) WWW.BIQU.EQUIPMENT...
- Page 21 BIQU-B1 USER MANUAL Step 3 ① ② ③ Select from the touch screen in the previous step ①“Back”→ ② “Leveling”→ ③“Point 1”. When the nozzle moves to the "first point" position(as shown below ), and user put a piece of A4 paper under the nozzle. Twisting the hand screw nut to make the nozzle just contact with the A4 paper and that the A4 paper can move smoothly with slight friction.
- Page 22 In the same way, touch the "second point", "third point" and "fourth point" on the screen in turn, and use the same method to turn the hand-screw nut under the platform to manually level the platform. WWW.BIQU.EQUIPMENT...
- Page 23 BIQU-B1 USER MANUAL 4-2 Fill in filament 1. Extruder handle 2. Filament Cut a bevel on filament with Diagonal pliers, Holding the handle of the extruder while users pushing the filament into the extruder into the feed tube. Awareness: Please check all the screws and make sure that they are properly installed.
- Page 24 5. Ready to print 5-1 Introduction to working mode BIQU-B1 3D printer has two working modes, offline printing mode and online printing mode. Offline printing : After adjusting the platform, save the slice file generated by the slicing software in the TF card, then insert the TF card into the TF card slot of the base, click "Print"...
- Page 25 BIQU-B1 USER MANUAL 5-2 Installing Driver software Turn on the power of the 3D printer, and connect the computer to the 3D printer through the data cable. Right-click "This Computer" → "Properties" → "Device Manager", and then the window will show above.
- Page 26 Always install this driver software WWW.BIQU.EQUIPMENT...
- Page 27 BIQU-B1 USER MANUAL Always install this driver software If the computer contains a firewall or anti-virus software, please manually agree to install the driver. Close...
- Page 28 Ps: Because the user's computer environment is different, after the driver installation is complete, if there is an exclamation mark under the "port", it means that the installation has encountered problems. At this time, please unload this port and then install the driver again. WWW.BIQU.EQUIPMENT...
- Page 29 BIQU-B1 USER MANUAL 5-3 Install Ultimaker Cura Software Next Double click the "Ultimaker.Cura-4.6.0-win64-beta.exe" application file, the software installation window will show above, please follow the below illustration to install the software. Agree...
- Page 30 Browse Next Select the location of the file installed. Next WWW.BIQU.EQUIPMENT...
- Page 31 BIQU-B1 USER MANUAL Install Finish Ultimaker Cura Installation Completed!
- Page 32 5-4 Software Settings After the installation, if users open the software for the first time, please set the software according to the following steps. WWW.BIQU.EQUIPMENT...
- Page 33 BIQU-B1 USER MANUAL...
- Page 34 WWW.BIQU.EQUIPMENT...
- Page 35 BIQU-B1 USER MANUAL...
- Page 36 Click“preference”→“configure cura” WWW.BIQU.EQUIPMENT...
- Page 37 BIQU-B1 USER MANUAL Software Setup Completed!
- Page 38 5-5 Usage of Ultimaker Cura Software Drag the model file of stl format into the slicing software window. Select the printer model that users has previously set and select the slice parameters. WWW.BIQU.EQUIPMENT...
- Page 39 BIQU-B1 USER MANUAL The slicing software starts slicing the model. Slice Completed!
- Page 40 6. Start Printing 6-1 Offline printing Step 1 After the slicing software finishes slicing the model, users can start printing. First save the G-code file to the TF card after model slicing, and then use the SD card for offline printing. WWW.BIQU.EQUIPMENT...
- Page 41 BIQU-B1 USER MANUAL Step 2 Put the G-code file from TF card in the card slot.(As shown in the figure) Step 3 Connect the power cord, turn on the machine, and select on the touch screen homepage ①“print”→ ②“TFT SD”,Then select the slice file saved in the TF card.
- Page 42 Step 1 The computer is connected to the 3D printer via a data cable. Insert one end of the data cable into the USB port(as is shown below), and the other end into the USB port of the computer. WWW.BIQU.EQUIPMENT...
- Page 43 BIQU-B1 USER MANUAL Step 2 Open the slicing software. Drag the stl format model into the slicing software window to slice the model. After slicing, click "Print via USB" to start online printing.
- Page 44 A4 paper and that the A4 paper can move smoothly with slight friction. When users turn the hand-screw nut clockwise, the platform will rise, and when users turn the nut clockwise, the platform will fall. WWW.BIQU.EQUIPMENT...
- Page 45 BIQU-B1 USER MANUAL In the same way, touch the "second point", "third point" and "fourth point" on the screen in turn, and use the same method to turn the hand-screw nut under the platform to manually level the platform.
- Page 46 If the distance between the nozzle and the platform becomes too close, it will cause damage to the nozzle and printing platform. User should twist the nut slightly and clockwise to low down the platform. WWW.BIQU.EQUIPMENT...
- Page 47 Choose from the touch screen homepage ① “ Menu ” → ② “Movement”→ ③“ABL”→ ④“ABL”。 ② ① ④ ③ Note: If users does not install BLtouch on BIQU-B1 or does not install it properly, the touch screen will pop up a prompt window, as shown below:...
- Page 48 After finishing the automatic leveling, user can click "Repeat" in the previous operation interface, the printer starts printing, and the users can evaluate the leveling effect of the platform based on the printing effect to optimize the next step. WWW.BIQU.EQUIPMENT...
- Page 49 First, users remove the filament run out detection module from BIQU-B1, and then installs the smart filament sensor module. Choosing from the homepage of the 3D printer touch screen ①“Menu”→ ②...
- Page 50 When the button of "Filament Sensor" shows "intelligent", owes to smart filament detection sensor module, BIQU-B1 starts detecting filament-jam status. When the button of "Filament Sensor" shows "OFF", BIQU-B1 would neither detect filament run out nor filament-jam status. Normally, BIQU-B1 defaults to open filament run-out detection function.
- Page 51 BIQU-B1 USER MANUAL 7-4 Model Preview When there are many 3D printed files in the TF card, it is difficult for users to find the files they needed. The model preview function can help users find their target files more quickly and directly.
- Page 52 Uncheck the "Add machine prefix to job name" WWW.BIQU.EQUIPMENT...
- Page 53 BIQU-B1 USER MANUAL Step 2 Save the G-code file in the root directory of TF card after slice. Note: Save the G-code file in the root directory of TF card, and name of G-code should be same as the thumbnail’s.
- Page 54 Click "Load File" to find the stl format model file that users want to slice. Select the model file and click "Open", the software will automatically load the model. Open After the model has been loaded, click "OK". WWW.BIQU.EQUIPMENT...
- Page 55 BIQU-B1 USER MANUAL Step 3 Select the appropriate model preview angle and click "Output Thumbnail". And then select the output location where the G-code file of the model is located. Click "Save". Output thumbnail Save...
- Page 56 G-code file.The 3D printer will automatically recognize the G-code file corresponding to the thumbnail. Note: Save the G-code file in the root directory of TF card, and name of G-code should be same as the thumbnail’s. WWW.BIQU.EQUIPMENT...
- Page 57 BIQU-B1 USER MANUAL Step 4 Choose from the touch screen homepage ① “Menu” → ② “Settings”→ ③“Feature”→ ④“Page down”→ ⑤“Page down” → ⑥“Files Viewer List Mode”。 ② ① ③ ④ ⑤ ⑥ When“Files Viewer List Mode”option turns red,it means that the...
- Page 58 The outputted sliced files will display thumbnail icons, while without outputted sliced files will not display thumbnail icons. Users could select the slice file they want to print at a glance. WWW.BIQU.EQUIPMENT...
- Page 59 BIQU-B1 USER MANUAL 7-5 Marlin Operating System BIQU-B1 has also equipped with a retro-style Marlin operating system, users can choose their favorite operating system according to their own preferences. Below is a brief description of the system. Step 1 Long press the knob next to the touch screen, select "Marlin Mode"...
- Page 60 After printing is completed, the print head and hot bed will automatically cool down. When the temperature of nozzle and hot bed reach indoor temperature, users then can remove the model. WWW.BIQU.EQUIPMENT...
- Page 61 BIQU-B1 USER MANUAL 8. Troubleshooting Question 1 layershifting Printing too fast, please control the speed between 60 ~ Answer 1 80mm /s. The bell pully or bell might be loosened. Tighten them The stepper motor is missing steps. The current through the motor might be too small so that the stepper motor doesn’t have enough torque.
- Page 62 Providing a closed environment in order to keep the temperature stable. Reducing the printing speed and allowing enough time to adjust the temperature change. The line width of the first layer is widened, that is, to increase the extrusion amount of the bottom layer. Adding Brim support. WWW.BIQU.EQUIPMENT...
- Page 63 BIQU-B1 USER MANUAL Question 5 Bobbling on the top of the print Answer 5 Insufficient cooling is possible, make sure the fan is working. Top layer height is too thin, increase top layer height in your print setting. Cracks and Gaps in 3D prints Question 6 Insufficient extrusion.
- Page 64 Try lowering the print temperature by 5 degrees each time. Lower the travel distance. Lower the distance between each model if you are printing multiple models a time. WWW.BIQU.EQUIPMENT...
- Page 65 BIQU-B1 USER MANUAL 9. Cautions 1. To prevent scalds, please don’t touch the nozzle or the heated bed when the printer is printing. Please don’t touch the magnet bed immediately after a print is done, wait for the hot plate to cool down before taking the print out.
Need help?
Do you have a question about the B1 and is the answer not in the manual?
Questions and answers
Hello can you please send me a manual on how to change the Y traction belt? My belt snaped and I have to change it