Table of Contents
Advertisement
Quick Links
Advertisement
Table of Contents

Subscribe to Our Youtube Channel
Related Manuals for Telestar Imperial DABMAN i450CD


Summary of Contents for Telestar Imperial DABMAN i450CD
- Page 1 Instruction manual DABMAN i450CD 18/07/19 DABMAN i450CD...
- Page 2 Operating Manual...
-
Page 3: Table Of Contents
CONTENTS 1. FOREWORD ........110 1.2. - Page 4 CONTENTS 6.8 Network configuration ......137 6.8.1 Network selection ....... 137 7.
- Page 5 CONTENTS 7.1.12. Temporary storage ......156 7.1.13. Weather ........156 7.1.14.
- Page 6 CONTENTS 8.4.2. FM radio operation ......172 8.5. DAB ......... . . 173 8.5.1 DAB station search .
- Page 7 CONTENTS 10. APP CONTROL ....... . . 185 11. TROUBLESHOOTING ......189 12.
-
Page 8: Proper Use According To Design
1. FOREWORD Dear customer, Thank you for choosing this product. Please read these instructions carefully, and keep them for future reference. These operating instructions are an integral part of the device! If you sell or distribute the device, please hand over this manual. 1.2. -
Page 9: Safety Instructions
2. SAFETY INSTRUCTIONS 2.1. Explanation of symbols Symbol meaning This signal word describes a hazard with a high level of risk, that may lead to death or severe injury if not followed. This signal word describes a hazard with a medium level of risk, that may lead to death or severe injury if not properly followed. - Page 10 2. SAFETY INSTRUCTIONS 2.1. Explanation of symbols Protection class II Electric devices with a protection class II have an increased or double insulation at the rated insulation voltage between the active and touchable parts (VDE 0100 component 410, 412.1). They are usually not connected to the protective conductor.
- Page 11 2. SAFETY INSTRUCTIONS 2.1.Explanation of symbols In the case of devices with wooden plugs this symbol marks the plug’s polarity. 2 variants are distinguished here Image 1: Outside plus/ Inside minus Image 2: Inside plus / outside minus Devices with this symbol may only be used indoors in a dry environment.
-
Page 12: Safety Instruction
2. SAFETY INSTRUCTIONS 2.2. Safety Instruction Inspect the device prior to use. Should there be any damage or a defect on the device it may not be used. Risk of injury! There is a risk of injury for children and persons with reduced physical, sensory or mental capacities (for example partially disabled, older persons with limited physical or mental abilities) or a lack of experience... -
Page 13: Operational Safety
Should you detect visible damages or the device has visible damages, do not use it. > Should you detect a technical or mechanical problem please contact the TELESTAR service. > Only use the power unit that was included! Never use a different power unit. - Page 14 2. SAFETY INSTRUCTIONS spare parts or additional devices that were not explicitly appro- ved or shipped by us. > Do not use the device in areas that have a high explosion risk. These include, for example, petrol storage areas, petrol stations, or areas in which solvents are stored or processed.
-
Page 15: Connecting The Device
2. SAFETY INSTRUCTIONS Take care to prevent moisture, water or splash water from coming into contact with the device and ensure that receptacles filled with water - e.g. vases - are not placed on or near the power unit. > In the event that foreign objects or liquid should enter the device or power unit, immediately unplug the power unit. -
Page 16: Protecting The Device Against Damage
2. SAFETY INSTRUCTIONS installed grid socket with 220-240 V alternating current, 50-60 hz. > Place the radio on a solid, even surface. > The device consumes power in standby mode. To fully switch off the device, the power plug must be pulled from the socket or the power unit on the back of the device must be switched off. - Page 17 2. SAFETY INSTRUCTIONS > Do not place any heavy objects on the device or the power unit. > Do not use the device in areas that have a high explosi on risk. These include, for example, petrol storage areas, petrol stations, or areas in which solvents are stored or processed.
-
Page 18: Notes On The Radio Interface
2. SAFETY INSTRUCTIONS 2.7. Notes on the radio interface The device generates an electro-magnetic field. Please pay attention to any indications in your surroundings that may prohibit or restrict the use of electronic devices. This may be the case in hospitals, petrol stations and patrol depots or airports, for example. -
Page 19: Handling Batteries
2. SAFETY INSTRUCTIONS 2.8. Handling batteries Only use the type of battery that was part of the delivery. Risk of injury! Never open batteries, short-circuit these or toss them into flames. Never charge these batteries. There is a risk of explosion when charging these batteries. - Page 20 2. SAFETY INSTRUCTIONS Store new as well as used batteries out of children’s reach. Swallowing batteries poses a risk of internal injuries. The battery acid contained inside the batteries may cause injuries if it comes into contact with skin. After accidental swallowing or if there are signs of skin burns, rinse the affected area with sufficient clear water and seek medical attention immediately.
-
Page 21: Cleaning The Device
2. SAFETY INSTRUCTIONS > Pay attention to the correct polarisation when inserting batteries. > Never charge these batteries. > Batteries should be stored in a cool and dry place. > Never toss batteries into fire. > If the device is not used for a longer period of time please remove the batteries from the device. -
Page 22: Legal Information
2. SAFETY INSTRUCTIONS 2.10. Legal information The device is intended for us in all countries of the European Union as well as Switzerland, Norway, Liechtenstein and Iceland. The range of radio signals to be received meets all legal regulati- ons of these countries. If the device is to be used in a different country, the laws of that country must be considered and complied with. -
Page 23: Scope Of Delivery
3. SCOPE OF DELIVERY Please remove all parts from the packaging and completely dispose of all packaging materials. Please contact us if one or more of the specified parts are missing: TELESTAR Service Center, Am Weiher 14, 56766 Ulmen e-mail: service@telestar.de Explanation... -
Page 24: Overview Of Control Elements
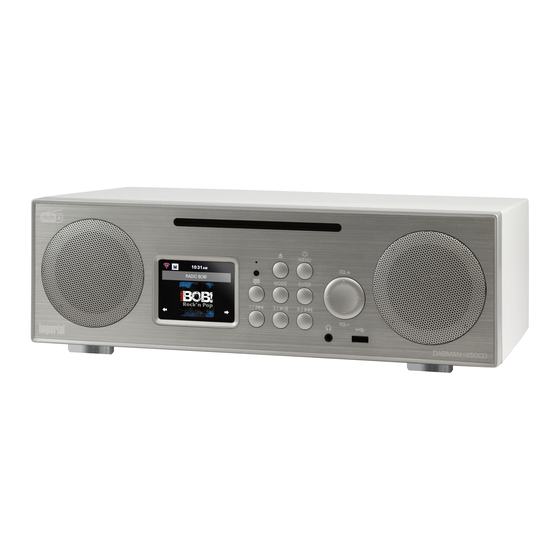
4. OVERVIEW OF CONTROL ELEMENTS Display 9 10 Operating Manual... - Page 25 4. OVERVIEW OF CONTROL ELEMENTS 1. Voice message Save a voice message on the device with this button. Please also read chapter 7.1.19 2. Eject Ejects an inserted CD. 3. Mode Here you can switch the operating mode of the device between Internet radio, DAB+, FM, UPnP, AUX, Bluetooth, CD, Spotify and USB.
-
Page 26: Display Overview
4. OVERVIEW OF CONTROL ELEMENTS 10. CD slot Insert a CD with the labelled side facing up. 11. Power switch Switch the device on or off here. The device is disconnected from the power supply unit in position 0. 12. Power supply connection Connect the device to the power supply unit at this socket (included). - Page 27 4. OVERVIEW OF CONTROL ELEMENTS Symbolises the radio reception strength. WIFI connection active. No network connection via network cable. AUX mode active. Repeat the music track in the selected folder. Shuffl e play activated. Repeat for the selected music track active. Alarm clock activated.
-
Page 28: Remote Control
5. REMOTE CONTROL The radio can be controlled using both the device buttons as well as the remote control. The remote control is the more conveni- ent and easier way to operate the device. For this reason, this manual mainly explains how to set up and operate the radio using the included remote control. - Page 29 5. REMOTE CONTROL DABMAN i450CD...
- Page 30 5. REMOTE CONTROL 1. Standby button Switch the device on or off using this button. 2. Sleep Use these buttons to switch the Sleep Timer of the device on or off. 3. WPS button Use this button to establish a WIFI connection to your home network. Please also read chapter 8.
- Page 31 5. REMOTE CONTROL Use this button to select the next track or fast forward. 16. Play Start or pause playback 17. Mute Mutes the device’s sound. 18. Stop Stop playback 19. V+ volume Increases the volume 20. EQ equaliser function You can activate the equaliser function with this button and change custom sound settings.
-
Page 32: Installation
6. INSTALLATION 6.1 General operating instructions > Switch the unit on or off using the standby button on the remote control. > You can increase the volume using the VOL+ button on the remote control. > You can decrease the volume using the VOL+ button on the remote control. -
Page 33: Mounting The Antenna
6. INSTALLATION There is a risk of explosion if not used properly! Please read the related safety information in Chapter 2.8. Pay attention to the correct polarity of the battery! Then reinsert the battery compartment and replace the screw. 6.3 Mounting the antenna Screw the included antenna into the radio’s antenna connector. -
Page 34: Network Connection
6. INSTALLATION 6.5. Network connection To use the radio’s Internet functions, the device must be con- nected to a network. You can use a cable (LAN) or the integrated WIFI receiver to make a connection. If you are using a LAN cable, connect it to the LAN connector (see image on page 24, point 13). - Page 35 6. INSTALLATION 6.8 Network configuration To connect the radio to your network, confirm the following prompt with Yes. If you do not wish to connect the device to a network, you can skip this menu item by selecting No. 6.8.1 Network selection Select the type of connection you want to connect to the radio.
- Page 36 7. SETTINGS Local stations Internet radio Settings Media Centre FM radio DAB+ radio Information Centre Bluetooth You can select the menu items using the ►◄ arrow buttons. Con- firm the selection with the ENTER button on the remote control or by pushing the ENTER button on the unit.
- Page 37 7. SETTINGS 7.1. Settings Press the MENU button on the remote control or the device and use the ►◄ buttons to select the menu item settings. Confirm our choice with the ENTER button on the remote control or pressing the ENTER button on the unit.
- Page 38 7. SETTINGS 7.1.2 Manage My MediaU Here you can activate or deactivate the MediaU management function. With MediaU you can create an custom station list and play these stations. To create and activate your station list, you will need to register on: http://www.mediayou.net/web One you have logged in, you can register your radio, Enter your radio’s MAC address as the serial number.
- Page 39 7. SETTINGS 7.1.3. Network For the device to function as an Internet radio, the network your radio is connected to needs to have the following features: The network router used must have a DHCP server function so that the device can be assigned an automatic IP address in the network.
- Page 40 7. SETTINGS Select the desired menu item with the buttons ▼▲ and confirm the entry with ENTER. 7.1.3.1. LAN network settings If you want to integrate the radio into your network with a net- work cable, you can activate a wired network connection in these settings.
- Page 41 7. SETTINGS The network function via a LAN cable is activated when the de- vice is started from standby mode. If you plug in the network cable when the device is on, switch it off using the power button on the radio or the power button on the remote control and then on again.
- Page 42 7. SETTINGS Confirm your entry with ENTER. Please note that the registration process may take a while. 7.1.3.3. WIRELESS network (WPS PBC) WPS is a function on WIFI devices that allows you to establish a network connection at the touch of a button without having to enter a password.
- Page 43 7. SETTINGS in this area. Here you can deactivate the DHCP function to assign a manual IP address to your radio. Use the ▼▲ buttons on the remote control to select the manual configuration and press the ENTER button on the remote or the ENTER button on the device.
- Page 44 7. SETTINGS 7.1.3.4.2. Enter SSID To manually configure the wireless network settings, you cen set the SSID here. A Service Set Identifier (SSID) is a freely selectable name of a WIFI device through which it can be addressed. It is therefore also referred to as the WIFI’s (wireless) network name.
- Page 45 7. SETTINGS 7.1.3.5. Network check during startup In this menu item you can determine whether the device should check the network connection to a network access point (net- work router) each time it is switched on. This automatic check is activated at the factory. It is recommend- ed that you leave this function enabled to ensure that the radio can connect to the network when it is turned on.
- Page 46 7. SETTINGS The device is factory-configured to automatically set the time. If the device is connected to the Internet via a network, the time and date are automatically synchronised. It is thus not necessary to set the time. 7.1.4.1. Set the date & time Use the ▼▲...
- Page 47 7. SETTINGS 7.1.4.3. Set the date format Change the date format here to set how the date is displayed. Select the Set Date Format menu item and press the ENTER button on the remote or confirm with the ENTER button on the device. Now change the date display to the desired format and confi rm with ENTER on the remote control or with the ENTER button on the unit.
- Page 48 7. SETTINGS Use the ▼▲ buttons on the remote control in the Settings menu to select the Alarm clock and press the ENTER button on the remote control or confirm with the ENTER button on the unit. Select Alarm clock 1 or Alarm clock 2 and confirm by pressing the ENTER button on the device or use the ENTER button on the remote control.
- Page 49 7. SETTINGS To stop an alarm, hit the standby button on the remote control. To active that snooze function, press the ENTER button during an alarm. The alarm will then be paused for 5 minutes. After 5 minutes, the alarm is reactivated. 7.1.5.1.
- Page 50 7. SETTINGS 7.1.5.2. Alarm clock volume Under Alarm Volume, set the volume for the alarm signal. Use the ▼▲ buttons on the remote control in the Settings menu to select the Alarm clock and press the ENTER button on the remote control or confirm with the ENTER button on the unit.
- Page 51 7. SETTINGS 7.1.7. Language You can set the menu language here. Use the ▼▲ buttons on the remote control in the Settings menu to select Language in the menu and press the ENTER button on the remote control or the ENTER button on the unit. Use the ▼▲...
- Page 52 7. SETTINGS Power saving mode: When the power saving mode is activated, the display is dimmed to the set brightness if the device is not operated within 15 seconds. Select the Power Saving Mode option and confirm your selection. Then use the ▸ ◂ buttons to select the brightness level you want for this mode.
- Page 53 7. SETTINGS automatically switch from operation to standby mode. You can choose between 5, 15 and 30 minutes. Using the ▼▲ buttons of the remote control, select the menu item Power settings in the Settings menu and press the ENTER button on the remote control or confirm by pressing the ENTER button on the device.
-
Page 54: Temporary Storage
7. SETTINGS 7.1.12. Temporary storage Here you can change the buffering time for music playback from the network. An increase in the buffering time can compensate for transmission disruptions in order to avoid an impairment of the playback. Use the ▼▲ buttons of the remote control to select the menu item Buffering in the Settings menu and press the ENTER but- ton on the remote control or the ENTER button on the device. -
Page 55: Fm Settings
7. SETTINGS Select a location for which you want to display the weather fore- cast and weather information. Temperature unit Specify which temperature unit is to be used. You can choose between Celsius ( C) and Fahrenheit ( Standby display Specify here whether the radio should display weather data in standby or not. -
Page 56: Mode
7. SETTINGS Which radio stations are to be found during an FM search can be set in the Sensitivity option. Use the ▼▲ buttons on the remote control in the Settings menu to select the FM Setting and press the ENTER button on the remote control or confirm with the ENTER button on the unit. -
Page 57: Local Stations Settings
7. SETTINGS Confirm your entry with ENTER on the remote control or by pressing the ENTER button on the unit. 7.1.15. Local stations settings To make it easier for you to search for stations in your area using Internet radio, you can search for specific radio stations from your region in the device's menu. -
Page 58: Playback Options
7. SETTINGS Confirm your entry with ENTER on the remote control or by pressing the ENTER button on the unit. Manual setup (US- Zipcode) In this setting, you can determine the location by entering a postal/zip code. Please note that this function is only available for locations within the USA. -
Page 59: Button
7. SETTINGS Here you can change the name of the device under which the radio is displayed on a DLNA device. Use the ▼▲ buttons on the remote control to select the letter you want to use and confirm your entry with the ENTER button on the remote control or the ENTER button on the device. -
Page 60: Sms
7. SETTINGS 7.1.19. SMS The radio set allows you to activate short message texts (SMS), which were created via the ‘AirMusic Control’ app, via the radio, or to send them to selected and previously entered phone numbers by pressing a button. You can use this function to set up a maximum of 3 mobile phone numbers to which SMS messages are sent. -
Page 61: My Eq
7. SETTINGS notification via the SMS Settings selection option. Once the notification via the app has been entered and saved, the SMS notification can be started via the MODE button on the radio (optionally via the remote control). Sending the SMS message. Press the MODE button for a few seconds to send the message to the phone numbers specified beforehand. -
Page 62: Resume Playback After Switching On
USB interface allows you to update your radio’s operating software, which can be downloa- ded from www.telestar.de if necessary. The software provided on the website must be unpacked. The unpacked file is then trans- ferred to an appropriate storage medium and connected to the radio via the USB port. -
Page 63: Reset To Factory Setting
7. SETTINGS 7.1.23. Reset to factory setting You can reset all the radio settings you have made to the fac- tory settings. This is useful if you have made changes that have resulted in the device not functioning optimally. Use the ▼▲ but- tons of the remote control in the settings menu to select Reset to factory settings and press the ENTER button on the remote control or confirm with the ENTER button on the device. -
Page 64: Internet Radio
8. OPERATION 8.2. Internet radio Press the MENU button on the remote control or on the unit, and use the ►◄ buttons to select Internet Radio. Confirm your settings by pressing ENTER on the remote control or pressing the ENTER button on the device. You can select and manage all Internet stations in the Internet radio menu. -
Page 65: Local Station
8. OPERATION Radio stations sorted by genre Radio stations sorted by country and region Radio station by recommendation. Confirm your settings by pressing ENTER on the remote control or pressing the ENTER button on the unit. 8.2.3. Local station Under this menu item, common Internet radio stations as well as DAB+ radio stations are sorted according to regions and can thus be accessed more easily. -
Page 66: Service
8. OPERATION 8.2.6. Service This menu item lets search for a specific radio station on the Internet. The name of the radio station must be entered. Select Find station in the Service menu and confirm with the ENTER key on the device. Use the ▼▲... -
Page 67: Media Centre
8. OPERATION 8.3. Media Centre Press the MENU button on the remote control or on the unit, and use the ►◄ buttons to select Media Centre. If the DABMAN i450CD is integrated into a wireless network, the radio can also be used as a media player to play music files from network devices such as PCs or smartphones via UPnP or DLNA. -
Page 68: Upnp Playlist
8. OPERATION 8.3.1. UPnP Playlist Under UPnP you can create a playlist in which you can individually save music tracks. To add a music track to the playlist proceed as follows: In UPnP mode, select a track you want to play and press ENTER on the unit to confirm. -
Page 69: Fm Station Search
8. OPERATION 8.4. FM Press the MENU button on the remote control or on the unit, and use the ►◄ buttons to select FM. This menu includes all relevant settings for receiving radio stations via FM. 8.4.1. FM station search When the DABMAN i450CD is switched to FM mode for the first time, a station scan must be performed. -
Page 70: Fm Radio Operation
8. OPERATION The device starts the automatic station search and saves found channels. Please note that the reception sensitivity and the related number of radio stations found depends on the search sensitivity settings. For FM search sensitivity settings, refer to chapter 7.1.14.2. Manual FM search You can also search for FM stations manually. -
Page 71: Dab Station Search
8. OPERATION 8.5. DAB Press the MENU button on the remote control or on the unit, and use the ►◄ buttons to select DAB. 8.5.1 DAB station search In addition to FM, the radio can also play the DAB+ radio, which can be received digitally via an antenna. -
Page 72: Dab Radio Operation
8. OPERATION to move the station to the desired favourite position and press the OK button to save the station on this position. Alternatively, you can store up to 5 stations on the unit using the station memory buttons 1-5. To do so, switch to a desired station and press and hold one of the 5 station memory buttons for ap- prox. -
Page 73: Weather And Finances
8. OPERATION 8.6. Information centre 8.6.1 Weather and finances Press the MENU button on the remote control or on the unit, and use the ►◄ buttons to select the Information Centre. Current weather and financial information is available in this section. In the Weather Information section, select the country and city for which you want to view the weather forecast. -
Page 74: System Information
8. OPERATION 8.6.2. System information Use this menu to check the details of the connected network. The information includes the MAC address that is required to register your device when you register for mymediaU. (Please also read chapter 7.1.2) 8.7. AUX You can connect an external music playback device, such as an MP3 player, to the radio. -
Page 75: Bluetooth
8. OPERATION 8.8. CD The device has a CD drive with which you can play both audio and MP3 data CDs. To do so, select CD in the menu. Insert a CD into the drive. The device will automatically load the An overview of the audio tracks on the CD is displayed. -
Page 76: Establish A Bluetooth Connection
8. OPERATION The Bluetooth mode is recommended if you are near the radio with a device to be connected and no network connection is avail- able. Select Bluetooth from the menu. A Bluetooth connection must be established before you can send audio files to the radio via Bluetooth. -
Page 77: Spotify Connect
8. OPERATION 8.10. Spotify Connect Use your phone, tablet or computer as a remote control for Spotify. Go to spotify.com/connect to learn how. The Spotify Software is subject to third party licenses found here: https://www.spotify.com/connect/third-partylicenses DABMAN i450CD... -
Page 78: Daily Use Functions
9. DAILY USE FUNCTIONS 9.1. Volume Adjust the volume using the VOL+/VOL- buttons on the remote control or on the device. 9.2. Switching the mode Press the MODE button on the remote control or on the unit to switch between DAB Radio, FM Radio, AUX, UPnP, Internet Radio and USB modes. -
Page 79: Weather Information
9. DAILY USE FUNCTIONS show or information about the broadcast rate. To do this, use the ►◄ buttons on the device or the remote control. 9.5. Weather information If the device is in standby mode, you can call up weather informa- tion and forecasts via the display. -
Page 80: Stop And Start Playback
9. DAILY USE FUNCTIONS 9.5. Stop and start playback To start playing a song via UPnP or USB, press the ►/II button on the remote control. Press the button on the remote control. 9.6. Shuffle playback You can switch on shuffle mode for music files on a USB data carrier. -
Page 81: Save Favourite Stations
9. DAILY USE FUNCTIONS 9.8. Save favourite stations In any reception mode (DAB/FM/Internet), you can store them as favourite stations. Storing stations in the Favourites list can be done as follows: Select the station you want to store and confirm with the ENTER button. -
Page 82: Calling Up Local Radio Stations
9. DAILY USE FUNCTIONS 9.9. Calling up local radio stations You can use the LOCAL RADIO button on the remote control to call up predefined radio stations from your region. Please also read chapter 7.1.15. Press the LOCAL RADIO button on the re- mote control to access the radio station overview for your region. -
Page 83: App Control
10. APP CONTROL Air Music Control ® The radio can be controlled with a smartphone or tablet and a cor- responding app. All important functions of the radio can thus be conveniently controlled via a mobile device. You can download the AIR Music Control app for Android and Ap- ple iOS. - Page 84 10. APP CONTROL Please note: This description corresponds to the app as at 02.2019. In the course of updates to the app’s software, the app functions or appearance may change! Download the application from the Google Play Store ® Android operating systems, or from the itunes Store for iOS ®...
- Page 85 10. APP CONTROL Internet radio In this mode, all typical functions can also be selected during internet radio operation. You can select the station storage slots 1-5 in the lower area. Media Centre In this area, you can connect to media servers in your network.
- Page 86 10. APP CONTROL FM radio In this mode you can operate the FM radio. In this mode you can operate DAB+ radio. Operating Manual...
-
Page 87: Troubleshooting
11. TROUBLESHOOTING Symptom Possible cause and remedy Empty display Connect the power Radio no reacting using the included to operation power unit. Check that the main switch on the back of the device is switched Remote control does Battery is empty or not inserted prop- erly. - Page 88 11. TROUBLESHOOTING Symptom Possible cause and remedy AUX playback DABMAN i450CD in the wrong mode does not work Change the mode to AUX Cable connection faulty. Check. the ca- ble connection between the radio and the external device File with low bit rate. Check the audio Poor audio quality file.
- Page 89 11. TROUBLESHOOTING Symptom Possible cause and remedy No WIFI connection Check the availability of the WIFI net- can be made works. Reduce the distance between the WIFI router and the radio. Make sure that you are using the correct WEP/WPA password when logging on to a WIFI router.
-
Page 90: Storage
12. STORAGE When not in use, please remove the power unit from the socket, disconnect the radio’s cable from the device and store the device in a dry place, protected against dust. If the unit is not in use for a longer period of time, the battery must be removed from the remote control. -
Page 91: Disposal Information
14. DISPOSAL INFORMATION 14.1. DISPOSING OF THE PACKAGING Entsorgung The packaging consists exclusively Verpacku of materials that may be recycled. Please dispose of Ihr Gerät b this according to the schäden in ‘Dual system’. Rohmater werden od 14.2. DEVICE DISPOSAL werden. -
Page 92: Disposing Of The Batteries
14. DISPOSAL INFORMATION 14.3. DISPOSING OF THE BATTERIES Batteries and power units may not be disposed of with the household waste. The symbol on the right means that you as a consumer are required to separately dispose of all batteries and power units. Suitable collection bins are provided at specialist shops and numerous public facilities. -
Page 93: Properties And Technical Data
15. PROPERTIES AND TECHNICAL DATA Internet radio Chip set Magic M6 approx. 25,000 Internet radio stations available Audio codecs MP3 (bit rate up to 320 Kbits/s, sampling rate up to 48 KHz) AAC/AAC+ (bit rate up to 320 Kbits/s, sampling rate up to 48 KHz) WMA (bit rate up to 320 Kbits/s, sampling rate up to 48 KHz) DAB/DAB+/FM... - Page 94 15. PROPERTIES AND TECHNICAL DATA Connections Line out 3.5 mm stereo jack socket Headphones 3.5 mm stereo jack socket AUX IN 3.5 mm stereo jack socket 10/100 Mbps (RJ45) Polarity Power supply connec- tion USB plug USB 2.0 standard Power unit Manufacturer Dongguan Yingna Electronic Technology Co., Ltd...
- Page 95 15. PROPERTIES AND TECHNICAL DATA Operating conditions Temperature range C - 45 Air humidity 20% - 80% relative air humidity WIFI interface Frequency range 2.412 GHz - 2.4835 GHz Modulation CCK, DQPSK, DBPSK, 64-QAM, 16-QAM, QPSK, BPSK, IEEE standards IEEE 802.11b/g /n WIFI data rate 802.11b: 1, 2, 5.5, 11Mbps...
-
Page 96: Service And Support
Professional specialists are ready to offer their assistance in our service area. Here you can ask any questions you may have about TELESTAR products and get suggestions on troubleshooting. Our technicians are available Monday- Friday from 08:00 - 16:45 at the following phone number: 02676 / 95 20 101 or by email at: service@telestar.de... -
Page 97: Ce Labelling
17. CE LABELLING Your device is CE marked and complies with all necessary EU standards. TELESTAR DIGITAL GmbH hereby declares that the DABMAN i450CD device complies with the essential requirements and other relevant provisions of RoHS Directive 2011/65/EU, RE Directive 2014/53/EU and ErP Directive 2009/125/EC. - Page 98 We are not liable for any misprints or mistakes. Reproduction and duplications are only permitted with the express permission of TELESTAR-DIGITAL GmbH. As at: July 2019 Operating Manual...
Need help?
Do you have a question about the Imperial DABMAN i450CD and is the answer not in the manual?
Questions and answers