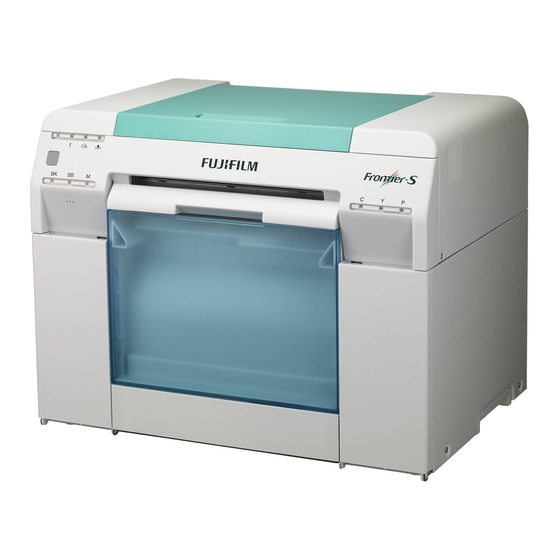
FujiFilm Frontier-S DX100 Instructions Manual
Ink discharge and flushing
Hide thumbs
Also See for Frontier-S DX100:
- Service manual (303 pages) ,
- Field maintenance manual (25 pages) ,
- Installation manual (25 pages)
Advertisement
Quick Links
Temporary Lab Shut‐down Steps
Please follow the steps below for each machine to properly prepare the Photo Lab equipment for temporary shut‐down.
For Wet‐Labs Printers
1. Click and follow the normal [Post‐operation Check].
2. Note the automatic shut‐down operations take several minutes to fully complete. It is very important to allow
the printer to fully finish this process. When complete the printer will shut down completely.
3. When the printer has turned itself off, then turn the built‐in circuit breaker off; located
on the lower right side of printer. See illustration to the right.
4. Do additional cleaning to the crossovers & dryer entrance rack by removing and
cleaning them in the sink. Use spray bottle with warm water to rinse the tops of the
racks to thoroughly wash down any chemical residue in the working tanks.
5. Important: Re‐install crossovers & dryer entrance rack back into the machine.
6. Clean and replace all circulation filters.
7. Close the dryer section and all other doors.
8. Do normal Windows shut‐down on the LPC and PIC computers.
Recommendation for short term storage: Weekly steps to minimize the oxidation and crystallization of the
chemicals:
1. Restart the system by first turning on the printer's breaker, and then manually start machine by turning on the
stand‐by switch. Note the machine may alarm of the working tank levels being low. If this occurs you need to
top off by adding warm water into each of the working tanks.
2. The machine will need to warm up for approx. 30 – 60 minutes. Also note that "Evaporation Compensation" will
likely be displayed for a much longer time period. This is normal and will clear automatically when finished.
3. Start up the LPC. Once fully started Start up the PIC computer.
4. Print at least (300) 6x4 prints and (50) 12x18 prints to allow the circulation and replenishment systems to be
exercised and refreshed.
5. Follow the shutdown steps again as described above.
6. Following these steps should prolong the chemical in the working tank for approximately one month.
Recommendation for short term storage: Recommend for shutdown over 30 days:
1. Click and follow the normal [Post‐operation Check].
2. Note the automatic shut‐down operations take several minutes to fully complete. It is very important to allow
the printer to fully finish this process. When complete the printer will shut down completely.
3. When the printer has turned itself off, then turn the built‐in circuit breaker off; located on the lower right side of
printer. See illustration above.
4. Do normal Windows shut‐down on the LPC and PIC computers
5. Do additional cleaning to the crossovers & dryer entrance rack by removing and cleaning them in the sink. Use
spray bottle with warm water to rinse the tops of the racks to thoroughly wash down any chemical residue in
the working tanks.
6. Drain Working tanks and properly dispose of the chemicals.
7. Drain the Replenisher tanks and properly dispose of the chemicals.
8. Fill and drain the Working and Replenisher tanks with room temperature water 2 times.
9. Important: Re‐install crossovers & dryer entrance rack back into the machine.
10. Dispose of all circulation filters.
11. Leave the dryer section open at Stopper Postion 1.
(for Lab Managers/Supervisors)
(Fuji LP5700R, LP5700, and LP5900 printers):
3/24/2020
Advertisement

Related Manuals for FujiFilm Frontier-S DX100


Summary of Contents for FujiFilm Frontier-S DX100
- Page 1 Temporary Lab Shut‐down Steps 3/24/2020 (for Lab Managers/Supervisors) Please follow the steps below for each machine to properly prepare the Photo Lab equipment for temporary shut‐down. For Wet‐Labs Printers (Fuji LP5700R, LP5700, and LP5900 printers): 1. Click and follow the normal [Post‐operation Check]. 2. Note the automatic shut‐down operations take several minutes to fully complete. It is very important to allow the printer to fully finish this process. When complete the printer will shut down completely. 3. When the printer has turned itself off, then turn the built‐in circuit breaker off; located on the lower right side of printer. See illustration to the right. 4. Do additional cleaning to the crossovers & dryer entrance rack by removing and cleaning them in the sink. Use spray bottle with warm water to rinse the tops of the racks to thoroughly wash down any chemical residue in the working tanks. 5. Important: Re‐install crossovers & dryer entrance rack back into the machine. 6. Clean and replace all circulation filters. 7. Close the dryer section and all other doors. 8. Do normal Windows shut‐down on the LPC and PIC computers. Recommendation for short term storage: Weekly steps to minimize the oxidation and crystallization of the chemicals: 1. Restart the system by first turning on the printer’s breaker, and then manually start machine by turning on the stand‐by switch. Note the machine may alarm of the working tank levels being low. If this occurs you need to top off by adding warm water into each of the working tanks. 2. The machine will need to warm up for approx. 30 – 60 minutes. Also note that “Evaporation Compensation” will likely be displayed for a much longer time period. This is normal and will clear automatically when finished. 3. Start up the LPC. Once fully started Start up the PIC computer. 4. Print at least (300) 6x4 prints and (50) 12x18 prints to allow the circulation and replenishment systems to be exercised and refreshed.
- Page 2 For Dry Labs (Fuji DL600 or DL650 printers and DX100): 1. Click and follow the normal [Post‐operation Check]. 2. Note the automatic shut‐down operations take about 1 – 2 minutes to fully complete. Allow the process to fully finish. 3. Turn off the Power Switch on the printer located above the main power connection. See illustration to the right. 4. Do normal Windows shut‐down on the LPC and PIC computers. 5. Important: Do not remove any of the ink cartridges, they must remain in the machine and fully inserted to properly seal the ink systems. 6. Clean all surfaces of the lab equipment. 7. Seal all remaining paper by placing in the Fuji Paper cases and keep in a safe area. 8. Following these steps should keep the print head and inks in working order for at approximately 30 days. If the down time is known to be more than 30 days, it would be best to drain and flush the printers. As an alternative, one might be able to prolong the dormant time by periodically making a few prints or test prints and then do a normal shutdown. Performing a weekly nozzle check, weekly Diagnostic Cleaning and if indicated a Forced Cleaning would be ideal if that is possible. Recommendation: 1. If the printer is expected to be out of service for more than 30 days, it would be advisable to flush the system of ink. For the DX100, see attachment “DX100 Drain and Clean.pdf”. i. Cleaning cartridges for the DX100 can be used up to 10 times (6 cartridges needed) b. For the DL650, see the service manual section Head Draining/Washing. i. Cleaning cartridges for the DL600/650 can be used up to 2 times (6 cartridges needed) Product Names for DL650 Order From Product Code Price Number of Machines Per Cartridge Set ...
- Page 3 Ink Discharge and Flushing Instructional Preface These instruction are intended to guide you through the process of discharging and flushing the ink from your DX100. Please read this page and refer back to it for troubleshooting. Supplies required to perform ink discharge and flushing are as follows: 6 - Drain Cartridges / Part # 1614982 6 - Cleaning Cartridges / Part # 1614981 1 - Maintenance Cartridge /SAP# 16394996...
- Page 4 Ink Discharge and Flushing Instructions For DX100 Installing the Discharge and Flushing Utility Insert the media with the DX100 Flush utility into your PC. Browse to your media and double Click the Apps icon. The following message appears. Click Yes. The installation will initiate.
- Page 5 Click Install. The necessary files will be extracted. This may take up to a minute. The application will begin to install and progress bar will continue.
- Page 6 Select Yes to install the redistributable files. This will ensure proper functionality of the application. The following messages will appear showing the install progress. Click Finish and remove your media. The installation is now complete. Note: The Utility Icon will be placed on your desktop.
- Page 7 Performing Discharge and Flushing Unload the paper from the Roll Unit. Double click the DX-100 Flush Ink Utility Click OK to the license agreement to continue. Click the + to expand the Adjustment / Maintenance Menu. The expand the Ink System Maintenance Menu...
- Page 8 Select Ink Flushing / Discharge Select the radio button for Discharge and Flushing. Then click RUN. Remove the Ink Cartridges. Then insert the Drain Cartridges and click OK.
- Page 9 Click OK to initiate the process. The Progress Bar appears, this will take 15 min. to complete. Note: The Blue LED should be blinking above the power button on the printer. Important: Do not interrupt this process by opening any doors, unplugging the AC power or USB cable.
- Page 10 The Progress Bar appears, this will take 15 min. to complete. Note: The Blue LED should be blinking above the power button on the printer. Remove the Cleaning Cartridges and insert the Drain Cartridges. Then Click OK Click OK to the final draining cycle.
- Page 11 The Progress Bar appears, this will take 15 min. to complete. Note: The Blue LED should be blinking above the power button on the printer. Once the process is complete the following message appears. Do not turn off the printer or remove the Draining Cartridges.
- Page 12 5.5 Head Related Adjustment The Cleaning Cartridge contains cleaning fluid almost C H E C K P O I N T enough for cleaning the head two times. After using the cartridges for the first time, make sure to put some mark or something on them so as to indicate that the cartridges have been used once.
- Page 13 5.5 Head Related Adjustment Click [3. Wash] to wash the print head. Take out the Cleaning Cartridges and install the Draining Cartridges again. Click [4. Drain] to drain Cleaning fluid. Take out the Draining Cartridges and install the Cleaning Cartridges again. Click [5.
Need help?
Do you have a question about the Frontier-S DX100 and is the answer not in the manual?
Questions and answers