Apogee Duet User Manual
Hide thumbs
Also See for Duet:
- User manual (52 pages) ,
- Quick start manual (43 pages) ,
- Supplementary manual (1 page)
Table of Contents
Advertisement
Quick Links
Advertisement
Table of Contents

Related Manuals for Apogee Duet


Summary of Contents for Apogee Duet
- Page 1 Apogee Duet User’s Guide-Ver 2.0 June, 2016...
-
Page 2: Table Of Contents
Low Latency Mixing Setting Sample Rate Touchpads Software Setup Mac OS: Using Duet with Logic Mac OS: Using Duet with Avid Pro Tools Mac OS: Using Duet with Ableton Live Using Duet with iOS Apps Troubleshooting Additional Support Duet Specifications Warranty &... -
Page 3: Introduction
Apogee Duet User’s Guide Introduction Thank you for purchasing Duet. This User’s Guide describes how to set up Duet with your Mac and iPad, connect speakers or headphones to play back music and connect mics and instruments to record your own creations. -
Page 4: Package Contents
● 2 meter USB cable ● Universal power supply with NA, EU, UK, AU, JP ● QuickStart Guide Note: Lightning iOS cable sold separately. user’s guide please go to the link above and look for Duet 2 downloads. Page 3... -
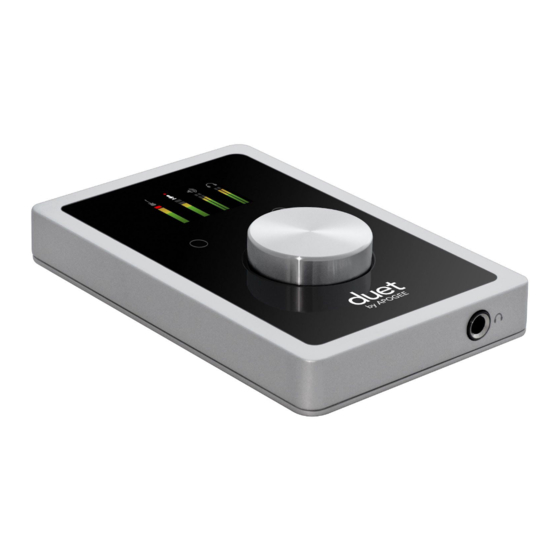
Page 5: Duet Panel Tour
Full Color interactive OLED Display Duet's OLED display provides full color visual feedback and metering. Multi-function Controller Knob Duet’s multi-function controller knob allows you to easily switch between Inputs and Outputs as well as adjust their levels. User Assignable Touchpads Duet's two assignable touchpads can be assigned to control many of Duet's settings and parameters. - Page 6 ● Power-hungry condenser mics are connected. If you have Duet set at a reasonable output volume and are not drawing a significant amount of power over the USB bus, you will be able to connect any microphones that require phantom power.
- Page 7 Apogee Duet User’s Guide Duet includes a USB 2.0 cable providing High Speed connection to Mac. Direct digital connection to iPad and iOS devices is also available (Lightning and 30-pin cables sold separately). OLED Screen Tour Home View Detail View (Input)
-
Page 8: Getting Started
6. You will be required to restart your computer after the install is complete. Choosing Duet for Mac Sound I/O After connecting Duet, installing the software and restarting your Mac, a dialog box will prompt you to choose Duet for Mac sound input and output. C lick Yes. Page 7... -
Page 9: Connecting To Your Ipad
Install Apogee Maestro from App Store 1. Connect Duet to your iPad/iPhone using a Lightning or 30-pin iOS cable (sold separately) 2. Connect the provided external power supply to Duet. When connecting to iPad/iPhone, the external power supply is required. Page 8... - Page 10 Apogee Duet User’s Guide 3. On the iPad/iPhone, open Settings and choose General > About > Duet, then choose "Find App for Accessory" . The App Store will open and navigate automatically to the Apogee Maestro app. Or you can go to App store and search for the app.
-
Page 11: Analog Inputs
Analog Inputs 1. Connect the provided breakout cable to the Analog I/O port on the rear of the unit. 2. Connect your analog input source(s) to either of the 2 combination connectors on Duet’s breakout cable: Microphone: XLR connection to Duet’s combination connector +4 dBu/-10 dBV line level device:... - Page 12 Apogee Duet User’s Guide 3. To adjust the input gain level, press Duet’s Multi-function Controller Knob until either the microphone or instrument icon is lit on the Duet’s display. Then turn the knob clockwise to increase the input gain level.
-
Page 13: Analog Outputs
Analog Outputs 1. Connect the provided breakout cable to the Analog I/O port on the rear of the unit 2. Connect your left and right speakers to the respective 1/4” TRS balanced output connectors on Duet’s breakout cable. Page 12... - Page 14 3. Connect headphones to the 1/4” headphone jack on Duet’s front panel. 4. To adjust the volume, press Duet’s Multi-function Controller Knob until the speaker or headphone icon is lit on the display’s Home View and turn the knob clockwise to increase the volume.
-
Page 15: Midi
Apogee Duet User’s Guide MIDI Duet’s USB MIDI input/output provides a MIDI connection between class compliant Core MIDI devices such as keyboards and other controllers and Apple’s Mac OS X and iOS operating systems. A class-compliant MIDI device works with Core MIDI without the need to install drivers or other additional software. -
Page 16: Maestro Software
Maestro lets you easily configure your Apogee interface to fit your workflow. Maestro, Apogee’s free app for iOS, brings total hardware control to iPad. Designed to create a seamless transition between Mac and iOS, Maestro’s design was customized for each device;... - Page 17 Apogee Duet User’s Guide Input Input Tab for Mac Input Tab for iOS Page 16...
- Page 18 2. Analog Level - Use this menu to select microphone, instrument, or line input. 3. Soft Limit - Use this menu to engage Soft Limit. Soft Limit is Apogee’s proprietary analog process for taming transients before A/D conversion. By gently rounding transients in a transparent manner, it’s possible to maximize level BEFORE the A/D...
- Page 19 Apogee Duet User’s Guide Output Output Tab for Mac Output Tab for iOS Page 18...
- Page 20 Sum to Mono engaged - once you have something that sounds good, then disengage Sum to Mono and revel at the beautiful stereo mix you've created! Duet's top panel touch buttons may be set to engage um to Mono on the Speaker outputs, the headphone outputs or both at the same time ...
- Page 21 Apogee Duet User’s Guide Mixer Mixer Tab on Mac Mixer Tab on iOS Page 20...
- Page 22 Apogee Duet User’s Guide 1. Device Icon & ID Button - A device icon and ID button is placed adjacent to each row of parameters to identify the hardware unit to which the row belongs. By clicking on the ID button, the corresponding hardware unitʼs front panel will illuminate.
- Page 23 Apogee Duet User’s Guide Device Settings Device Settings Mac Device Settings iOS Page 22...
- Page 24 Apogee Duet User’s Guide 1. Device Icon & ID Button (Mac only) - A device icon and ID button is placed adjacent to each row of parameters to identify the hardware unit to which the row belongs. By clicking on the ID button, the corresponding hardware unitʼs front panel will illuminate.
- Page 25 Apogee Duet User’s Guide System Setup (Mac only) 1. Device Icon & ID Button (Mac only) - A device icon and ID button is placed adjacent to each row of parameters to identify the hardware unit to which the row belongs.
- Page 26 Quit Apogee Maestro 2 - Choose this menu item to quit Maestro. File Menu Rescan - Choose this menu item to re-initialize the link between Maestro software and Apogee hardware connected to the Mac, in the case where the hardware is correctly connected and powered on but not detected in Maestro.
- Page 27 Zoom - Choose this menu item to maximize the size of the Maestro window. Open any of the currently active tabs by typing Command + number. Help Menu Help - Choose this menu item to open Maestro Help for any Apogee hardware devices connected to your Mac. Page 26...
- Page 28 Main Menu Apogee Device - Select device in use to access Maestro tab windows. Register Product - Please register your Apogee Duet for free technical support and to receive product updates and notifications via email. Knowledge Base - The Apogee KnowledgeBase is your number one resource for Frequently Asked Questions regarding your Duet.
-
Page 29: Operation
1. Connect your input source ( s ee analog inputs section> 2. Open Apogee Maestro software (found in your Mac’s Applications folder), and select the Input tab. 3. Select the Analog Level setting that corresponds to the device you have connected to Duet’s input(s). - Page 30 4. If you are using a condenser microphone that requires phantom power, select the 48V box on the Input tab of the appropriate channel in Maestro. Phantom power is indicated on Duet’s display by a red dot above the microphone icon. 48V Phantom power button in Maestro...
- Page 31 1. Connect your input source ( s ee Analog Inputs Section> 2. Open Apogee Maestro app, choose Duet from the main menu and select the Input tab. 3. Select the Analog Level setting that corresponds to the device you have connected to Duet’s input(s).
- Page 32 4. If you are using a condenser microphone that requires phantom power, select the 48V box on the Input tab of the appropriate channel in Maestro. Phantom power is indicated on Duet’s display by a red dot above the microphone icon. 48V Phantom power indicator on...
-
Page 33: Configuring The Output
Speaker Output Level - Mac 1. Connect Duet to the Mac. 2. Open Apogee Maestro software (found in your Mac’s Applications folder), and select the Output tab. 3. Go to Speaker Output drop down menu and select your Output source for desired playback (1-2, 3-4 or Mixer).1-2 is usually the default Output source on most... - Page 34 Apogee Duet User’s Guide Headphone Output Level - Mac To change Duet’s headphone output level (i.e the listening level of connected headphones): 1. Connect Duet to the Mac. 2. Open Apogee Maestro software (found in your Mac’s Applications folder), and select the Output tab.
- Page 35 Speaker Output Level - iPad 1. Connect Duet to the iPad. 2. Open Apogee Maestro app, choose Duet from the main menu and select the Output tab. 3. Go to Speaker Output drop down menu and select your Output source for desired playback (1-2, 3-4 or Mixer).1-2 is usually the default Output source on most recording...
- Page 36 To change Duet’s headphone output level (i.e the listening level of connected headphones): 1. Connect Duet to the iPad. 2. Open Apogee Maestro app, choose Duet from the main menu and select the Output tab. 3. Go to Headphone Output drop down menu and select your Output source for desired playback (1-2, 3-4 or Mixer).
-
Page 37: Adjusting Input & Output Levels
The controller knob operates in parallel with Maestro’s speaker and headphone control. Input level To change Duet’s input level (i.e the preamp gain of microphones and instruments): 1. Push the Multi-function Controller Knob until the microphone or instrument icon is lit on the Duet’s display. - Page 38 Speaker Output level To change Duet’s speaker output level (i.e the listening level of connected speakers): 1. Push the Multi-function Controller Knob until the speaker icon is lit on the Duet’s display 2. Turn the controller knob to the desired listening level.
- Page 39 Apogee Duet User’s Guide Headphone Output level To change Duet’s headphone output level (i.e the listening level of connected headphones): 1. Push the Multi-function Controller Knob until the headphone icon is lit on the Duet’s display 2. Turn the controller knob to the desired listening level.
-
Page 40: Low Latency Mixing
Apogee Duet User’s Guide Low Latency Mixing While recording, if you notice a delay between the moment you play or sing a note and when you hear it in your headphones you are experiencing latency. To minimize this latency, instead of using your recording software’s monitoring features, you can use the hardware monitor... - Page 41 Apogee Duet User’s Guide 4. Go to Mixer Tab to control volume, mute and solo of input. Page 40...
- Page 42 Apogee Duet User’s Guide Why use a Low Latency Mixer? A bit of background information concerning latency and computer-based digital recording setups will help you better understand these functions. When recording with most computer-based digital audio applications, the delay between the input and output of the recording system often disturbs the timing of the musicians performing.
- Page 43 Apogee Duet User’s Guide Figure B By routing the hardware input directly to the hardware output and mixing in playback as shown in Figure B, it’s possible to provide the vocalist a headphone monitoring signal with a much shorter delay. First, the signal being recorded (in this case, a vocal mic) is split just after the A/D stage and routed to both the software application for recording and directly back to the hardware outputs without going through the latency-inducing software.
-
Page 44: Setting Sample Rate
Duet with GarageBand, Duet’s sample rate is automatically set to 44.1 kHz, to match the GarageBand Song sample rate. For those audio applications that don’t include a sample rate setting such as iTunes, Duet’s sample rate may be set in Audio MIDI Setup or on the System Setup tab of Maestro. - Page 45 Apogee Duet User’s Guide iPad 1. Connect Duet to the iPad. 2. Open Apogee Maestro app, choose Duet from the main menu and select the Device Settings tab. 3. Select either touchpad A or B drop down menu and select the desired assignment.
-
Page 46: Software Setup
Mac OS: Using Duet with Logic 1. Go to the Logic Pro or Logic Express menu and choose P references > Audio. 2. In the Core Audio pane of the Device tab, select Duet for Output Device and Input Device. - Page 47 Apogee Duet User’s Guide 4. Now close the Logic Pro Preferences window and select New > Empty Project > from the File Menu. 5. If you are recording a single microphone or instrument, make the following selections in the New Tracks dialog box and click Create:...
-
Page 48: Mac Os: Using Duet With Avid Pro Tools
Apogee Duet User’s Guide Mac OS: Using Duet with Avid Pro Tools 1. Choose S etup menu > P layback Engine . 2. Choose D uet USB for C urrent Engine . 3. Set the H/W Buffer Size to 64 Samples. This setting may need to be adjusted based on your computer’s performance. -
Page 49: Mac Os: Using Duet With Ableton Live
1. Choose Live > Preferences . Click on the Audio tab. 2. Select CoreAudio in the Driver Type menu. 3. Select Duet in both the Audio Input Device and Audio Output Device menus. 4. Set Buffer Size to 64 Samples. This setting may need to be adjusted based on your computer’s performance. -
Page 50: Using Duet With Ios Apps
Apogee Duet User’s Guide Using Duet with iOS Apps Duet works with any iOS Core Audio compatible app on iPod Touch, iPhone or iPad. Simply download M aestro for iOS , your favorite app, connect Duet and you’re ready to go! GarageBand 1. - Page 51 Apogee Duet User’s Guide 2. Select the instrument to be used. ● Audio Recorder for Vocals ● Amp for Guitar ● Keyboard for your MIDI controller 3. Go to Input Setting on the top left corner of the screen. Page 50...
- Page 52 Apogee Duet User’s Guide 4. Select Input Channel 1 5. Set monitor to ON, Press Record on the top of the screen and you are ready to go! If you are recording with a microphone that requires 48v Phantom power, please refer to the ...
- Page 53 Apogee Duet User’s Guide If you would like to record two tracks at the same time, add and Select another instrument ● Audio Recorder for Vocals ● Amp for Guitar ● Keyboard for your MIDI controller 1. For this example select Amp 2.
- Page 54 Apogee Duet User’s Guide 3. Make sure Monitor is turned on Enable recording on the two separate mono tracks simultaneously. We recommend you do this instead of creating a single stereo track so audio output is panned correctly. 4. Begin by touching the tracks view button. Then swipe right to expand the tracks controls.
- Page 55 Apogee Duet User’s Guide Auria 1. Open Auria App 2. Choose Menu > New Project. Select Sample Rate and number of tracks. Press Save. Page 54...
- Page 56 Apogee Duet User’s Guide 3. Choose Menu > Input Matrix and make sure the input is going to the desired track. If you are recording with a microphone that requires 48v Phantom power, please refer to the C onfiguring the Input Section of this User Guide.
- Page 57 Apogee Duet User’s Guide 4. Set your input levels and Record enable the desired track. 5. Press the Record button and then Play to start your recording. Page 56...
- Page 58 Apogee Duet User’s Guide Cubasis 1. Open Cubasis app and create a New Project. 2. Add an Audio Track by touching the + Audio Button. Page 57...
- Page 59 Apogee Duet User’s Guide 3. Go to the Routing drop down Menu and select Mono input and your input source by tapping on the input channel number. If you are recording with a microphone that requires 48v Phantom power, please refer to the ...
- Page 60 Apogee Duet User’s Guide Animoog 1. Connect Core MIDI device into the USB MIDI I/O port on the Duet Open Animoog. Page 59...
- Page 61 Apogee Duet User’s Guide 2. Choose > Setup > MIDI In and select Duet USB. 3. Press any key on your MIDI Keyboard to test. 4. Find your sound and play! Page 60...
-
Page 62: Troubleshooting
Q : My Duet is not getting recognized by my iPad and it says not charging, what should I A: Make sure that your DC power cable is connected properly and in all the way, if this doesn’t work try resetting the Duet. -
Page 63: Additional Support
Apogee Duet User’s Guide Visit for the most up to date information. Additional Support For more information: ● Complete Apogee Duet User's Guide ● Apogee KnowledgeBase and FAQs ● Apogee Product Registration ● How to contact Apogee Technical Support Visit:... -
Page 64: Duet Specifications
Apogee Duet User’s Guide Duet Specifications Computer Connectivity USB 2.0 High Speed Roundtrip Latency performance 32 buffer @ 96kHz = 3.5 ms 64 buffer @ 44.1kHz = 4.2 ms Power USB Bus Power or DC power supply Bit resolution/sample rate 24-bit/44.1-192kHz... -
Page 65: Warranty & Notifications
This warranty is void if Apogee determines, in its sole business judgment, the defect to be the result of abuse, neglect, alteration or attempted repair by unauthorized personnel. The warranties set forth above are in lieu of all other warranties, expressed or implied, and Apogee specifically disclaims any and all implied warranty of merchantability or of fitness for a particular purpose. - Page 66 If you have any questions with regard to the above, please contact Apogee. In the event your Apogee product needs to be upgraded or repaired, it is necessary to contact Apogee prior to shipping, and a Return Merchandise Authorization (RMA) number will be assigned.
- Page 67 Apogee Duet User’s Guide 2. Redistributions in binary form must reproduce the above copyright notice, this list of conditions and the following disclaimer in the documentation and/or other materials provided with the distribution. THIS SOFTWARE IS PROVIDED BY THE COPYRIGHT HOLDERS AND CONTRIBUTORS “AS IS”...
- Page 68 Règlement sur le matérial brouilleur du Canada. Declaration of Conformity – CE Apogee Electronics Corporation hereby declares that the product, the Duet, to which this declaration relates, is in material conformity with the following standards or other normative documents: •...
- Page 69 Apogee Duet User’s Guide Apogee Electronics Corp. Santa Monica, CA Page 68...
Need help?
Do you have a question about the Duet and is the answer not in the manual?
Questions and answers