Table of Contents
Advertisement
Advertisement
Table of Contents
Troubleshooting

Related Manuals for Scantron SelfScore


Summary of Contents for Scantron SelfScore
- Page 1 SelfScore Scanner ® Operator Guide 1-800-722-6876 www.scantron.com...
- Page 2 Scantron Corporation. Information in this document is subject to change without notice and does not represent a commitment on the part of Scantron. The software described in this document is subject to the license agreement included with the product which specifies the permitted and prohibited uses of the product.
- Page 3 Preface About This Manual This Operator's Guide is your guide for day to day use of your scanner. It provides the information you need to handle basic tasks related to scanner operation, simple maintenance, and troubleshooting. Software References Your scanner can operate using any of the following software applications.
- Page 4 • Chapter 4, “Chapter 4: Scanner Modes” describes operating in the SelfScore mode and Scantron Score Emulation mode for data collection. • Chapter 5, “Chapter 5: Using the Background Menu”...
- Page 5 • Chapter A, “Appendix A: Recalibration” explains when and how to recalibrate the scanner. Operator’s Guide...
- Page 6 • Elements of Data Collection • SelfScore Quick Start • SelfScore Quick Tips - Scanning Tests, Surveys, and Ballots Contacting Customer Support If you require assistance, see “Chapter 9: Product Support and Services” on page 97 for information on contacting Scantron Customer Support.
-
Page 7: Table Of Contents
SelfScore Standard Features ........ - Page 8 Scantron Score Emulation Mode........
- Page 9 Chapter 8: Troubleshooting ........8-93 Troubleshooting Chart .
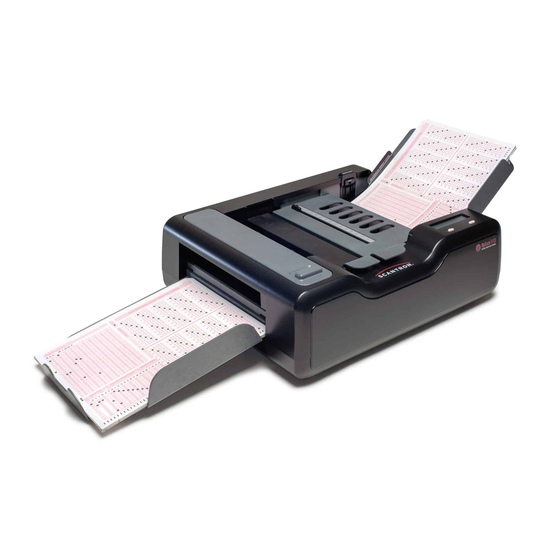
- Page 10 Scantron SelfScore Scanners...
- Page 11 Scanner Components ....1-2 SelfScore Standard Features ..1-5 System Requirements....1-6 User Precautions .
-
Page 12: Chapter 1: Scanner Basics
Sheet deflector Sheet deflector goes here. area Thickness sensor Used to detect thickness of forms to ensure only one sheet is being scanned at a time. Transport bed Supports the sheet as it moves through the scanner. Scantron SelfScore Scanners... -
Page 13: Transport Bed Closed View
Chapter 1: Scanner Basics Transport Bed Closed View Component Function Adjustment bar Stops the sheet in the output tray as the sheet leaves the transport bed. Prior to scanning, the adjustment bar needs to be adjusted to the length of the sheets being scanned. Buttons Enable you to start and stop the scanner and perform other menu driven functions. -
Page 14: Side And Back View
Releases (when pressed) the input tray for removal from the scanner. Located on the back of the upper input tray under the Quick Tips slot. USB port Provides a connection point for the USB cable coming from the computer. Scantron SelfScore Scanners... -
Page 15: Selfscore Standard Features
Chapter 1: Scanner Basics SelfScore Standard Features Standard Features • 2800 sheet per hour throughput • Automatic-feed • Pencil mark detection • Jam, multiple-sheet, and skew detection • 40 character alphanumeric display panel • Dual printers (adjustable) with rescore capability print the entire length of the sheet in two columns. -
Page 16: System Requirements
100-240 volt operation: 100-240 volts AC (- 10%, +6%): 47-63 Hz; US 3-prong plug; 15 amp dedicated circuit • Communications • USB 1.1 or 2.0 - SelfScore can be operated asynchronously using a virtual com port with user-defined protocol • Operation •... -
Page 17: Environmental Information
The scanner and power supply must only be used indoors in a dry location. • Use only the power supply that was provided with your Scantron scanner. Do not substitute another power supply model or another manufacturer’s power supply. •... -
Page 18: Waste Electrical And Electronic Equipment (Weee)
This class is eye-safe under all operating conditions • Array pulse duration 256usec, maximum power output 0.34mW. CAUTION: Use of controls or adjustments or performance of procedures other than those specified herein may result in hazardous radiation exposure. LED Aperture Scantron SelfScore Scanners... -
Page 19: Chapter 2: Setting Up Your Scanner
Handling the “Recalibrate/See Manual” Message ..2-26 Uninstalling the Scanner Utilities Software... 2-26 Chapter 2: Setting Up Your Scanner This chapter covers setup of your Scantron SelfScore scanner. Selecting a Good Location... - Page 20 The scanner itself is 21 X 15 X 9 in. (54 X 37 X 23 cm). 6. Temperature. Place the scanner in a location with temperatures between 60° and 85° F (16° and 29° Scantron SelfScore Scanners...
-
Page 21: Assembling The Scanner
Chapter 2: Setting Up Your Scanner Assembling the Scanner Extend the positioning stand so that the scanner is placed at the proper angle for operation. 2. Install the paper guide by sliding it into the slot in the input tray. 3. - Page 22 NOTE: When removing the tray from the scanner, depress the tray release tab. 4. Insert the Quick Tips guide (shipped with your scanner) into the slot on the underside of the input tray. This helps prevent loss of the instructions. Scantron SelfScore Scanners...
- Page 23 Chapter 2: Setting Up Your Scanner 5. Install the output tray by hooking the two prong- like tabs into the end of the scanner. 6. Adjust the adjustment bar to the length of the sheets that you will be scanning. Operator’s Guide...
-
Page 24: Installing Or Replacing An Ink Cartridge
Installing or Replacing an Ink Cartridge NOTE: The scanner does not come with the ink cartridges installed. To install or replace an ink cartridge, follow these steps: Unlatch the printer cover and remove it. 2. Locate the cartridge holders. Scantron SelfScore Scanners... - Page 25 Chapter 2: Setting Up Your Scanner 3. Slide the printer cartridge into the cartridge holder “feet first” then press the top of the cartridge firmly into the cartridge holder until you feel two clicks. This ensures that the cartridge is fully seated.
-
Page 26: Positioning The Printers
2. Notice the location of the cartridge holder that is inside the printer assembly. Also notice the ruler, the printer alignment mark, and the thumbscrew that sit beside the cartridge holder. These are the elements used to position the printer(s). Scantron SelfScore Scanners... - Page 27 Chapter 2: Setting Up Your Scanner 3. SelfScore forms require that the printers are positioned to 1.6 and 4.3 inches. There are small triangles on the scanner printer ruler indicating these two locations. Check the printer(s) to see if they are in the correct position.
- Page 28 Chapter 2: Setting Up Your Scanner 5. Move the printer to the 1.6 inch mark and lightly tighten the thumbscrew. 6. Adjust the position of the second printer to 4.3 inches. Scantron SelfScore Scanners...
- Page 29 Chapter 2: Setting Up Your Scanner Replace the printer cover, making sure that it is firmly seated. Operator’s Guide...
-
Page 30: Connecting The Power Supply
CAUTION: If lightning damage is a possibility, use a power strip with surge protection CAUTION: Do not connect the scanner to an outlet that also serves another major piece of equipment other than the computer (if used). Scantron SelfScore Scanners... - Page 31 Chapter 2: Setting Up Your Scanner 3. Plug the rectangular end (three receptacles) of the power cable into the open end (with three prongs) of the power supply. 4. Plug the rounded end of the power supply into the power port on the back of the scanner. CAUTION: Do not plug the rounded end of the power supply into any part of the computer.
-
Page 32: Installing The Scanner Utilities Software (Optional)
Chapter 2: Setting Up Your Scanner Installing the Scanner Utilities Software (Optional) Your SelfScore scanner can be operated as a standalone test scoring machine. However, if you like, you can also attach it to a computer with ScanTools software to capture and manage the scanned data. -
Page 33: Connecting The Scanner To The Computer (Optional)
Chapter 2: Setting Up Your Scanner Connecting the Scanner to the Computer (Optional) If you are using your SelfScore scanner as a standalone test scoring machine and will not be connecting it to a computer, skip this section. IMPORTANT: Before connecting the scanner to the... - Page 34 2. Plug the USB B connector (square end) into the USB port on the back of the scanner. IMPORTANT: There may be a sticker covering the USB port. If so, remove it before plugging in the USB cable. Scantron SelfScore Scanners...
-
Page 35: Turning The Scanner On
Chapter 2: Setting Up Your Scanner Turning the Scanner On CAUTION: If you are connecting the scanner to a computer, do not turn on the scanner before installing the scanner utilities software. Doing so may result in incorrect drivers being loaded. Press the switch on the back of the scanner to turn the scanner on (l). -
Page 36: Handling The "Recalibrate/See Manual" Message
2. Open the Control Panel and access the list of programs. Wait for the list to populate. 3. Select the Scantron scanner utilities you have installed on your computer, and click Uninstall. A message appears asking you to confirm that remove the selected application and all of its features. - Page 37 In this chapter: Verifying Proper Setup ....3-27 Configuring the Scanner ....3-30 Scanning Sheets .
-
Page 38: Chapter 3: Operating Your Scanner
Ensure that the positioning stand is in the down position. 2. Ensure that the input tray and output tray (or Select Stacker) are in place and that the adjustment bar is properly positioned for the sheets being scanned. Scantron SelfScore Scanners... - Page 39 Chapter 3: Operating Your Scanner 3. Ensure that the covers on the sheet deflector, read head, and printers are closed and fully seated. 4. Ensure that the power supply is plugged into both a wall outlet or power strip and the back of the scanner.
-
Page 40: Configuring The Scanner
USB cable if you will be collecting data with ScanTools software. Configuring the Scanner Your scanner comes pre-configured by Scantron ready to meet most scanning needs. However, should you have special requirements, use the background menus to configure the scanner. See Chapter 5, “Chapter 5: Using the Background Menu”... -
Page 41: Scanning Sheets
Chapter 2, “Chapter 2: Setting Up Your Scanner”. If the message is different from the one shown above, refer to the Scanning Tests, Surveys, and Ballots Using SelfScore guide (included with your scanner) for instructions on display panel messages. 2. Press the Press To Load button on the side of the input tray and while holding it down, complete steps 3 (optional), 4, and 5 in this procedure. - Page 42 Press To Load button is depressed. To release the lock after you have loaded sheets, depress the Press To Load button and release it. Scantron SelfScore Scanners...
- Page 43 6. Slide the paper guide so that it just touches the sheets. IMPORTANT: Release the Press To Load button if locked. Follow the instructions in the Scanning Tests, Ballots, and Surveys Using SelfScore guide to scan the type sheets that you just loaded. Operator’s Guide...
-
Page 44: Storing Information
Scanner status • Errors • What to do next • Button functionality See the Scanning Tests, Surveys, and Ballots Using SelfScore guide (included with your scanner) for explanations of all display panel messages. The messages are listed alphabetically. Scantron SelfScore Scanners... -
Page 45: Clearing Document Jams
You can use the following general procedure for clearing jams, or see the chapter on display panel messages in the Scanning Tests, Surveys, and Ballots Using SelfScore guide (included with your scanner) for more information on the specific error message that you received. - Page 46 Chapter 3: Operating Your Scanner NOTES Scantron SelfScore Scanners...
-
Page 47: Chapter 4: Scanner Modes
In this chapter: SelfScore Mode ......4-37 Scantron Score Emulation Mode..4-40... -
Page 48: Special Features
ASCII data as well. Otherwise the key and item analysis data is erased from memory when you start the next batch of tests or turn off the scanner. Special Features Some of the special features supported by SelfScore mode are: • Multiple keys •... -
Page 49: When To Avoid
• You have a PC and ScanTools software and want to collect ASCII data When To Avoid • Select a different mode if: • You need to use a custom form (ScanTools in combination with OMR with Imaging mode or OMR Only mode is best for that) •... -
Page 50: Scantron Score Emulation Mode
Scantron Score Emulation Mode Scantron Score mode allows you to use your scanner to perform the following Scantron Score functions. Test Scoring • Score multiple choice, true/false, and matching tests • Print a red error mark to indicate a wrong answer •... - Page 51 Printer Positioning There are small triangles on the scanner printer ruler indicating printer position locations. When operating in Scantron Score emulation mode, the printer position must be set to 2.5 inches and 6.2 inches to properly print the incorrect marks, percentage, score, etc.
- Page 52 2. Note the location of the cartridge holder inside the printer assembly. Also note the ruler, printer alignment mark, and thumbscrew that sits beside the cartridge holder. These are the elements used to position the printer. Scantron SelfScore Scanners...
- Page 53 3. Scantron Score forms require that printers used with an iNSIGHT 4ES scanner are positioned at 2.5 inches and 6.2 inches. Check the printer(s) to ensure that they are in the correct position. Operator’s Guide...
- Page 54 4. If the printer position requires adjustment, loosen the thumbscrew so you can move the printer. 5. Adjust the position of the second printer to the 6.2 inch mark. Scantron SelfScore Scanners...
- Page 55 6. Move the printer to the 2.5 inch mark and lightly tighten the thumbscrew. Replace the printer cover, ensuring that it is firmly seated. Operator’s Guide...
- Page 56 Select Stacker Note that the Select Stacker is not supported in Scantron Score emulation mode. Marking Keys and Scoring Tests For Single Sided Keys: Mark the Key Mark the key using the same form used by students. 2. Find the key marking row immediately above the first question.
- Page 57 End. For Two Sided Keys When using a form on a dual head scanner, Scantron Score emulation mode allows you to scan both sides of a form simultaneously, and print a total for both sides.
- Page 58 4. When finished feeding forms, press End. NOTE: If scanning to software (for example, Remark Classic OMR) press Save to transfer the data to the computer before pressing End. Scantron SelfScore Scanners...
- Page 59 Subjective Scores (on select forms): Mark the Key To print a combined objective and subjective score on each test: Mark the total possible subjective points in the Subjective Score area of the test key. Mark only one bubble per line, for a maximum of 163 points. 2.
- Page 60 3. Feed the ballot or survey key. 4. Feed the ballot or survey forms (up to 9,999). 5. Feed a Tally form. Troubleshooting • View on-screen error messages for error type and recovery information. • For technical assistance, Scantron SelfScore Scanners...
- Page 61 In this chapter: Entering the Background Menu ..5-52 Background Menu Flowchart ..5-53 Scanner Information ....5-54 Defaults Menu .
-
Page 62: Entering The Background Menu
Entering the Background Menu Enter the background menu by holding down both buttons for about five seconds. When the message “Background Menu” appears briefly, release the buttons. Scantron SelfScore Scanners... -
Page 63: Background Menu Flowchart
Background Menu Flowchart The background menu is organized as shown on the below. Operator’s Guide... -
Page 64: Scanner Information
Sheet Count Variables Where <Count>= • Number of sheets Description Sheet count refers to the number of sheets that have been scanned since the scanner was put into service. Press Next to advance to the next menu item. Scantron SelfScore Scanners... -
Page 65: Defaults Menu
Defaults Menu The Defaults menu is the first of three submenus within the background menu system. Using the Defaults menu, you can set display of comm status and power saver parameters. See below for a full description of each menu item. NOTE: See “Background Menu Flowchart”... - Page 66 • Reset to Off • Start over at 5 minutes NOTE: The default setting for the power saver is 5 minutes. Press Next to accept the displayed setting and to advance to the next menu item. Scantron SelfScore Scanners...
-
Page 67: Utilities Menu
Utilities Menu The Utilities menu is the second of three submenus in the background menu. In it, you will find utility programs that allow you to calibrate the read heads, view and set communications parameters, adjust the display brightness, turn on and off the leading edge skew check, and adjust the printer offset. - Page 68 Received a “Recalibrate Scanner...” message on the scanner display • Moved the scanner to a new location. • Been instructed to do so by Scantron Customer Support. For best results, perform the following before calibrating: • Clean the scanner and the read heads. See Chapter 7, “Chapter 7: Cleaning the Scanner”...
- Page 69 Comm Configuration Variables Where <Scanner Model>= • SelfScore Description This menu item allows you to display and configure the communications parameters. NOTE: The Comm Configuration menu item is not displayed if the scanner is displaying the “Recalibrate...
- Page 70 Start Record 6 = FF • End Record 1 = 0D • End Record 2 = 0A • End Record 3 = FF • End Record 4 = FF • End Record 5 = FF • End Record 6 = FF Scantron SelfScore Scanners...
- Page 71 • End Document = FF • Compress = 15 • Record Length = FFFF • Check Char = FF • Initiate From = CPU • Initiate Code = 11 • Positive = 11 • Negative = 1A • X-On = FF •...
- Page 72 Press Next to abort this function and to advance to the next menu item. To proceed with scanner configuration, feed the Scantron Configuration Sheet by simply placing it in the input tray after marking the sheet. It will automatically scan. A Comm Config Complete message will display.
- Page 73 Comm Config - Display Variables Where <Scanner Model>= • SelfScore Description This menu item allows you to display the communications configuration. Press Next to skip this function and advance to the next menu item. Press Display if you want the scanner to display each of the communications parameters on the display panel.
- Page 74 If that occurs, this function allows you to turn leading edge skew detection off to suppress the errors. However, Scantron cannot guarantee the accuracy of the data collected when leading edge skew detection is turned off.
- Page 75 Print Offset Variables Where <Position #>= • Whole numbers from +10 to -10 Description This menu item allows you to adjust the printer offset. Printer offset helps ensure that the error marks or answer verification marks are printed next to the question.
-
Page 76: Diagnostics Menu
This menu item allows you to test the scanner’s feed and print capabilities. The test feeds sheets loaded in the input tray, and the printers print a string of characters. Press Next to skip this test and to advance to the next menu item. Scantron SelfScore Scanners... - Page 77 Calibration sheets (part number 202-171-989). Press Next to skip this test and to advance to the next menu item. Press Run to proceed with the test. The following menu item appears. Place a stack of five, Scantron Reflective Calibration Operator’s Guide...
- Page 78 Sheets (part number 202-171-989) into the input tray so that the words “Scantron Reflective” are on top and enter the scanner first. Press Start to perform the test. The scanner scans the sheets. If the scanner passes the test, the following menu item appears.
-
Page 79: Exiting The Background Menu
Refer to the instructions for Top Read Validation above with the following exception: Place the Calibration Sheets in the input tray so that the words “Scantron Reflective” are face down and enter the scanner last. Exiting the Background Menu Description After you have navigated through the background menu, the menu item shown above appears. - Page 80 Scantron SelfScore Scanners...
-
Page 81: Chapter 6: Transport Printers
Troubleshooting ......6-83 Chapter 6: Transport Printers This chapter covers setting up and using the dual transport printers for SelfScore scanners. IMPORTANT: Remove the cartridges from the printers and store in a sealed container in a cool place if: •... -
Page 82: Getting Started
Installing or Replacing an Ink Cartridge NOTE: The scanner does not come with the ink cartridges installed. To install or replace an ink cartridge, follow these steps: Unlatch the printer cover and remove it. Scantron SelfScore Scanners... - Page 83 2. If replacing a used cartidge, remove it by holding the printer cartridge tab and pivoting the used cartridge out of the cartridge holder. 3. Prepare the new cartridge. • Remove the new cartridge from the box and peel off the tape that covers the ink cartridge nozzles.
- Page 84 This ensures that the cartridge is fully seated. 5. Repeat step 4 for the second printer. 6. Adjust the position of the printers as described in the next section. Scantron SelfScore Scanners...
-
Page 85: Positioning The Printers
These are the elements used to position the printer(s). 3. SelfScore forms require that the printers are positioned to 1.6 and 4.3 inches. There are small triangles on the scanner printer ruler indicating these two locations. - Page 86 Check the printer(s) to see if they are in the correct position. If not, use the following steps to position the printer(s). 4. Loosen the thumbscrew so that you can move the printer. Scantron SelfScore Scanners...
- Page 87 5. Move the printer to the 1.6 inch position and lightly tighten the thumbscrew. 6. Adjust the position of the second printer to 4.3 inches. Operator’s Guide...
-
Page 88: Testing The Printers
(Do not use Calibration Sheets as you may need those in the future.) 2. Hold down (at the same time) the left and right buttons found under the display panel for about five seconds to enter the background menu. The Scantron SelfScore Scanners... - Page 89 message Background Menu appears briefly. Release the buttons. 3. Press the Next button five times or until the following menu item appears. 4. Press Enter to enter the Diagnostics menu. The following menu item appears. 5. Press Run to run the Feed/Print test. For the printers to successfully pass the test, sheets must feed through the scanner and the printers must print characters on the sheets.
- Page 90 If the printer does not print on the sheets, verify that you have installed the ink cartridge as directed. Repeat the testing procedure. If printing still does not appear, call Scantron Customer Support for assistance as described in “Chapter 9: Product Support and Services” on page 97.
-
Page 91: Cleaning The Cartridge Holder
Cleaning the Cartridge Holder If ink leaks from the cartidge, it may be necessary to clean the cartridge holder. NOTE: Perform this procedure only if you are experiencing problems. You can damage the electrical contacts in the cartridge holder if you clean them too frequently. - Page 92 3. Using a clean swab, gently wipe the area of the cartridge holder that contains the electrical contacts. CAUTION: Do not spray any substance directly into or on the cartridge holder. Scantron SelfScore Scanners...
-
Page 93: Troubleshooting
Troubleshooting Use the following table to troubleshoot most printer problems. If after trying the table, you are not able to resolve your difficulty, contact, Scantron Customer Support as described in “Chapter 9: Product Support and Services” on page 97. If you have:... - Page 94 Scantron SelfScore Scanners...
-
Page 95: Chapter 7: Cleaning The Scanner
In this chapter: Schedule ......7-85 Supplies ......7-86 Procedure . -
Page 96: Supplies
Lint-free cloths • Canned air (with non-condensing propellant) Procedure IMPORTANT: Turn the scanner off before cleaning. An illustration to help you identify key parts that need to be cleaned is shown below. The recommended cleaning procedure follows. Scantron SelfScore Scanners... - Page 97 Raise the read head and sheet deflector. Also, remove the printer cover. 2. Spray canned air (with a non-condensing propellant) directly on the transport bed area. This removes large amounts of dust and other types of debris. Operator’s Guide...
- Page 98 CAUTION: Do not use the canned air after this step as it can blow dust on areas that have been cleaned. 4. Lightly dampen a lint-free cloth with water or with a static-reducing spray. Scantron SelfScore Scanners...
- Page 99 5. Using the dampened cloth, wipe along the transport bed. Start at one end of the bed and work to the other. 6. Lightly dampen a lint-free cloth with soapy water. Locate the drive rollers. Wipe the drive rollers using the lightly dampened cloth. CAUTION: Do not touch the read head with the soapy cloth.
- Page 100 11. Using the same cloth, clean the glass on the bottom read head. NOTE: Single read head units do not have glass beneath the top read head. Instead, they have black, shiny strip. This must also be cleaned. Scantron SelfScore Scanners...
- Page 101 12. Close the read head and sheet deflector. Also replace the printer cover. 13. Turn the scanner back on after it has had a chance to dry. Operator’s Guide...
- Page 102 Scantron SelfScore Scanners...
-
Page 103: Chapter 8: Troubleshooting
If you are still unable to resolve the problem, contact Scantron Customer Support as described in “Chapter 9: Product Support and Services” on page 97. NOTE: For information regarding error messages, see... -
Page 104: Troubleshooting Chart
• the number of sheets in the input tray is less than approxi- mately 100 sheets of 60-100 lb offset paper. • you are using Scantron sheets designed for use with the SelfScore scanner • you try powering the scanner down, and then up again. - Page 105 • the scanner covers are firmly closed. • the scanner has been cleaned as outlined in Chapter 7, “Chapter 7: Cleaning the Scanner”. • your forms are printed by Scantron. Data is not captured Make sure that: as expected (if you are •...
- Page 106 Scantron SelfScore Scanners...
-
Page 107: Chapter 9: Product Support And Services
Software Support ....9-99 Chapter 9: Product Support and Services This chapter explains how and where to get assistance with and supplies for your Scantron SelfScore scanner. Hardware Support and Form Orders Custom and Standard Form Orders www.ScantronStore.com Email: customer_service@scantron.com... -
Page 108: Hardware Support
Hardware Support Call For Scantron scanners, call (800) 338-5544. For all other hardware support, call (800) 228-3628. Outside the U.S. Contact your local sales agent. Email ScantronHelp@scantron.com • Before contacting Technical Support, gather the following information: • Customer number: listed on the shipping documents •... - Page 109 Software Support The Scantron Technical Support Department can provide product support in a variety of ways. Call (800) 445-3141 between 6:00 A.M. and 8:00 P.M., Central Time, Monday through Friday. Before contacting Technical Support, gather the following information: • Type of computer and the operating system you are using •...
- Page 110 NOTES Scantron SelfScore Scanners...
-
Page 111: Appendix A: Recalibration
• Moved the scanner to a new location. • Instructed to do so by Scantron Customer Support. NOTE: Do not recalibrate unless required to do so. Recalibrating too often can produce less than optimal results. Operator’s Guide... -
Page 112: Procedure Overview
Preparing for Recalibration For best results, perform the following before calibrating: • Clean the scanner and the read head(s) as outlined in Chapter 7, “Chapter 7: Cleaning the Scanner”. • Ensure that the calibration forms are clean and undamaged. Scantron SelfScore Scanners... -
Page 113: Navigating The Background Menu
Navigating the Background Menu In order to recalibrate, you need to navigate the background menu to get to the Top Head Calibrate and Bot Head Calibrate functions. Use the following procedure. Enter the background menu by holding down both buttons for about five seconds. When the message “Background Menu”... -
Page 114: Top Head Calibration
Press Start to begin calibration. Press Next at any time to abort calibration. 3. When calibration is complete, the following menu item appears. 4. Press Next to complete calibration and to advance to the next menu item. Scantron SelfScore Scanners... -
Page 115: Bottom Head Calibration
Bottom Head Calibration NOTE: Single read head scanners have only a top read head. If your scanner has a single read head, skip this part of the procedure. From the menu item shown above, perform a bottom read head calibration using the Bot Head Calibrate function. - Page 116 NOTES Scantron SelfScore Scanners...
-
Page 117: Index
Index Connecting the Scanner to the Assembling the Scanner ....2-11 Computer ..........2-23 Background Menu Flowchart ... 5-53 Default Config - Set ..... 5-60 Bar Code Test ......... 5-69 Defaults Menu .........5-55 Bot Head Calibrate ..5-59 A-105 Defaults Submenu ......5-55 Bot Read Validation .....5-69 Diagnostics Menu ...... - Page 118 Specifications ........1-5 Preparing for Recalibration ..A-102 Standard Features ......1-5 Print Offset= ........5-65 storing information .......3-34 Printer Features ......6-72 Supplies ..........7-86 Procedure ......... 7-86 System Requirements .....1-6 Procedure Overview ....A-102 Testing the Printer(s) ....6-78 Scantron SelfScore Scanners...
- Page 119 Top Head Calibrate ....... 5-57 Top Head Calibrate Function A-104 Top Read Validation ..... 5-67 Transport Bed Closed View ..1-3 Transport Bed Open View .....1-2 Troubleshooting ......6-83 Troubleshooting Chart ....8-94 Turning the Printer(s) On Or Off .. 6- Turning the Scanner On ....2-25 Understanding Display Panel Messages ..........3-34 Uninstalling the Drivers and Scanner...
- Page 120 © 2019 Scantron Corporation. All rights reserved. # 277 287 074...
Need help?
Do you have a question about the SelfScore and is the answer not in the manual?
Questions and answers