Table of Contents
Advertisement
Advertisement
Table of Contents

Related Manuals for Icera St.Thomas iWash CS-20


Summary of Contents for Icera St.Thomas iWash CS-20
- Page 1 Muse iWash CS-20 Integrated Bidet Toilet Instruction Manual Read all opera ng instruc ons before installa on and use. Please save this instruc on manual and place in an easily accessible loca on. External appearance and specifica ons are subject to change for improvement of product without no ce.
-
Page 2: Important Safeguards
● Never operate this product if it has a damaged cord or plug. If it is not working properly, if it has been dropped or damaged, or dropped into water, call Icera Customer Service for assistance before use or installation. - Page 3 Do not twist or pull the connection hoses. This may affect the water supply or cause leaks. ● If the unit seems to be malfunctioning, do not use. Disconnect the power cord and call Icera Customer Service for assistance. Using a malfunctioning seat may be a fire and / or electric shock hazard.
-
Page 4: Main Unit
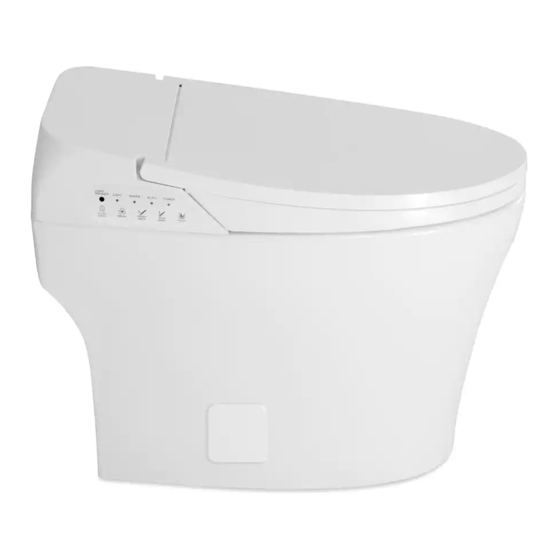
Parts Iden fica on Main unit Seat Control Non-sittable Panel Seat Lid Floor Bolt Covers Seat Manual Sensor Flush Buttons Wash Nozzle Deodorizer Cover Vent Warm Air In-bowl Dryer Outlet LED Nightlight Front Wash Rear Wash Spray Spray... -
Page 5: Parts Identification
Parts Identification Control Panel Light sensor Remote control Front... - Page 6 Parts Iden fica on Included Parts 3/4” Transfer hose x1 1/2” Supply line x1 Water filter x1 Brass filter adapter x1 Seat anchor (for top-side of seat) x2 AAA Battery x3 Rear hold-down bolt x1 Seat screw and washer x2 Washer x1 Nut x1 Rubber anchor cap x2...
- Page 7 Basic Instruc ons The bu ons on the toilet bowl are supplementary controls to be used in case of emergency. Water pressure and dryer temperature can be controlled via the remote only. Sit on the seat The seat sensor is triggered by skin touch. The sensor will recognize that the seat is occupied and the bowl pre-mist will run.
- Page 8 Func ons & Opera on Oscilla ng Wash Press to ac vate the OSCILLATING WASH. The nozzle moves back and forth while in REAR WASH posi on. This func on can also be ac vated in FRONT WASH posi on by pressing FRONT WASH, then press OSCILLATING WASH.
-
Page 9: Auto Flush
Func ons & Opera on Deodorizer Press the bu on to ac vate a 3 minute deodorizer cycle. Press again to end the deodorizer cycle early. LED Nightlight Ac vate the LED NIGHTLIGHT by pressing the bu on on the remote control. The nightlight will turn on only when the sensor reads a dim or dark environment, and will automa cally shut off... -
Page 10: Power On/Off
Func ons & Opera on User Presets SAVING USER PRESETS: Set water pressure and temperature, nozzle posi on, dryer temperature and seat temperature to the desired se ngs, then hold the bu on for 4 seconds to save. A long beep will sound once the se ngs are saved. Repeat for ACTIVATING USER PRESETS: Quickly press and release the user preset desired to ac vate. -
Page 11: Installation
Installation IMPORTANT NOTE: Installation of ceramic Please read through this entire list of instructions and take an inventory of included parts before beginning installation. If you have any questions at all, please call Customer Connect the Angle-valve at the Shut-off valve. Service at 855-444-2372 before you begin your installation. - Page 12 Installation Installation of ceramic 2a. Insert toilet mounting bolts (not supplied) into drain flange. IMPORTANT NOTE: Bolts must be no longer than 2-1/2”. Connect the Angle-valve at the Shut-off valve. 2b. Position waxless gasket (recommended, not included) on the floor flange. If a traditional wax ring is used, affix to the bottom of the toilet bowl.
-
Page 13: Water Supply
Installation Installation of ceramic 4a. Unbox the bidet seat and the rest of the bowl. Hand-tighten the bowl jet supply line to the 1/2” plastic inlet on the left bottomside of the seat. Connect the Angle-valve at the Shut-off valve. 4b. - Page 14 Installation Installation of ceramic 5a. Install seat anchors (included) in bowl deck holes. 5b. Insert plastic hold-down bolt (included) under the rear of the seat. Align seat with Connect the Angle-valve at the Shut-off valve. anchors/rear deck mounting hole. 5c. Affix seat to bowl by using screws/washers threaded into the anchors in front and by threading washer/plastic nut in the rear.
- Page 15 Installation Installation of ceramic 6a. Hand-tighten 1/2” brass adapter to the water filter (both included). 6b. Hand-tighten filter to 3/4” transfer hose. Using an adjustable wrench, GENTLY tighten Connect the Angle-valve at the Shut-off valve. each connection. DO NOT OVER-TIGHTEN AS THE PLASTIC THREADS WILL BE DAMAGED AND LEAK.
- Page 16 Installation Installation of ceramic 8. GENTLY align bowl over drain flange guiding mounting bolts through the mounting holes in the base of the bowl. Connect the Angle-valve at the Shut-off valve. Insert the flange-packing into the flange. flange-packing flange 9a. Thread bolt nuts onto bolts and hand-tighten. 9b.
- Page 17 Installation Installation of ceramic 10. Hand-tighten 1/2” supply hose to angle stop. Use a wrench to tighten fully. Ensure supply hose is not kinked or awkwardly bent. The hose should appear as in the picture below. Connect the Angle-valve at the Shut-off valve. Insert the flange-packing into the flange.
-
Page 18: Cleaning The Water Filter
Maintenance Troubleshoo ng Check the followings details before calling for service. Cleaning the water filter Check points Symptoms If your integrated toilet seems to be experiencing a loss of water pressure, your water filter Is the power off? Press either the STOP, REAR WASH, FRONT may be dirty or clogged and should be cleaned. - Page 19 Troubleshoo ng Check the followings details before calling for service. Check points Symptoms Is the power off? Press either the STOP, REAR WASH, FRONT WASH, or DRYER ON/OFF bu ons on the remote control to power on the unit. The unit does not operate Is the power plug disconnected? Make sure the plug is securely connected.
- Page 20 Product Specifica ons Item S-20.C01 (Bidet seat top only) Power Supply 120V~ , 60Hz Max. Power Consump on 1460W Power Cord Length (1.2 M) Water Supply Connec on Direct connec on to the water supply Water Supply Pressure 22 - 99 PSI ( 1.5 - 7.0 kgf/cm ) Rear 0.65L / min Water...
- Page 21 Remote Specifica ons Item S-20 RF Type of Equipment Remote Controller Rated Power Supply DC 4.5V Opera ng Frequency 2422MHz Modula on Type Ambient Temperature Range 37.4°F - 104°F ( 3°C - 40°C ) This device complies with Part 15 of the FCC Rules. Opera on is subject to the following two condi ons: 1.) This device may not cause harmful interference, and 2.) this device must accept any interference received, including interference that may cause undesired opera ons.
- Page 22 4 seconds. A er 4 seconds, the le most LED bar light under the ICERA logo should start to flicker. To change the frequency channel, quickly press the either the UP or DOWN water pressure adjustment bu on again.
-
Page 23: Warranty
Warranty CERAMIC TOILET BOWL - LIMITED LIFETIME WARRANTY Icera | St. Thomas Creations provides a LIMITED LIFETIME WARRANTY for its Icera and St. Thomas Creations branded vitreous china and fire clay plumbing fixtures to be free of defects in material and workmanship. - Page 24 IMPLIED WARRANTIES INCLUDING THAT OF MERCHANTABILITY AND FITNESS FOR A PARTICULAR PURPOSE ARE EXPRESSLY LIMITED IN DURATION TO THE DURATION OF THIS WARRANTY. ICERA AND/ OR SELLER DISCLAIMS ANY LIABILITY FOR SPECIAL, INCIDENTAL OR CONSEQUENTIAL DAMAGES. Some states/provinces do not allow limitations on how long an implied warranty lasts, or the exclusion or limitation of special, incidental or consequential damages, so these limitations and exclusions may not apply to you.
- Page 25 Warranty ICERA USA P.O. Box 4238 Westminster, CA 92684 P: 855-444-2372 E: service@icerausa.com 6522-0482-00 Rev. 0...
Need help?
Do you have a question about the St.Thomas iWash CS-20 and is the answer not in the manual?
Questions and answers