iOptron iPolar Installation
Polarscope for cem60
Hide thumbs
Also See for iPolar:
- Operation manual (9 pages) ,
- Replacing instructions (2 pages) ,
- Operation manual (14 pages)
Table of Contents
Advertisement
Quick Links
iPolar Installation –CEM60 Internal (#3339A‐060)
1. Remove CEM60 polar scope cover
2. Remove the bubble level from the polar
scope by releasing two bubble level set
screws.
3. Remove polar scope illuminating LED.
Then remove three flat head screws that
secure
Management System (CMS)
4. Pull the CMS input panel so a 1.5mm allen
wrench can be inserted. Find two set
screws that separated ~90 degree from
each other on RA axle that hold the optical
polar scope. Slightly release the set screws
so the polar scope can be pulled out.
Pull the polar scope out.
5.
the
input
panel
of
Cable
Advertisement
Table of Contents

Related Manuals for iOptron iPolar


Summary of Contents for iOptron iPolar
- Page 1 3. Remove polar scope illuminating LED. Then remove three flat head screws that secure input panel Cable Management System (CMS) 1. Remove CEM60 polar scope cover 4. Pull the CMS input panel so a 1.5mm allen wrench can be inserted. Find two set...
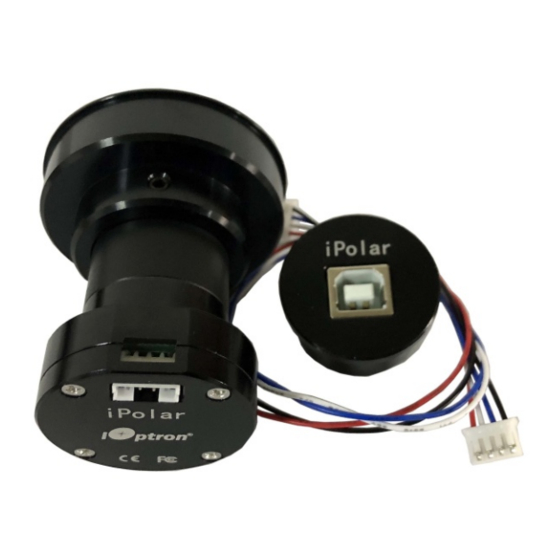
- Page 2 9. Pull the 4-wire cable from the rear end. 6. Remove polar scope front cover. Plug the cable into the socket on the rear 7. Plug the 4 wire cable to the iPolar. Insert it end USB adapter. into the CEM60 RA axle. You may use a wire to pull the cable to the rear of the RA axle.
- Page 3 11. Insert the iPolar USB adapter into the RA axle through the CMS input panel. Lock it by tightening the set screws. 12. Replace three flat head screws to secure the CMS input board.
Need help?
Do you have a question about the iPolar and is the answer not in the manual?
Questions and answers