Table of Contents
Advertisement
Quick Links
Advertisement
Table of Contents

Subscribe to Our Youtube Channel
Related Manuals for SOLZAIMA AMBER


Summary of Contents for SOLZAIMA AMBER
- Page 1 Instruction Manual English Firewood Round Stove AMBER Mod. 940 – B...
- Page 2 * All local regulations, including but not limited to national and European standards, must be observed when installing, operating and servicing the unit; * SOLZAIMA free standing fire units are tested and found to be in compliance with the EN 13240:2002 + EN 13240:2002/A2:2005 + EN 13240:2002/AC:2006 + EN 13240:2002/A2:2005/AC:2006 standards;...
-
Page 3: Table Of Contents
Contents Page Solzaima .......................... 4 Technical specifications ...................... 4 Unit components ....................... 6 3.1. Components ........................6 3.2. Opcionals ........................7 Assembly and disassembly of casings ................. 12 Installation ........................14 5.1. Combustion air and gas circulation ................. 14 5.2. Installation space requirements ..................16 Instructions for use ...................... -
Page 4: Solzaima
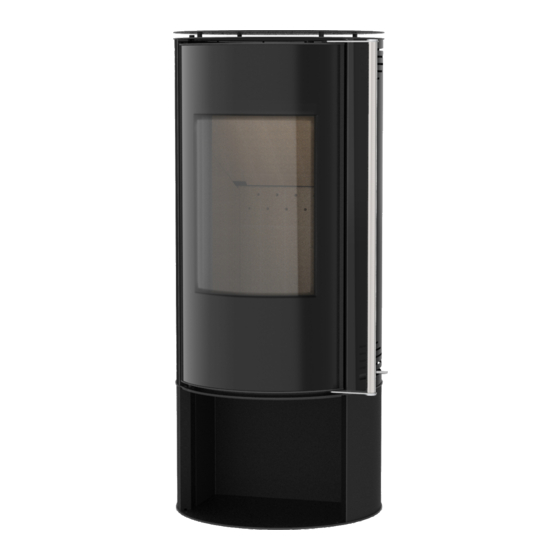
40 years. As a result of the persistence and unconditional support from a network of partners, Solzaima is currently the leading manufacturer of biomass heating units, especially with its range of central heating stoves with backboilers. - Page 5 Figure 1 - Equipment identification – Amber Front Side Back Figure 2 - General dimensions of the Amber stove...
-
Page 6: Unit Components
Height (mm) 1153 Widdth (mm) Depth (mm) Particles (mg/Nm3) OCG (mg C/m3) NOX (mg/m3) Table 1 - Technical characteristics of Amber stove 3. Unit components 3.1. Components Subtitles: A – Top cover B – Door C – Side cover D – Wooden Base E –... -
Page 7: Opcionals
3.2. Optional 3.2.1. Vertical/horizontal fume outlet The Amber stove has the option of using the smoke outlet horizontally or vertically, the latter being the way in which the salamander is prepared for the customer. To convert the smoke outlet to horizontal mode, the vermiculite pieces must be removed from the combustion chamber, the double baffle must be removed by loosening the two screws that fix it, and the screws that fix the neck must be loosened. - Page 8 Unscrew the 4 nuts and remove the cover. Figure 5 - Rear view of the equipment; (M) section to remove for external air inlet After removing the cover, place the optional air inlet kit as shown in Figure 6, tightening the kit with the 4 nuts that come in the package.
- Page 9 2- From the base of the equipment If the installation of the air inlet kit is from the base of the equipment, you can choose from 2 installation zones, from the back of the base or from below the base as shown in Figure 8. You must break the micro assemblies of the zone (M), using the option you chose to apply the kit.
- Page 10 1- Using a key, carefully fold the tab on the right side of the base, so that it is perpendicular to the side, as shown in Figure 10. Figure 10 - Preparation of the base of the equipment, to place the door 2- Place the magnet on the bent tab and secure it with the nut.
- Page 11 NOTE: So that the door, once fitted to the base, aligns with the circumference of the equipment, you can do so by adjusting the door handle, giving more or less inclination. You can also adjust the alignment of the door, by the tab of the base, also giving more or less inclination.
-
Page 12: Assembly And Disassembly Of Casings
Assembly and disassembly of casings If you need to remove the casings from the equipment, you should follow this procedure: 1- Remove the top, just lift it up, as shown in Figure 15. Figure 15 - Disassemble the worktop in the equipment 2- Loosen the screws on the upper part of the casings, as shown in Figure 16, so that the casings are free. - Page 13 3- Disassembly direction, to remove the casings, follow the direction of the arrows, as shown in Figure 17. Dismantling direction of the left side casing. Direction of disassembly of the right-side casing. Regulator side. Figure 17 - Disassembly of the side casings in the equipment 4- When you are about to mount the side casings pay attention to the following, the lower area of the covers has 2 holes, these holes, must match the screws that come in the machine, you can see in Figure 18.
-
Page 14: Installation
The installer should assess this need, according to the existing appliances overall air flow requirements; * The Amber units cannot be installed in areas where air extraction appliances, such as kitchen extractor fans, may operate simultaneously, as this may prevent the correct operation of the unit;... - Page 15 Figure 20 - Correct elbow angle Figure 21 - Incorrect elbow angle * Single-walled tubes installed on the exterior of a building results in the condensation of water vapour in the combustion gases. To prevent this, we recommend that you use a double-walled, insulated tube.
-
Page 16: Installation Space Requirements
A minimum of 1 m above the highest point Figure 26 - Incorrect chimney height Figure 27 - Correct chimney height * Never use the same chimney flue for more than one unit or open fireplace. For shared chimneys, each flue should individually reach the external outlets at the same level, to ensure that the air circulation adequately expels the exhaust fumes;... -
Page 17: Instructions For Use
* Before proceeding with the installation, please check whether the intended location allows an easy access to the unit, to facilitate any cleaning procedures as well as the inspection of the fume outlet connection; * Please make sure the air intake vents from the building are not obstructed; * Ensure that the structure built into the wall is of an appropriate size to house the unit;... -
Page 18: Power
Hard mountain regions the country Table 2 - Types of firewood that may be used in SOLZAIMA heat exchanger appliances, their geographical distribution and respective calorific value/reactions 6.2. Power * The power of your unit translates its heating capacity, i.e. the heat transfers your unit gets from the energy of the firewood used (usually measured in kW), which is directly dependent on the amount of firewood placed in the units. -
Page 19: Air Control
chimney cleaning to prevent possible fires in the chimney. If you are using wet or green firewood, the combustion control should always be more open to ensure proper combustion. Radiant heating It is emitted by the embers, the steel plate and the vermiculite plates on the back of the stove. The radiant heating is also transmitted through the glass to the compartment and heats the area in front of the stove. -
Page 20: Energetic Efficiency And Performance Ratings
A Solzaima unit of 5kW with an efficiency rate of 75% is expected to consume approximately 1,6 kg (3,5 lbs) of firewood per hour to heat a 35 m (377 sq ft) room. -
Page 21: Using The Unit For The First Time
A fire stove with an efficiency rate of 50% will need to consume 2,4 kg (5,3 lbs) of firewood. A Solzaima fire stove appliance with an efficiency rate of 75% only needs to consume 1,6 kg (3,5 lbs) of firewood. -
Page 22: Safety
* In case of fire in the chimney, immediately close the door of the unit, as well as the primary and secondary air inlets; * We recommend that you use only spare parts supplied by the manufacturer – (SOLZAIMA). -
Page 23: Cleaning And Maintenance
Cleaning and Maintenance 10.1. Cleaning - Ash build up should be regularly removed from the chamber (but only after turning off the unit and allowing it to cool down); - The glass should always be cleaned with an appropriate product , following the instructions for use and avoiding any contact of the cleaning product with the window rope gasket OR any painted metal parts, –... -
Page 24: Troubleshooting
5 - Be careful not to damage any of the unit's vermiculite plates (side, rear and back) when removing the baffle plate. Figure 31 - Action sequence to remove the fume baffle 11. Troubleshooting Problem Solution - Check moisture level of firewood - Check for any obstructions in the fume outlet / Check installation (insufficient draught) Glass gets dirty quickly... -
Page 25: End-Of-Life Units
End-of-life units * Around 90% of the materials used in the manufacture of these Solzaima units are recyclable, contributing towards a reduced environmental impact and a more sustainable planet; * End-of-life units should be taken to licensed waste operators. We advise contacting your local council to ensure their correct collection. -
Page 26: Glossary
Glossary * cal (Calories): the amount of heat required to increase the temperature of one gramme of water by one degree centigrade. * cms (centimetres): unit of measurement. * CO (carbon monoxide): A lightly flammable, colourless, odourless gas that is very dangerous due to its high toxicity. -
Page 27: Warranty
In order to exercise its rights, and provided that the term indicated in 3.1 is not exceeded, the Buyer must report in writing to Solzaima, S.A., the lack of conformity of the Product within a maximum period of: 3.5.1... - Page 28 Product must be performed exclusively by the Official Technical Services of the Brand. All services provided under this Guarantee will be performed Monday through Friday within the working time and calendar legally established in each region. All requests for assistance must be submitted to the Solzaima, S.A. Customer support service, means proper...
- Page 29 Buyer, and the Buyer shall be responsible for any charges arising therefrom. 3.17 The Warranty is valid for the Products and equipment sold by Solzaima SA solely and exclusively within the geographical and territorial zone of the country where the Product was sold by Solzaima.
- Page 30 4.10. The Products that have been modified or manipulated by people outside the Official Technical Services of the brand and consequently without the explicit authorization of Solzaima, SA.; 4.11. Damage caused by external agents (rodents, birds, spiders, etc.), atmospheric and / or...
- Page 31 4.16. The installation of the equipment supplied by Solzaima, S.A. should contemplate the possibility of their easy removal, as well as points of access to the mechanical, hydraulic and electronic components of the equipment and the installation. When the installation does not allow immediate and safe access to the equipment, the additional cost of access and security will always be borne by the Buyer.
- Page 32 From the moment they are removed from the equipment, the Parts used are considered as waste. Solzaima as a producer of waste in the scope of its activity is obliged by the legislation in force to deliver them to a licensed entity that performs the proper waste management operations under the law and therefore is prevented from giving them another destination, whatever.
-
Page 33: Statement Of Performance
Statement of performance ECLARAÇÃO DE ESEMPENHO ECLARACIÓN RESTACIONES ECLARATION OF ERFORMANCE ÉCLARATION DE ERFORMANCE ICHIARAZIONE DELLE PRESTAZIONI DD-044 º 1. Código de identificação único do produto-tipo | Código de identificación único del tipo de producto | Unique identification code of the product type | Le code d'identification unique du type de produit | Codice unico di identificazione del tipo di prodotto –... - Page 34 Especificações técnicas harmonizadas | Características essenciais | Desempenho | Desempeño | Performance Especificaciones técnicas armonizadas Características esenciales | Essencial | Prestazione | Harmonized technical specifications | characteristics | Caractéristiques Spécifications techniques harmonisées essentielles | Caratteristiche essenziali | Specifiche tecniche armonizzate De acordo com os requisitos | De De acordo com relatório de ensaio OK (A1).
- Page 35 Please read this Instruction Manual carefully and keep it for future reference. All Solzaima products come with a 2-year warranty. APPROVED PRODUCT...
Need help?
Do you have a question about the AMBER and is the answer not in the manual?
Questions and answers