Table of Contents
Advertisement
Quick Links
Advertisement
Table of Contents

Subscribe to Our Youtube Channel
Summary of Contents for BH FITNESS H973
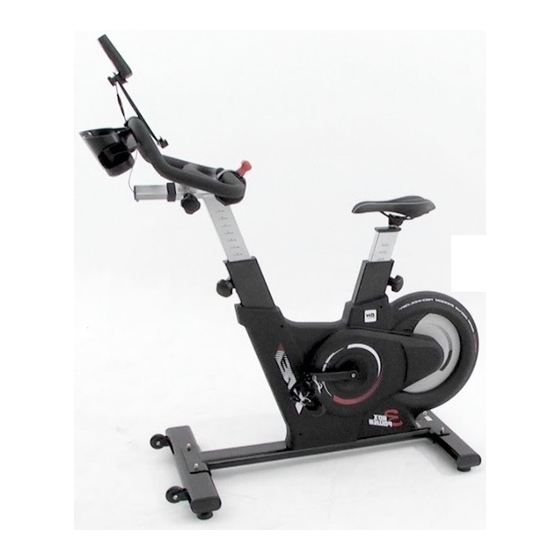
- Page 1 H973 H915P OWNER’S MANUAL...
- Page 3 ATTENTION: Read instructions carefully, failure to do so may cause permanent damage to your body. Please verify that all parts associated with this product are in good condition and accounted for. During the assembly process please be sure to follow each step accordingly as it has been explained within the manual.
- Page 4 SAFETY INFORMATION: 1. Keep children and pets away from this equipment at all times. DO NOT leave them unsupervised in the room where the machine is kept. 2. If you experience dizziness, nausea, chest pains or any other symptom while using this machine STOP the exercise.
-
Page 5: Assembly Drawing
CAUTION: During assembly it is recommended that all bolts be tightened by hand, upon completing assembly, bolts should then be properly secured using the wrench provided. To avoid injury, check bolts carefully before use. Assembly Drawing STEP 1 Attach the front foot tube (35) first by lifting up the front of the frame and sliding the front foot tube under the frame. -
Page 6: Right Pedal
STEP 3 Screw the I-PAD bracket (41) onto handle bar (46) by clamp which is on the back of I-PAD bracket. Attach the pedals (20) into the crank arms (21), each pedal is marked with L (left) or R (right) to denote the side of the spinning bike they are on. - Page 7 Remark: Riding this bike backwards may loosen the pedals which will damage the threads. Please always check pedals to ensure that the pedals are tightened. If the pedals have become loose, tighten threads with the wrench supplied to ensure they are securely attached. STEP 4 Insert the Monitor (49) on the I-PAD Bracket (41) and tighten it with screw.
- Page 8 MOVING There are moving wheel (11) located in front foot tube for moving the machine. Kind reminder: There are the labels next to the release levers of frame. That is reminding the user adjust the lever to proper direction to prevent interference. Please make sure the lever direction as following before your training.
- Page 9 Instruction It is important that the handlebar and seat are set at the correct height for your body. Ask your instructor for assistance. Handlebar adjustment - Adjusting the handlebar height-Undo the adjuster release lever that is located where the handlebar post fits into the frame.
-
Page 10: Exploded Drawing
Exploded Drawing... -
Page 11: Part List
Part list Name Unit No. Name Unit Saddle 29 End cap for foot tube Rubber cover for seat post 30 Fixed bolt for foot tube 31 Rear foot tube complete 3,2,40 Seat post w/ rubber cover, stopper REAR foot tube pad (w/ washer, Bolt for brake system set screw) End cap for handlebar post... -
Page 12: Maintenance Chart
Maintenance Chart DESCRIPTION Daily Weekly Monthly Quarterly Annually Keep machine clean: Wipe machine down with clean & dry fabric to clear dirt & sweat. Wipe Anti-rusty cream or similar on the seat post set, handlebar set Visual check Check security of handle bar post & seat post Check security of saddle Remove handlebar post and clean... - Page 13 一. 主題說明 / General: 此電子錶為 LCD 視窗(無背光模組) , 其顯示共有 7 種模式 : RPM , CALORIES, DISTANCE, TIME, PULSE (有搭配 HR receiver 的才有)。 This console has non-backlit LCD which displays Speed, RPM, Calories, Distance, Time and Pulse, optional. 二. 開機/關機顯示 Power On / Off: 當踏板運轉後電子錶...
- Page 14 c. RPM: 顯示機台每分鐘運轉次數或週期,顯示範圍 0~140。若 RPM 超過 140,基於安全因素電子錶顯示 STOP。 Rotation Per Minute. Range: 0~140. If RPM exceeds 140, LCD will show STOP for safety reason. d. DISANCE: 為一正數,其距離計數設定為 0,距離由 000.0 向上正數至 999.9,每次增加 0.1 公里(英里)。 Start from 0 and plus. Range: 000.0~999.9 ; Increase: 0.1 KM(ML) e.
- Page 16 BH Asia Ltd. No. 80, Zhongshan Rd., Daya Dist., Taichung City 42841, Taiwan Tel: +886 4 2560 9200 Fax: +886 4 2560 9280 Email: info@bhasia.com.tw...


Need help?
Do you have a question about the H973 and is the answer not in the manual?
Questions and answers