SUSS MJB4 Manual
Hide thumbs
Also See for MJB4:
- User manual (164 pages) ,
- Safety and installation (52 pages) ,
- User manual (5 pages)
Table of Contents
Advertisement
Quick Links
Suss Microtec MJB4 Mask Aligner Operating Procedure
1. General Perspective
This document describes the basic operating procedure to perform contact UV exposure
for photolithography.
1.1 General Safety Precautions
1.1.1 Do not perform any work that you are not specifically trained to do.
1.1.2 Never look directly at the UV light, which is harmful to the eyes.
1.2 Process Failure
If a problem that is not covered in this document occurs:
Do not try to fix or adjust anything by yourself.
1.2.1 Hold all work affected by the problem.
1.2.2 Report the problem to SYSTEM OWNER OR OMSCIENTIFIC staff immediately
1.2.3 In case of a lamp explosion, lamp breakage or any other danger, turn the main switch to
"OFF", leave the room and close the door immediately.
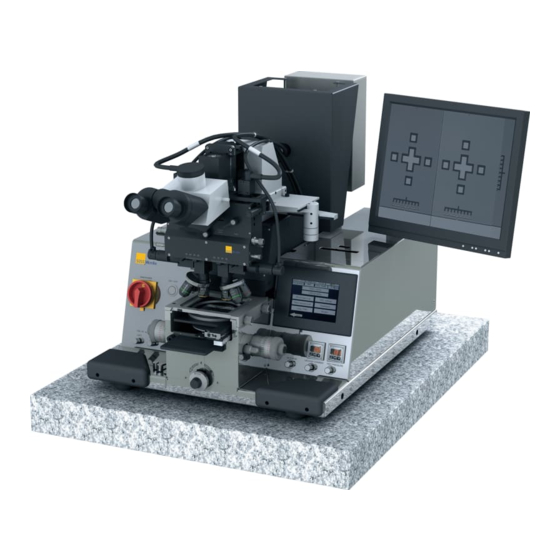
2. System Description and Specification
The MJB4 Mask Aligner can perform contact UV exposures for a variety of sample and mask
sizes. Sample sizes that can be accommodated range from small pieces to 4 inch wafers. It can be
used with masks of up to 5 by 5 inches. The maximum combined thickness of the substrate and
mask is 9 mm. The achievable position alignment accuracy is ~1 μm. The MJB4 allows 1 um
resolution in vacuum contact mode. The tool has 5 different contact modes (proximity, soft, hard,
low vacuum, and vacuum), and three different exposure modes (flood, first, and align and
expose).
3. Operation
3.1 Open CDA, N2 and vacuum line:
3.1.1 . Open the main valve of Nitrogen cylinder gas line.
Notes: Turn on the lamp without gas flowing might cause the explosion of the Hg lamp and damage
the system permanently.Turn on the switch of vacuum line.
pressure
values:
• Compressed air: 5.5 bar
• Nitrogen: 1.5 bar
• Vacuum: -0.8 bar (0.2 bar absolute)
• Vaccum chamber indicator value > 0.1
• WEC pressure: 0.05 - 0.1
3.1.2. Power on the system:
Turn the main switch clockwise to "ON" and press the "Electronics ON/OFF" button. The
start page appears in the display. It takes about 5 seconds for the system initializing. Then
press "=>" on the lower right of the touch screen to open the MAIN MENU.
On the MAIN MENU screen, press and hold the button "Maskvacuum is on". Note: the
button has to be pressed and hold for ~10sec until it changes to "Maskvacuum is off" after
beeping once.
Check and make sure all "Air", "Nitrogen", and "Vacuum" showing "OK" on screen. If
The machine should have the following
Advertisement
Table of Contents

Related Manuals for SUSS MJB4


Summary of Contents for SUSS MJB4
- Page 1 5 by 5 inches. The maximum combined thickness of the substrate and mask is 9 mm. The achievable position alignment accuracy is ~1 μm. The MJB4 allows 1 um resolution in vacuum contact mode. The tool has 5 different contact modes (proximity, soft, hard, low vacuum, and vacuum), and three different exposure modes (flood, first, and align and expose).
- Page 2 NOT, stop here and inform for help! ...
- Page 3 3.1.3 Igniting the exposure lamp (Controller CIC1200): The CIC1200 controller will be powered on automatically once system is powered on. Wait until “STAND BY” show on the alphanumeric display and make sure all “Air”, “Nitrogen”, and “Vacuum” showing “OK” on the MAIN MENU screen (see step 3). Then press the key ...
- Page 4 Raise the sample by gently pushing the contact lever forward until it stops. Note: this should be a smooth process. If you feel resistance when pushing the handle, pull it back and double check the position of the sample holder. Make sure the marks are aligned. Do NOT violently push the handle.
- Page 5 Attention: Never adjust the sample if the mask and sample are in contact! Doing so will damage the mask and the sample. 3.1.8 Align the TSA Microscope with mask. The left, right, or both microscope objectives can be viewed in the eyepieces by using the SPLIT-FIELD SELECTOR directly under the microscope eyepieces.
- Page 6 3.1.8 Setting exposure values: Raise the sample back to the contact level with the separation level knob. The screen will change to exposure window automatically. Active EXPOSURE SETTING window by press EXPOSURE VALUE button. You can set the exposure parameters through touch screen.
- Page 7 Lower the sample by pulling the contact lever backward. Note: the TSA microscope will be lift up from focus level and the touch screen will switch to MAIN MENU window automatically. Pulling out the transport slide as far as it can go. Take off the sample from the chuck. If you need to expose another sample with same type of substrate, repeat from STEP 8.
Need help?
Do you have a question about the MJB4 and is the answer not in the manual?
Questions and answers