Advertisement
KOBALT
and the K Design
are registered
®
®
trademarks of LF, LLC. All Rights Reserved.
ATTACH YOUR RECEIPT HERE
Serial Number
Questions, problems, missing parts? Before returning to your retailer, call our customer
service department. For service in Canada, call 1-866-206-0888,
8 a.m. - 4:30 p.m., EST, Monday – Friday. For service in the United States, call
1-866-235-5112, 8 a.m. - 5 p.m., CST, Monday – Friday.
AB141072B
2050
1.4
MAX PSI
MAX GPM
Purchase Date
1
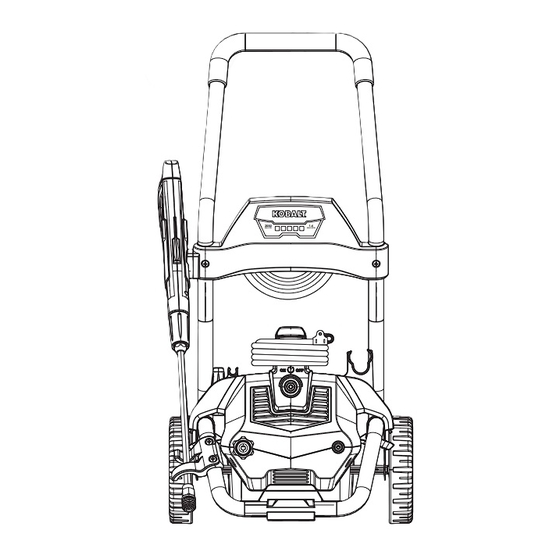
2-In-1 ELECTRIC
PRESSURE WASHER
MODEL #KPW 2N1
kobalttools.com
ITEM
XXXXXXX
Français p. 21
Advertisement
Table of Contents

Subscribe to Our Youtube Channel
Related Manuals for Kobalt KPW 2N1


Summary of Contents for Kobalt KPW 2N1
- Page 1 2050 MAX PSI MAX GPM ITEM XXXXXXX 2-In-1 ELECTRIC PRESSURE WASHER MODEL #KPW 2N1 Français p. 21 KOBALT and the K Design are registered ® ® trademarks of LF, LLC. All Rights Reserved. ATTACH YOUR RECEIPT HERE Serial Number Purchase Date Questions, problems, missing parts? Before returning to your retailer, call our customer service department.
-
Page 2: Table Of Contents
Care and Maintenance ..................... 16 Troubleshooting ........................ 18 One-Year Limited Warranty ....................19 Replacement Parts List ....................20 PRODUCT SPECIFICATIONS SPECIFICATIONS Max PSI Max GPM Cold Water Model (lbs/sq. in.) (Gal/per min) Only Volts Amps Weight (lbs.) KPW 2N1 2,050 36.4 ✔ kobalttools.com... -
Page 3: Package Contents
PACKAGE CONTENTS PW909106K 1 .4 Soap – Black 0° – Red 15° – Yellow 25° – Green PART DESCRIPTION QUANTITY PART DESCRIPTION QUANTITY Hose Holder Nozzle Holder Handle Extension Lance Rotary Nozzle Wheels O-ring Kit Spray Gun Quick Connect Nozzle Spray Gun Trigger Lock Power Washer Unit Spray Gun Holster... -
Page 4: Hardware Contents
HARDWARE CONTENTS (shown actual size) Screw Screw Qty. 2 Qty. 2 Cotter Pin Qty. 2 Axle Pin Qty. 2 SAFETY INFORMATION Please read and understand this entire manual before attempting to assemble, operate, or install the product. This manual contains information that relates to PROTECTING PERSONAL SAFETY and PREVENTING EQUIPMENT PROBLEMS. - Page 5 SAFETY INFORMATION WARNING To reduce the risk of injury, the user must read and understand the instructions before using this product. • To avoid personal injury and/or damage to property and to maximize your power washing experience, carefully follow all of the safety tips, instructions, warnings and safeguards and become familiar with all of the controls.
- Page 6 SAFETY INFORMATION • NEVER use a water supply to your power washer that exceeds 150 PSI maximum. • NEVER disconnect the high pressure hose from the power washer while the system is pressurized. • NEVER permanently engage the trigger mechanisms on the spray gun. •...
-
Page 7: Assembly Instructions
ASSEMBLY INSTRUCTIONS ASSEMBLY INSTRUCTIONS Frame Assembly 1. Install axel pins (AA), and wheels (J) to lower frame (G). Secure with cotter pins (DD). Hardware Used Axle Pin Cotter Pin 2. Install nozzle holder (H) to lower frame (G). Secure with two screws (BB). Hardware Used Screw kobalttools.com... - Page 8 ASSEMBLY INSTRUCTIONS ASSEMBLY INSTRUCTIONS ASSEMBLY INSTRUCTIONS 3. Press buttons on lower frame (G) extensions and install handle (B). Lower frame extensions will click when handle is in proper position. 4. Install hose holder (A) onto back side of upper handle (B). Secure with two screws (CC). Hardware Used Screw kobalttools.com...
- Page 9 ASSEMBLY INSTRUCTIONS 5. Slide spray gun holster (M) into place on the upper handle (B). 6. Place power washer unit (F) into position on the lower frame (G). 7. Pull back on collar at one end of soft PVC hose (N). Push firmly to connect hose to spray gun (K).
- Page 10 ASSEMBLY INSTRUCTIONS ASSEMBLY INSTRUCTIONS 8. Locking Spray Gun (before Lance installation) To lock trigger of spray gun (K), point gun away from you and turn dial to lock (“3ˮ and “9” position). Squeeze or pull trigger to make sure it is locked. ALWAYS leave in locked position when not in use.
- Page 11 ASSEMBLY INSTRUCTIONS ASSEMBLY INSTRUCTIONS 11. To remove nozzle (E), pull back on collar of lance (I) and pull out nozzle. 12. Pull upward on latches that are located on sides of lower frame (G). Once upper latch is flush, push down until lower latch clicks into place.
- Page 12 ASSEMBLY INSTRUCTIONS 14. Slide spray gun (K) with extension lance (I) into spray gun holster (M). Place rotary nozzle (C) into place on power washer unit (F) for storage. 15. Attach a garden hose to built in garden hose adapter. The water is now connected to your power washer.
-
Page 13: Operating Instructions
OPERATING INSTRUCTIONS • Turn on water supply at the faucet. • Make sure the power switch is off (light will be off). Unlock • Unwind the power cord completely and plug into a grounded 120 volt outlet. • Turn the safety lock button on the spray gun to unlocked. While pointing the spray gun in a safe direction, squeeze the trigger on the spray gun until there is a steady stream of water, letting the water and air out of the hose. - Page 14 OPERATING INSTRUCTIONS • Always test a small area to avoid chance of damaging the surface. • When using the detergent, fill it with a properly formulated detergent or cleaner with water ratio according to instructions on the container. Close detergent tank when done filling. •...
- Page 15 OPERATING INSTRUCTIONS Removing Power Washer Unit from Frame for Handheld Operation • Locate latches on the lower side of frame. Unlock latches by pulling downward on the latches. Place a foot on the pad at the front of the lower frame and then lift the power washer unit off the frame.
-
Page 16: Care And Maintenance
OPERATING INSTRUCTIONS • NEVER use a narrow high pressure stream of water on soft surfaces susceptible to damage. • Use the 25˚ angle quick connect nozzle when cleaning windows. Be sure to place the nozzle approximately four to five feet away from the window with the nozzle at forty five degree angle. Squeeze the trigger and vary the spray pattern and angle until optimum cleaning efficiency is achieved. - Page 17 CARE AND MAINTENANCE Cleaning Garden Hose Adapter • The screens inside the adapter should be cleaned periodically. Rinse it with clean water, and then place it back in the adapter. Cleaning Nozzles • A clogged or partially clogged nozzle can cause significant reduction of water pressure coming out of the nozzle and/ or cause the unit to pulsate while spraying.
-
Page 18: Troubleshooting
TROUBLESHOOTING If you have any questions regarding the product, please call one of our customer service departments. In Canada, call 1-866-206-0888. In the United States, call 1-866-235-5112. PROBLEM CORRECTIVE ACTION Unit will not turn 1. Make sure the power washer is OFF. Plug in the electrical cord to a grounded 120 volt outlet (no electrical extension cord should be used). -
Page 19: One-Year Limited Warranty
TROUBLESHOOTING PROBLEM CORRECTIVE ACTION The power washer 1. When the water is connected, the accessories are assembled properly, turns on for and the power switch is turned on, the power washer may turn on for 1 - 2 2 seconds, shuts seconds to prime the pump. -
Page 20: Replacement Parts List
O Ring Kit PW909383SS 15° QC Nozzle PW4221440 Extension Lance PW3400960 25° QC Nozzle PW4221450 Wheel PW4620400 Garden Hose Adapter XXXXXXXX Printed in China KOBALT and the K Design are registered ® ® trademarks of LF, LLC. All Rights Reserved. kobalttools.com...
Need help?
Do you have a question about the KPW 2N1 and is the answer not in the manual?
Questions and answers