Table of Contents
Advertisement
Technical guide
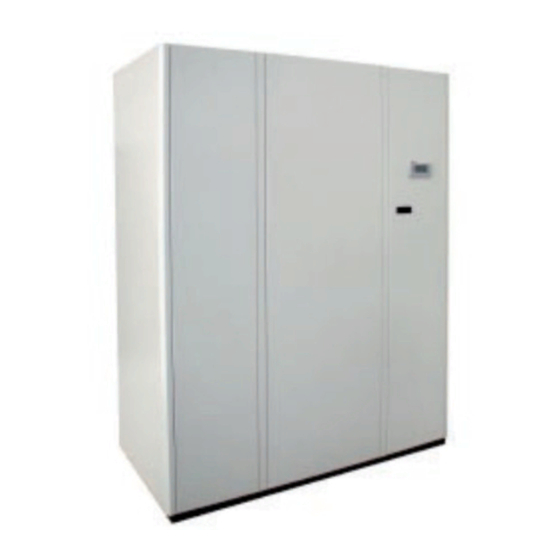
Mercury Close Control Unit
Direct Expansion Unit
EDAB / EUAB / EDAV / EUAV / EDWB / EUWB / EDWV / EUWV
1105-1106-2107-2207-2109-2209-2111-2211-2113-2213-2216-
2218-2222-4222-2225-4225-4228
Chilled Water Unit
EDCB / EUCB / EDCV / EUCV
0070-0100-0120-0170-0200-0250-0270-0340-0400
April 2012
PKG-SVX19B-E4
Advertisement
Table of Contents
Troubleshooting

Related Manuals for Trane MERCURY EDAB 1105A


Summary of Contents for Trane MERCURY EDAB 1105A
- Page 1 Technical guide Mercury Close Control Unit Direct Expansion Unit EDAB / EUAB / EDAV / EUAV / EDWB / EUWB / EDWV / EUWV 1105-1106-2107-2207-2109-2209-2111-2211-2113-2213-2216- 2218-2222-4222-2225-4225-4228 Chilled Water Unit EDCB / EUCB / EDCV / EUCV 0070-0100-0120-0170-0200-0250-0270-0340-0400 PKG-SVX19B-E4 April 2012...
- Page 2 PKG-SVX19B-E4...
-
Page 3: Table Of Contents
Contents GENERAL INSTRUCTIONS Cleaning and replacing the filters Information contained in the manual Troubleshooting Symbols MERCURY - CHILLED WATER Storage Technical characteristics Storage after use Operating description Disposal Name and description of the main components Disposal of the machine Checks to be made on delivery SAFETY Unloading the unit General Instructions... -
Page 4: General Instructions
It is an integral part of the product. essential precautions. The descriptions and illustrations in this manual are unbinding; Trane reserves the right to make any alterations reliminary oPerations it sees fit in order to improve the product without having to Power supply and data processing system: update this document. - Page 5 • FINNED COIL WARNING! The fans of some machine models are Remove the finned coils from the machine. integral part of the carrying structure. Removing - Materials: copper, aluminium, steel. the fans can compromise the stability of the • HUMIDIFIER frame.
-
Page 6: Safety
• %rHmin=30% • %rHmax=70% personnel must wear individual safety devices. Safety during maintenance work Trane will only consider itself responsible for the safety, reliability and performance of the machine if: All repair work must be carried out by professionally qualified •... -
Page 7: Introduction
INTRODUCTION Presentation of the system The Mercury precision air conditioners are designed for environments which are characterised by the presence of highly technologically advanced equipment: telecomms and internet centres, data processing rooms and any type of environment which is characterized by high concentrations of power. The Mercury series consists of 2 types of conditioners: •... - Page 8 MODELS The code which distinguishes the models is composed of 9 characters: MODELS Identifying prefix of the Mercury family The code which distinguishes the models is composed of 9 characters: Air discharge U = Upflow (upwards discharge) D = Downflow (downwards discharge) Identifying prefix of the Mercury family Operating typology Air discharge...
- Page 9 SYMBOLS APPLIED TO THE MACHINES SYMBOL MEANING High voltage Sharp edges Moving parts SYMBOLS APPLIED TO THE PACKAGES SYMBOL MEANING FRAGILE: handle with care DO NOT STORE IN DAMP CONDITIONS: the packaged unit must be stored in a dry place CENTRE OF GRAVITY: shows the centre of gravity of the packaged unit KEEP AWAY FROM HEAT: the unit must be stored away from heat sources THIS SIDE UP: indicates the correct position of the packaged unit...
-
Page 10: Mercury - Direct Expansion
MERCURY - DIRECT EXPANSION Technical characteristics AIR COOLED DIRECT EXPANSION UNITS WITH BACKWARD CURVED BLADE FANS Model EDAB - EUAB 1105A 1106A 2107A 2207A 2109A 2209A Height 1960 1960 1960 1960 1960 1960 Width 1010 1010 1310 1310 1310 1310 Depth Weight Number of refrigerant circuits... - Page 11 AIR COOLED DIRECT EXPANSION UNITS WITH EC BACKWARD CURVED BLADE FANS Model EDAV - EUAV 1105A 1106A 2107A 2207A 2109A 2209A Height 1960 1960 1960 1960 1960 1960 Width 1010 1010 1310 1310 1310 1310 Depth Weight Number of refrigerant circuits Number of compressors Power supply voltage 400V/3ph+N/50Hz...
- Page 12 CHILLED WATER DIRECT EXPANSION UNITS WITH BACKWARD CURVED BLADE FANS Model EDWB - EUWB 1106A 2109A 2113A 2216A 2218A Height 1960 1960 1960 1960 1960 Width 1010 1310 1720 2171 2171 Depth Weight Number of refrigerant circuits Number of compressors Power supply voltage 400V/3ph+N/50Hz Model EDWB...
-
Page 13: Operating Description
The room unit and external condenser form an autonomous sealed the outside using air cooled refrigerant heat exchangers (condensers). circuit once installed. The TRANE remote condensers used with The room unit and external condenser form an autonomous sealed circuit MERCURY units include a precise electronic system to regulate the fan once installed. -
Page 14: Name And Description Of The Main Components
Name and description of the main components A User terminal B Electrical panel door C Cover panels D Electrical panel E Filters F Fans G Cooling circuit H Brazed plate heat exchanger (present in chilled water models) MODELS ED/EU 1105 - 2218 MODELS ED/EU 2222 - 4228 PKG-SVX19B-E4... - Page 15 Description of the components A - User terminal MODELS ED/EU 1105 - 2218 Allows the unit to be turned on or off and the configuration and visualization of the condition of the machine. • A1 LCD Display • A2 ALARM key: visualization and reset of alarms; when the alarm is activated, it flashes red.
- Page 16 G - Cooling circuit G4 G5 • G1 Compressor • G2 High pressure switch • G3 Schrader Valve • G4 Safety Valve • G5 Shut -off valve • G6 Circuit Exit • G7 Circuit entrance • G8 Liquid receiver • G9 Dehydration filter •...
-
Page 17: Checks To Be Made On Delivery
Check that the delivery is complete and inform the carrier of supplied on request from Trane. However, the upflow units any damage to the unit which may be attributed too careless (upwards air flow) with air intake through the rear or front can or inappropriate transportation. -
Page 18: Door Opening And Removal Of The Panels
Door opening and removal of the panels Installation of the mounting frame To install the unit on raised flooring using the mounting frame, Door opening carry out the following procedures: • a flexible seal at least 5 mm thick should be fitted To open the door of the unit, carry out the following between the raised floor panels and the mounting frame procedure:... -
Page 19: Internal Protection Panels
Internal protection panels MODELS ED. 1105 - 2218 The technical compartment, the electric heaters and the autotransformer fans are protected by internal protection panels for safety reasons and to allow the opening of the external panels without triggering the unit’s safety alarms. In the figures below, the different types of internal protection panels are shown on various types of machines. -
Page 20: Electrical Connections
Electrical connections • refer to the wiring diagram and connect the cable to the main switch D5. WARNING! Electrical connection of the machine to the power supply must ONLY be carried out POWER SUPPLY CABLE by a qualified electrician. (at customers at care) WARNING! Electrical lines must be established in full respect of CEI standards. -
Page 21: Connection To The Drains
Connect the drainage tube of the unit to the collection tray DIGITAL CONFIGURABLE INPUTS (U4) of the humidifier. Terminal board 51-20 Connect the drainage tube of the humidifier (U7) to the - User drains of the building using a rubber or plastic tube, which - ON - OFF Remote is resistant to high temperatures (minimum 100 °C) with an - Flooding sensor (SAS) -
Page 22: Refrigerant Connections On Air Cooled Units
Refrigerant connections on air cooled units Installation guide WARNING! The pipes must always be protected from the sun. Choosing the diameter of the discharge tube The discharge line must be sized in such a way that it guarantees the flow of oil, in particular when operating at partial load, avoiding the return of the condensate refrigerant to the head of the compressor and prevent excessive vibration and noise due to the pulsations of hot gas, vibrations of the compressor, or both. -
Page 23: R410A
R410A Graphic 1 Discharge tube - horizontal line 18,0 14 mm 12 mm 16,0 16 mm 14,0 12,0 10,0 18 mm 20 mm 22 mm 24 mm 28 mm Cooling capacy/circuit (kW) Graphic 2 Discharge tube - vertical line 18,0 12 mm 14 mm 16,0... - Page 24 Graphic 3 Unacceptable DP/L DP/L DP/L DP/L = 14 = 12 = 10 DP/L DP/L DP/L Acceptable DP/L DP/L DP/L Recommended DP/L Equivalent lilne [m] Equivalent line [m] PKG-SVX19B-E4...
- Page 25 Conforming to the Standards EN 14276-1 and EN 14276-2 the minimum recommended thickness for the gas supply pipe where bends are made for the air cooled units with R410A refrigerant, must be equal to the values present in the attached table below.
-
Page 26: Backflow Line Dimensioning (Liquid)
BACKFLOW LINE DIMENSIONING (LIQUID) To avoid gas development inside the line and to ensure an adequate pressure is reached inside the laminating unit, the liquid line must be correctly dimensioned. Generally, the systems are dimensioned so that pressure loss along the line causes a variation of the saturation temperature between 0,5 K and 1 K During the installation of the cooling unit, a solenoid... - Page 27 (preferably less than 30 m) therefore the diameter of the welding connections prepared by Trane may not match with the diameter of the pipes, if so we recommend to use the special reductions. PKG-SVX19B-E4...
-
Page 28: Type Of Oil Recommended With Maneurop Compressors
Evacuation of the refrigeration circuit and charging of refrigerant WARNING! The charging and maintenance of the refrigeration circuit must only be carried out by a qualified hydraulic technician. The refrigeration circuit is pre-charged with nitrogen. To load the refrigerant, carry out the following procedure: R410A •... -
Page 29: Connection For Water Cooled Units
Connection for water cooled units If the water temperature falls to below the dew point of the air conditioner, isolate the piping with closed cell material WARNING! The laying of the lines and hydraulic (e.g.: Armaflex or equivalent) to avoid condensation; the connections must only be carried out by a isolation must allow the accessibility of the valves and the qualified plumber. -
Page 30: Manual Start Up And Shut Down Of The Unit
MANUAL START UP AND SHUT DOWN OF WA R N I N G ! D u r i n g p ro l o n g e d b re a ks a THE UNIT spontaneous migration of the refrigerant may occur in the casing of the compressor, which may WARNING! Check that the refrigerant circuit has cause foaming of the oil and consequent damage... -
Page 31: Setting And Adjustment
To shut down the unit carry out the following procedure: HOW TO ADJUST FAN SPEED In the ED*B and EU*B units, the speed of the fan rotation can be WA R N I N G ! D u r i n g p ro l o n g e d b re a ks a varied by using the ATR transformer (F1). - Page 32 After having selected the voltage level, carry out the connection in the following way: • with the unit turned off, open the front panels and the door of the electrical panel and the internal protection panels; • select the supply voltage by positioning the main switch to «0»...
- Page 33 MODELS WITH A PHASE CONTROL VOLTAGE REGULATOR To reach the head required by the system for conditioners with fans carrying a CE marking, the input voltage percentage can be adjusted from the user terminal (A). To select the voltage percentage to be applied, carry out the following procedures: •...
-
Page 34: Setting The Regulation And Safety Devices
Setting the regulation and safety devices Setting the air flow sensor After starting up the unit, set the following set points (see The FS differential pressure switch intervenes if the fan (or the microprocessor control manual): one of the fans) stops working. •... -
Page 35: Setting The Dirty Filter Sensors
Setting the dirty filter sensors MAINTENANCE The PFS differential pressure switch is set according to the Check every three months: loss of load dependent on the dirt inside the filters and the Carry out the following checks every three months: air flow. -
Page 36: Cleaning And Replacing The Filters
Cleaning and replacing the filters OTHER MODELS To clean and replace the filters carry out the following Models ED. 2222 ÷ 4228 procedures: To clean and replace the filters carry out the following • open the front panels of the machine; procedures: •... -
Page 37: Troubleshooting
Troubleshooting Troubleshooting is made easier by the indications on the control panel display: when an alarm signal is displayed, consult the control panel instruction manual. If necessary, call the nearest Service Centre describing the nature of the fault and its possible cause displayed on the control. - Page 38 HUMIDITY CONTROL PROBLEM POSSIBLE CAUSE CHECK/CORRECTIVE ACTION A) The parameter settings on the control panel are See control panel instruction manual. not correct. Check the latent load, fresh air conditions and B) The latent load is higher then expected. volume; external air infiltration. ROOM HUMIDITY TOO C) The compressor does not function during See «THE COMPRESSOR(S) DOESN’T / DON’T...
- Page 39 REFRIGERANT CIRCUIT PROBLEM POSSIBLE CAUSE CHECK/CORRECTIVE ACTION A) There is non-condensable air or gas in the refrigerant circuit, with bubbles in the flow sight Evacuate the refrigerant circuit and recharge. glass; excessive sub-cooling. 1) Check the fan operation and rotation direction in the remote heat exchanger.
- Page 40 COMPRESSORS PROBLEM POSSIBLE CAUSE CHECK/CORRECTIVE ACTION A) The room temperature is too low. See «ROOM TEMPERATURE TOO LOW». B) The air flow is too low or is absent. See «LOW AIR FLOW». C) The liquid line solenoid valve is not completely Check the valve opening.
-
Page 41: Mercury - Chilled Water
MERCURY - CHILLED WATER Technical characteristics CHILLED WATER UNITS WITH BACKWARD CURVED BLADE FANS Model EDCB - EUCB 0070 0100 Height 1960 1960 Width 1010 1010 Depth Weight Chilled water flow (*) 18,6 25,5 Chilled water flow (**) 3240 4480 Electric supply voltage 400V/3ph+N/50Hz Model EDCB - EUCB... -
Page 42: Operating Description
CHILLED WATER UNITS WITH EC BACKWARD CURVED BLADE FANS Model EDCV - EUCV 0070 0100 0120 0170 0200 0250 Height 1960 1960 1960 1960 1960 1960 Width 1010 1310 1310 1721 2172 2172 Depth Weight Chilled water flow (*) 4690 5750 7270 9210... -
Page 43: Name And Description Of The Main Components
Name and description of the main components A User terminal B Electrical panel door C Cover panels D Electrical panel E Filters F Fans G Chilled water valve Description of the components A - User terminal Allows the unit to be turned on or off and the configuration and visualization of the condition of the machine. - Page 44 C - Cover panels Allow access to the internal components of the machine. D - Electric panel • D1 Magnetothermic - auxiliary - heater (optional) - humidifier (optional) - fans • D2 Interface board • D3 Dirty filter sensor • D4 Air flow sensor •...
-
Page 45: Checks To Be Made On Delivery
• guarantee conditions flooring using mounting frames or appropriate floor stands supplied on request from Trane. However, the upflow units Unloading the unit (upwards air flow) with air intake through the rear or front can To unload the unit from the pallet, carry out the following be installed also on floors which are not raised. -
Page 46: Positioning Of The Unit
• the electrical energy distribution system has been Installation on flooring which is not raised produced in respect of CEI standards, suitable for the Installation on flooring which is not raised can occur without characteristics of the unit; using bases, but only on upflow models (upwards air flow) •... -
Page 47: Internal Protection Panels
MODELS EUCB - EUCV 0070, 0100, 0120, 0170,0200, 0250 NOTE: After having removed the side panels, the non- removable protective panel, blocks accessibility to the inside of the machine. MODELS EDCB - EDCV 0070, 0100, 0120, 0170,0200, Removal of the rear panels 0250, 0270 To remove the rear panels, carry out the following procedure:... -
Page 48: Electrical Connections
Electrical connections • refer to the wiring diagram and connect the cable to the main switch D5. WARNING! Electrical connection to the machine to the power supply must ONLY be carried out POWER SUPPLY CABLE by a qualified electrician. (at customers at care) WARNING! Electrical lines must be established in full respect of CEI standards. -
Page 49: Connection To The Water Drain
To connect the auxiliary connections to the terminal board Direct connection to the drains of the building carry out the following procedures: Connect the drainage tube of the unit to the drains of the • pass the cables through the power supply cable inlet building using a rubber or plastic tube with an internal D7B;... -
Page 50: Hydraulic Connections
Maintain a minimum slope of 1% downstream of the Filling the hydraulic circuit siphon. WARNING! The water used to fill the hydraulic circuit must be filtered. Drain WARNING! Filling the hydraulic circuit must only be carried out exclusively by a qualified hydraulic technician. -
Page 51: Manual Start Up And Shut Down Of The Unit
MANUAL START UP AND SHUT DOWN OF • check that the tracts of corrugated pipe with siphon, both THE UNIT internal and external to the conditioner, have been filled with water in the installation phase; WARNING! Check that the refrigerant circuit has •... -
Page 52: Setting And Adjustment
SETTING AND ADJUSTMENT To obtain the required prevalence of the implant, it is possible to vary the voltage by selecting one of the following levels, Selecting the power supply of the fans suitable for models from 0070: 140V -160V -180V -190V -200V -210V -220V -230V WARNING! Before establishing the electrical models from 0100 to 0270: connection, make sure that the power supply... - Page 53 EDCB/EUCB 0120 EDCB/EUCB 0250 FA[m /h=] 5700 7000 8000 9000 10200 11440 FA[m /h=] 10000 12000 16000 18680 19500 20570 EDCB/EUCB 0170 EDCB/EUCB 0270 FA[m /h=] 7800 9000 11000 14920 17000 19380 FA[m /h=] 13530 16030 17000 18725 19000 19500 20650 EDCB/EUCB 0200 EDCB/EUCB 0340 FA[m...
- Page 54 After having selected the voltage level, carry out the EDCB 0400 connection in the following way: FA[m /h=] 15940 19000 23000 25200 26500 27500 28100 • with the unit turned off, open the front panels and the door of the electrical panel and the internal protection panels;...
- Page 55 MODELS WITH FANS CARRYING A CE MARKING To reach the head required by the system for conditioners with fans carrying a CE marking, the imput voltage percentage can be adjusted from the user terminal (A). To select the voltage, carry out the following procedure: •...
-
Page 56: Setting The Regulation And Safety Devices
EDCV/EUCV 0120 EDCV/EUCV 0250 FA[m /h=] 5900 7000 8000 10000 11000 11740 FA[m /h=] 10540 12000 14000 16000 18680 21350 EDCV 0270 EDCV 0400 FA[m /h=] 12350 15000 17500 18761 19500 21000 22420 FA[m /h=] 16570 19000 23000 25217 2700 28500 31920 100 400 100 400 Setting the regulation and safety devices... -
Page 57: Setting The Air Flow Sensor
Setting the air flow sensor The FS differential pressure switch intervenes if the fan (or one of the fans) stops working. The factory set point of the FS differential pressure switch is at 0.8 mbar (= 80 Pa). As the difference in pressure between the suction and discharge of the fans depends on the air flow, it may be necessary to set the instruments after installation, checking that the contact closes when the fans are in operation. -
Page 58: Cleaning And Replacing The Filters
Cleaning and replacing the filters To clean and replace the filters carry out the following procedure: • open the front panels of the machine; MODELS WITH REAR AIR INTAKE • follow the instructions below and check the direction of the air flow indicated with a sticker on each filter; OTHER MODELS •... -
Page 59: Servomotor And Chilled Water Valve
Servomotor and chilled water valve Servomotor and hot water valve If necessary (in the event of a fault in the servomotor or To manually move the valve by turning the control knob the control system) manually move the valve as described clockwise to open and anti-clockwise to close. -
Page 60: Troubleshooting
Troubleshooting Troubleshooting is made easier by the indications on the control panel display: when an alarm signal is displayed, consult the control panel instruction manual. If necessary, call the nearest Service Centre describing the nature of the fault and its possible cause displayed on the control. PROBLEM POSSIBLE CAUSE CHECK/CORRECTIVE ACTION... - Page 61 HUMIDITY CONTROL PROBLEM POSSIBLE CAUSE CHECK/CORRECTIVE ACTION A) The parameter settings on the See control panel instruction manual. control panel are not correct. B) The latent load is higher then Check the latent load, fresh air conditions and volume; expected. external air infiltration.
-
Page 62: Accessories
ACCESSORIES Humidifier U1 Boiler cylinder U2 Water supply tray U3 High water level detector electrodes in the boiler cylin- U4 Condenser drain U5 Collector charge/discharge U6 Water input U7 Drain U8 Feed water solenoid valve U9 Boiler cylinder electric drainage valve U10 Overflow pipe (behind the cylinder) U11 Amperometric transformer for measuring the current (within the electrical panel) -
Page 63: Operating Principle
Operating principle In the electrode boiler humidifier, the current flowing between the electrodes in the water in the cylinder generates the heat necessary to boil the water. By controlling the water level and the concentration of salt measured in the steam cylinder (U1) using the feed water solenoid valve (U8) and the boiler cylinder electric drainage valve (U9), the electric current is regulated by means of an amperometric transformer (U11). -
Page 64: Maintenance
Maintenance The only maintenance required is periodic inspection and cleaning of the steam boiler components. This should be carried out at least once a year, preferably before the summer holiday shutdown. BOILER CYLINDER Limescale deposits must be cleaned periodically from the electrodes and particles of limescale must be removed from the filter at the base of the cylinder. -
Page 65: Electric Heaters
Electric heaters Mercury units can be equipped with electric heaters. For each model there are two levels available: standard and impro- ved. The fi nned elements are characterised by maintaining low power density of the surfaces in a highly effi cient way, therefore limiting overheating of the elements and consequently increasing their lifespan. -
Page 66: Temperature And Humidity Sensor
Replacing the electrical heaters WARNING! Before replacing the electrical heaters, disconnect the power supply from the unit. Make sure that it is not possible for the power to be turned on again while they are being replaced. WARNING! The heaters must only be replaced by a qualified electrician. The total power of the electrical heaters is divided into dif- ferent elements, each of 3 kW. -
Page 67: Connection To Fresh Air Intake
Connection to fresh air intake The unit can be fitted with an optional fresh air filter. During installation, connect the intake of the fresh air filter to the nearest external air inlet with a flexible hose which has a diameter of 100mm and secure the hose to the fresh air intake with a fastening collar. The connection from the unit to the external air inlet must have the shortest and straightest path possible. -
Page 68: Maintenance
Unit EDA*/EDW* 1105 - 1106 Unit EUA*/EUW* 1105 - 1106 Maintenance Clean, using a blast of compressed air, or replace the fresh air intake filters periodically. PKG-SVX19B-E4... -
Page 69: Discharge Temperature Threshold Sensor (Only On Chilled Water Models)
Discharge temperature threshold sensor (only on CHILLED WATER models) An NTC temperature sensor is an optional accessory which maintains the supply air temperature of the unit above a threshold value. The sensor is connected to the microprocessor control system as described in the electrical diagram of the unit. - Page 70 PKG-SVX19B-E4...
- Page 71 PKG-SVX19B-E4...
- Page 72 HVAC systems, comprehensive building services, and parts. For more information, visit www.Trane.com. Trane has a policy of continuous product and product data improvement and reserves the right to change design and specifications without notice. © 2012 Trane All rights reserved...
Need help?
Do you have a question about the MERCURY EDAB 1105A and is the answer not in the manual?
Questions and answers