Table of Contents
Advertisement
Available languages
Available languages
Quick Links
Advertisement
Table of Contents

Subscribe to Our Youtube Channel
Related Manuals for Axis Q3505-SVE


Summary of Contents for Axis Q3505-SVE
- Page 1 AXIS Q3505–SVE Network Camera Installation Guide...
- Page 2 Low Voltage (LVD) Directive 2006/95/EC. See Safety Every care has been taken in the preparation of this on page 3. document. Please inform your local Axis office of any • Restrictions of Hazardous Substances (RoHS) Directive inaccuracies or omissions. Axis Communications AB cannot 2011/65/EU.
- Page 3 FAQ database. この装置は、クラスB 情報技術装置です。この装置 Search by product, category, or phrase は、家庭環境で使用することを目 的としています • report problems to Axis support staff by logging in to が、この装置がラジオやテレビジョン受信機に近 your private support area 接して使用されると、 受信障害を引き起こすこと • chat with Axis support staff があります。...
-
Page 5: Hazard Levels
AXIS Q3505–SVE Network Camera Safety Information Read through this Installation Guide carefully before installing the product. Keep the Installation Guide for future reference. Hazard Levels DANGER Indicates a hazardous situation which, if not avoided, will result in death or serious injury. - Page 6 Battery The Axis product uses a 3.0 V BR/CR2032 lithium battery as the power supply for its internal real-time clock (RTC). Under normal conditions this battery will last for a minimum of five years. Low battery power affects the operation of the RTC, causing it to reset at every power-up. When the battery needs replacing, a log message will appear in the product’s server report.
-
Page 7: Dome Cover
AXIS Q3505–SVE Network Camera Dome Cover NO TICE TICE TICE • Be careful not to scratch, damage or leave fingerprints on the dome cover because this could decrease image quality. If possible, keep the protective plastic on the dome cover until the installation is complete. -
Page 9: Installation Steps
AXIS Q3505–SVE Network Camera Installation Guide This Installation Guide provides instructions for installing AXIS Q3505–SVE Fixed Dome Network Camera on your network. For other aspects of using the product, see the User Manual available at www.axis.com Installation Steps 1. Make sure the package contents, tools and other materials necessary for the installation are in order. -
Page 10: Optional Accessories
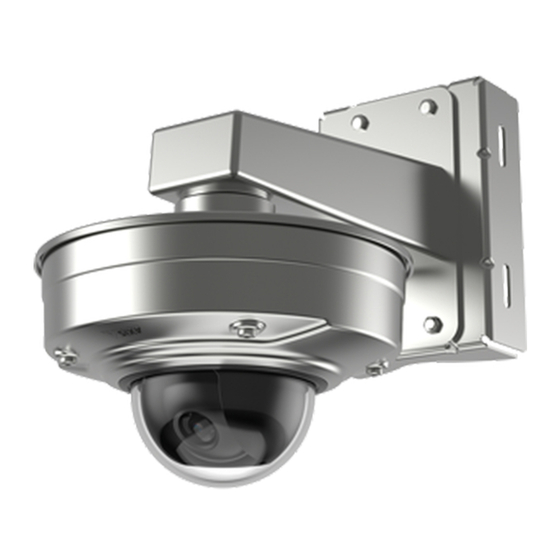
• AXIS Dome Intrusion Switch B • AXIS Q3505-SVE Smoked Dome • Multi-connector cable for connection of I/O and audio For information about available accessories, see www.axis.com Hardware Overview Mounting bracket Unit casing Cable gasket, network cable Cable gasket, multicable... -
Page 11: Led Indicators
AXIS Q3505–SVE Network Camera Dome cover Network connector Control button I/O connector Audio in connector Audio out connector SD card slot Status LED Function button Not used LED Indicators Note • The Status LED can be configured to flash while an event is active. -
Page 12: Status Led Behavior And Buzzer Signal For Levelling Assistant
PIRs, door/window contacts, glass break detectors, etc. When a signal is received the state changes and the input becomes active (shown under System Options > Ports & Devices). Audio Connector The Axis product has the following audio connectors:... -
Page 13: Multicable (Sold Separately)
For SD card recommendations, see www.axis.com Multicable (sold separately) The multicable can be purchased from an Axis reseller for connecting external equipment to the Axis product. The cable provides the following connectors: Audio connector - See Connectors on page 14... -
Page 14: Specifications
AXIS Q3505–SVE Network Camera I/O connector - See Connectors on page 14 Power connector - Not used. Specifications Product Classification Temperature Humidity AXIS Q3505–SVE IEC 60529 IP69K – 40°C to 10-100% RH (non-condensing) NEMA 250 60°C(– 40°F to 140°F) 4X-rated NO TICE TICE TICE Use a limited power source (LPS) with either a rated output power limited to ≤100 W... - Page 15 AXIS Q3505–SVE Network Camera 3– Configurable Digital input – Connect to pin 1 to activate, 0 to max 30 V DC (Input or or leave floating (unconnected) to deactivate. Output) Digital output – Connected to pin 1 when 0 to max 30 V DC, open...
-
Page 16: Connection Diagrams
AXIS Q3505–SVE Network Camera Connection Diagrams I/O Connector 0 V DC (-) DC output 12 V, max 50 mA I/O configured as input I/O configured as output Install the Hardware Mounting Bracket The mounting bracket has eight holes along the edge that should be used for fastening the bracket to a wall. - Page 17 AXIS Q3505–SVE Network Camera Depending on whether you want to use a junction box, or route the cables through or along the wall, follow the relevant instructions below. To mount the camera on a junction box: 1. Route the network cable (and the multicable if required) through the junction box and through the hole in the mounting bracket.
- Page 18 AXIS Q3505–SVE Network Camera NO TICE TICE TICE Not pulling the cable back could cause water to seep in and damage the product. 4. If using a multicable, remove the other cable gasket from the unit casing and discard it.
-
Page 19: Adjust Camera Angle
4. Remove the protective film from the dome cover. Access the Product AXIS IP Utility and AXIS Camera Management are recommended methods for finding Axis products on the network and assigning them IP addresses in Windows®. Both applications are free and can be downloaded from www.axis.com/techsup... -
Page 20: Set Zoom And Focus - Optical Zoom For Monitoring
Chrome or Firefox with other operating systems. For more information about using the product, see the User Manual available at www.axis.com Focus & Zoom If you have selected Optical zoom for installation, follow the instructions below to set focus and zoom. -
Page 21: Reset To Factory Default Settings
Further Information The User Manual is available at www.axis.com Visit www.axis.com/techsup to check if there is updated firmware available for your network product. To see the currently installed firmware version, go to Setup > About. Visit Axis learning center www.axis.com/academy for useful trainings, webinars, tutorials and... -
Page 22: Warranty Information
AXIS Q3505–SVE Network Camera Warranty Information For information about Axis’ product warranty and thereto related information, see www.axis.com/warranty/... -
Page 23: Niveaux De Risques
AXIS Q3505–SVE Network Camera Informations sur la sécurité Lisez attentivement ce guide d'installation avant d'installer l'appareil. Conservez le guide d'installation pour toute référence ultérieure. Niveaux de risques DANGER Indique une situation dangereuse qui, si elle n'est pas évitée, entraînera le décès ou des blessures graves. - Page 24 éviter d'endommager le produit. Batterie Le produit Axis utilise une batterie au lithium BR/CR2032 3,0 V comme alimentation de son horloge en temps réel interne (RTC). Dans des conditions normales, cette batterie a une durée de vie minimale de cinq ans.
-
Page 25: Couvercle De Dôme
AXIS Q3505–SVE Network Camera AVERTISSEMENT • Risque d'explosion si la batterie est remplacée de façon incorrecte. • Remplacez-la uniquement par une batterie identique ou une batterie recommandée par Axis. • Mettez au rebut les batteries usagées conformément aux réglementations locales ou aux instructions du fabricant de la batterie. -
Page 27: Procédures D'installation
AXIS Q3505–SVE Network Camera Guide d’installation Ce guide d'installation explique comment installer la caméra réseau AXIS Q3505–SVE à dôme fixe sur votre réseau. Pour toute autre information relative à l’utilisation du produit, consultez le manuel de l’utilisateur disponible sur le site www.axis.com Procédures d’installation... -
Page 28: Accessoires En Option
Interrupteur d'intrusion de dôme AXIS • Dôme fumé AXIS Q3505-SVE • Câble multiconnexion pour la connexion d’E/S et audio Pour plus d'informations sur les accessoires disponibles, consultez le site www.axis.com Aperçu du matériel Support de fixation Boîtier de l'unité Joint de câble, câble réseau Joint de câble, câble multiple... - Page 29 AXIS Q3505–SVE Network Camera Protection Couvercle de dôme Connecteur réseau Bouton de commande Connecteur E/S Connecteur d'entrée audio Connecteur de sortie audio Emplacement pour carte SD Voyant d'état Bouton Fonction Non utilisé Voyants Note • Le voyant d'état peut clignoter lorsqu'un événement est actif.
-
Page 30: Connecteurs Et Boutons
AXIS Q3505–SVE Network Camera Orange Fixe pendant le démarrage. Clignote pendant la mise à niveau du microprogramme. Orange / Rouge Clignote en orange/rouge en cas d'indisponibilité ou de perte de la connexion réseau. Comportement du voyant d'état et du signal sonore pour l'assistant d'alignement Pour plus d'information sur le bouton Fonction utilisé... - Page 31 • Réinitialisation du produit aux paramètres d’usine par défaut. Cf. page 40. • Connexion au service du Système d'hébergement vidéo AXIS ou au service AXIS Internet Dynamic DNS. Pour plus d'informations sur ces services, reportez-vous au Manuel de l'utilisateur. Bouton Fonction Le bouton Fonction permet de réaliser les opérations suivantes :...
-
Page 32: Câble Multiple (Vendu Séparément)
Pour obtenir des conseils sur la carte SD, rendez-vous sur www.axis.com Câble multiple (vendu séparément) Le câble multiple peut être acheté auprès d'un revendeur Axis pour connecter un équipement externe au produit Axis. Le câble fournit les connecteurs suivants : Connecteur audio - Cf. - Page 33 AXIS Q3505–SVE Network Camera Connecteurs Connecteur d'E/S Bloc terminal à 4 broches pour : • Alimentation auxiliaire (sortie CC) • Entrée numérique • Sortie numérique • 0 V CC (-) Fonction Bro-che Notes Caractéristiques 0 V CC 0 V CC (-) Sortie CC Peut servir à...
- Page 34 AXIS Q3505–SVE Network Camera 12 V max 50 mA Entrée/sortie configurée comme entrée Entrée/sortie configurée comme sortie Connecteur audio Connecteurs audio 3,5 mm (stéréo) 1 Pointe 2 Anneau 3 Manchon Entrée positive microphone Entrée microphone symétrique Masse Entrée audio symétrique/Entrée asymétrique négative...
-
Page 35: Installation Du Matériel
AXIS Q3505–SVE Network Camera Schémas de connexion Connecteur d'E/S 0 V CC (-) Sortie CC 12 V, maxi. 50 mA Entrée/sortie configurée comme entrée Entrée/sortie configurée comme sortie Installation du matériel Support de fixation Le bord du support de fixation comporte huit trous qui doivent être utilisés pour le fixer sur un mur. - Page 36 AXIS Q3505–SVE Network Camera Selon que vous souhaitez utiliser un boîtier de jonction ou faire passer les câbles le long du mur ou à travers le mur, suivez les instructions correspondantes ci-dessous. Montage de la caméra sur un boîtier de jonction : 1.
- Page 37 AXIS Q3505–SVE Network Camera A A A VIS Si vous ne tirez pas sur le câble, il existe un risque d'infiltration d’eau et d’endommagement du produit. 4. Si vous utilisez un câble multiple, retirez l'autre joint de câble du boîtier de l’unité et mettez-le au rebut.
-
Page 38: Utilisez Le Produit
4. Retirez le film protecteur du couvercle de dôme. Utilisez le produit Si vous souhaitez rechercher des produits Axis sur le réseau ou leur affecter des adresses IP sous Windows®, nous recommandons l’utilisation des applications AXIS IP Utility et AXIS Camera Management. Ces deux applications sont gratuites et peuvent être téléchargées... - Page 39 Pour plus d’informations concernant l’utilisation du produit, consultez le manuel de l’utilisateur disponible sur le site www.axis.com Focus & Zoom (Mise au point & zoom) Si vous avez sélectionné l'option Optical zoom for installation (Zoom optique pour l'installation), procédez comme suit pour régler la mise au point et le zoom.
-
Page 40: Réinitialisation Aux Paramètres D'usine Par Défaut
AXIS Q3505–SVE Network Camera Définir le zoom et la mise au point - Zoom optique pour la surveillance Pour définir l'option Focus & Zoom (Mise au point et zoom) lorsque vous avez sélectionné Optical zoom for monitoring (Zoom optique pour la surveillance) : Accédez à... -
Page 41: Pour Obtenir Plus De Renseignements
Pour connaître la version du microprogramme actuellement installée, reportez-vous à la page Setup > About (Configuration > À propos de). Visitez le centre de formation en ligne Axis sur le site www.axis.com/academy pour en savoir plus sur les formations, les webinaires, les tutoriels et les guides. -
Page 43: Weitere Nachrichtenstufen
AXIS Q3505–SVE Network Camera Sicherheitsinformation Lesen Sie das Installationshandbuch sorgfältig durch bevor sie das Produkt installieren. Bewahren Sie das Installationshandbuch für zukünftige Zwecke auf. Gefährdungsstufen GEFAHR Weist auf eine gefährliche Situation hin, die, falls nicht verhindert, zu Tod oder schweren Verletzungen führt. - Page 44 Produkts, wenn ein Batteriewechsel erforderlich ist. Weitere Informationen über den Serverbericht finden Sie auf den Setup-Seiten des Produkts, oder wenden Sie sich an den Axis Support. Die Batterie sollte nur bei Bedarf ersetzt werden. Wenden Sie sich in diesem Fall an den Axis Support unter www.axis.com/techsup.
- Page 45 AXIS Q3505–SVE Network Camera WARNUNG • Explosionsgefahr bei fehlerhaftem Batteriewechsel. • Die Batterie darf nur durch eine identische Batterie oder eine von Axis empfohlene Batterie ersetzt werden. • Verbrauchte Batterien sind gemäß den örtlichen Vorschriften oder den Anweisungen des Herstellers zu entsorgen.
-
Page 47: Empfohlene Werkzeuge
AXIS Q3505–SVE Network Camera Installationsanleitung In dieser Anleitung wird die Installation der festen AXIS Q3505–SVE Dome-Netzwerk-Kamera in Ihrem Netzwerk beschrieben. Weitere Informationen zur Nutzung dieses Produkts finden Sie im Benutzerhandbuch unter www.axis.com. Installationsschritte 1. Stellen Sie sicher, dass die Packungsinhalte, Werkzeuge und andere notwendige Materialien für die Installation in Ordnung sind. -
Page 48: Optionales Zubehör
• AXIS T91F61 Wandhalterung • AXIS Dome-Manipulationsschalter B • AXIS Q3505-SVE Getönte Kuppel • Mehrfachanschlusskabel zum Anschluss von E/A- und Audiogeräten Unter www.axis.com finden Sie Informationen über verfügbares Zubehör. Übersicht über die Hardware Montagehalterung Kameragehäuse Kabeldichtung, Netzwerkkabel Kabeldichtung, Mehrfachkabel Kameraeinheit... - Page 49 AXIS Q3505–SVE Network Camera Sichtschutz Kuppelabdeckung Netzwerkanschluss Steuertaste E/A-Anschluss Anschluss für Audioeingang Anschluss für Audioausgang SD-Kartensteckplatz Status-LED Funktionstaste Nicht verwendet LEDs Beachten • Die Status-LED kann so eingestellt werden, dass sie blinkt, wenn ein Ereignis aktiv ist. • Die Status-LED kann so eingestellt werden, dass sie blinkt, wenn die Einheit erkannt wird.
-
Page 50: Verhalten Der Led-Statusanzeige Und Summton Für Den Ausrichtungsassistenten
AXIS Q3505–SVE Network Camera Verhalten der LED-Statusanzeige und Summton für den Ausrichtungsassistenten Informationen zur Verwendung der Funktionstaste bei der Ausrichtung des Bilds finden Sie unter Anschlüsse und Tasten. Farbe Summer Kameraposition Durchgehend grün Durchgehender Ton Ausgerichtet Grün blinkend Kurzes Intervall... - Page 51 Die Steuertaste hat folgende Funktionen: • Zurücksetzen des Produkts auf die Werkseinstellungen. Siehe Seite 59. • Verbinden mit einem AXIS Video Hosting System-Service oder einem AXIS Internet Dynamic DNS-Service. Weitere Informationen zu diesen Diensten finden Sie in der Bedienungsanleitung. Funktionstaste Die Funktionstaste hat mehrere Aufgaben: •...
-
Page 52: Technische Daten
Dieses Produkt unterstützt microSD-/microSDHC-/microSDXC-Karten (separat erhältlich). Empfehlungen zu SD-Karten finden Sie unter www.axis.com. Mehrfachanschlusskabel (separat erhältlich) Das Mehrfachanschlusskabel zum Anschluss von Zubehör an das Axis Produkt erhalten Sie von Ihrem Axis Händler. Das Kabel weist folgende Anschlüsse auf: Audioanschlüsse - Siehe Anschlüsse auf Seite 53. - Page 53 AXIS Q3505–SVE Network Camera Anschlüsse E/A-Anschluss 4-poliger Anschlussblock Ein Beispielschaltbild finden Sie unter Anschlussschaltbilder auf Seite 54. Funktion Kon- Hinweise Technische Daten takt 0 V DC 0 V DC (-) Gleichstrom- Kann für die Stromversorgung von 12 V DC ausgang Zusatzgeräten verwendet werden.
-
Page 54: Installieren Der Hardware
AXIS Q3505–SVE Network Camera 2 Ring 1 Spitze 3 Schaft Audioeingang Symmetrischer Mikrofon-Plus- Symmetrischer Masse eingang (+)/unsymmetrischer Mikrofon-Minuseingang Mikrofon-/Leitungseingang (–) Audioausgang Masse Leitungsausgang (mono) Anschlussschaltbilder E/A-Anschluss 0 V (-) DC DC-Ausgang 12 V, max. 50 mA E/A als Eingang konfiguriert... - Page 55 AXIS Q3505–SVE Network Camera Es sind Bohrungen für die Montage der Halterung an folgenden Anschlussdosen vorhanden: • Standard-US-Doppelverteilerdose • Standard-US-Anschlussdose • Quadratische 4"-Anschlussdose • Achteckige 4"-Anschlussdose Befolgen Sie abhängig davon, ob Sie eine Anschlussdose verwenden oder die Kabel durch die Wand oder an der Wand entlang führen möchten, die entsprechenden nachstehenden Anweisungen.
- Page 56 AXIS Q3505–SVE Network Camera 2. Entfernen Sie die Kabeldichtung des Netzwerkkabels vom Kameragehäuse, siehe Übersicht über die Hardware. 3. Ziehen Sie zum Entfernen die Lasche an der Dichtung und führen Sie das Netzwerkkabel der mitgelieferten Durchführungshilfe für Netzwerkkabel durch die Kabeldichtung.
-
Page 57: Einstellen Des Kamerawinkels
AXIS Q3505–SVE Network Camera 8. Wickeln Sie das überstehende Kabel entlang der Wandhalterung auf und befestigen Sie das Kameragehäuse mit den beiden Schrauben an der Wandhalterung. 9. Überprüfen Sie, ob die Kabeldichtungen ordnungsgemäß am Kameragehäuse und den Kabeln montiert sind. -
Page 58: Zugriff Auf Das Produkt
AXIS Q3505–SVE Network Camera Zugriff auf das Produkt Für die Suche nach Axis Produkten im Netzwerk und zur Zuweisung einer IP-Adresse unter Windows® werden AXIS IP Utility und AXIS Camera Management empfohlen. Beide Anwendungen sind kostenlos und können von unserer Website unter www.axis.com/techsup heruntergeladen werden. -
Page 59: Zurücksetzen Auf Werkseinstellungen
AXIS Q3505–SVE Network Camera bewegt. Mit den Tasten << und >> wird die Fokusposition mehrere Schritte in die jeweilige Richtung bewegt. 4. Klicken Sie auf Enable iris (Blende aktivieren) sobald Sie zufrieden sind. Einstellen von Zoom und Fokus – Optischer Zoom für die Überwachung... -
Page 60: Weitere Informationen
Unter www.axis.com/techsup finden Sie Firmware-Aktualisierungen für Ihre Netzwerkprodukte. Um die aktuell installierte Firmware-Version zu sehen, gehen Sie auf Einrichten > Über. Besuchen Sie das Axis-Schulungszentrum www.axis.com/academy für anregende Schulungen, Webinare, Lernprogramme und Anleitungen. Gewährleistung Informationen zur Gewährleistung der Axis Produkte und hierzu verbundene Informationen, finden Sie unter www.axis.com/warranty/... -
Page 61: Livelli Di Pericolo
AXIS Q3505–SVE Network Camera Informazioni di sicurezza Leggere con attenzione questa guida all'installazione prima di installare il dispositivo. Conservare questo documento per usi futuri. Livelli di pericolo PERICOLO Indica una situazione pericolosa che, se non evitata, provoca morte o lesioni gravi. - Page 62 • Durante il trasporto del dispositivo Axis, utilizzare l'imballaggio originale o equivalente per evitare danni al dispositivo. Batteria Il prodotto Axis utilizza una batteria al litio da 3,0 V BR/CR2032 come alimentazione per il suo real-time clock (RTC) interno. In condizioni normali questa batteria avrà una durata minima di cinque anni.
-
Page 63: Cupola Di Protezione
AXIS Q3505–SVE Network Camera Cupola di protezione A A A VVISO VVISO VVISO • Fare attenzione a non graffiare, danneggiare o lasciare impronte sulla cupola di protezione, perché potrebbe diminuire la qualità dell'immagine. Se possibile, tenere la protezione in plastica sulla cupola fino a quando l'installazione non sarà completata. -
Page 65: Procedure Di Installazione
Guida all'installazione La presente Guida all'installazione fornisce le istruzioni necessarie per installare la telecamera di rete a cupola fissa AXIS Q3505-SVE nella rete in uso. Per ulteriori informazioni sull'utilizzo del dispositivo, consultare la Guida per l'utente disponibile all'indirizzo www.axis.com Procedure di installazione 1. -
Page 66: Accessori Opzionali
Interruttore anti-intrusione a cupola AXIS B • Cupola oscurata AXIS Q3505-SVE • Cavo multiplo per la connessione di I/O e audio Per informazioni sugli accessori disponibili, visitare il sito Web www.axis.com Panoramica dell'hardware Staffa di montaggio Casing dell'unità Guarnizione cavo, cavo di rete Guarnizione cavo, Multicable Unità... -
Page 67: Indicatori Led
AXIS Q3505–SVE Network Camera Coperchio della cupola Connettore di rete Pulsante di comando Connettore I/O Connettore ingresso audio Connettore uscita audio Slot per scheda SD LED di stato Tasto Funzione Non utilizzato Indicatori LED Nota • Il LED di stato può essere configurato per lampeggiare quando un evento è attivo. -
Page 68: Connettori E Pulsanti
AXIS Q3505–SVE Network Camera Comportamento del LED di stato e del segnale acustico per Levelling Assistant Per informazioni sul tasto Funzione utilizzato per il livellamento dell'immagine, consultare Connettori e pulsanti. Colore Segnale acustico Posizione telecamera Verde fisso Segnale acustico continuo... - Page 69 • Ripristino del dispositivo alle impostazioni predefinite di fabbrica. Consultare pagina 77. • Collegamento a un servizio AXIS Video Hosting System o AXIS Internet Dynamic DNS Service. Per ulteriori informazioni su questi servizi, consultare il Manuale Utente. Tasto Funzione Il tasto Funzione può essere utilizzato per più finalità: •...
-
Page 70: Dati Tecnici
Per i consigli sulla scheda SD, visitare il sito Web www.axis.com. Multicable (venduto separatamente) È possibile acquistare il Multicable presso il proprio rivenditore Axis per collegare un apparecchio esterno al prodotto Axis. Il cavo fornisce i connettori seguenti: Connettore audio - Consultare Connettori alla pagina 71 Connettore I/O - Consultare Connettori alla pagina 71 Connettore di alimentazione - Non utilizzato. - Page 71 AXIS Q3505–SVE Network Camera Connettori Connettore I/O Morsettiera a 4 pin Per un esempio di schema, consultare Schemi delle connessioni alla pagina 72. Funzione Note Specifiche 0 V CC 0 V CC (-) Uscita CC Può essere utilizzato anche per alimentare 12 V CC una periferica ausiliaria.
-
Page 72: Installazione Dell'hardware
AXIS Q3505–SVE Network Camera Schemi delle connessioni Connettore I/O 0 V CC (-) Uscita CC 12 V, max 50 mA I/O configurato come ingresso I/O configurato come uscita Installazione dell'Hardware Staffa di montaggio La staffa di montaggio è dotata di otto fori lungo il bordo che devono essere utilizzati per il fissaggio della staffa alla parete. - Page 73 AXIS Q3505–SVE Network Camera Attenersi alle procedure descritte di seguito, a seconda se si desidera utilizzare una scatola di derivazione o installare i cavi attraverso o lungo la parete. Per montare la telecamera su una scatola di derivazione: 1. Inserire nella scatola di derivazione il cavo di rete (e, se necessario, il Multicable) facendolo passare attraverso il foro sulla staffa di montaggio.
- Page 74 AXIS Q3505–SVE Network Camera A A A VVISO VVISO VVISO Se il cavo non viene tirato potrebbero verificarsi infiltrazioni d'acqua e danni al dispositivo. 4. Se si utilizza un Multicable, rimuovere l'altra guarnizione del cavo dal casing dell'unità ed eliminarla.
-
Page 75: Accedere Al Dispositivo
4. Rimuovere la pellicola protettiva dalla copertura a cupola. Accedere al dispositivo AXIS IP Utility e AXIS Camera Management sono i metodi consigliati per trovare i dispositivi Axis in rete e assegnare loro un indirizzo IP in Windows®. Queste applicazioni sono entrambe gratuite e possono essere scaricate da www.axis.com/techsup... - Page 76 AXIS Q3505–SVE Network Camera ® ® • Internet Explorer con Windows ® ® • Safari con OS X ® • Chrome o Firefox con altri sistemi operativi. Per ulteriori informazioni sull'utilizzo del dispositivo, consultare la Guida per l'utente disponibile all'indirizzo www.axis.com Messa a fuoco e zoom Se è...
-
Page 77: Ripristino Dei Valori Predefiniti Di Fabbrica
IP. Nota Gli strumenti per l'installazione e la gestione del software sono disponibili nelle pagine dedicate all'assistenza sul sito Web www.axis.com/techsup. Per ripristinare il dispositivo alle impostazioni predefinite di fabbrica: 1. Scollegare l'alimentazione dal dispositivo. 2. Tenere premuto il pulsante di controllo e ricollegare l'alimentazione. Consultare Panoramica dell'hardware alla pagina 66. -
Page 78: Ulteriori Informazioni
Setup (Impostazioni) > About (Informazioni su). Visitare il Centro di apprendimento Axis alla pagina www.axis.com/academy per servizi di formazione utili, webinar, tutorial e guide. Informazioni sulla garanzia Per informazioni sulla garanzia del dispositivo Axis e informazioni ad esso relative, consultare la pagina www.axis.com/warranty/... -
Page 79: Niveles De Peligrosidad
AXIS Q3505–SVE Network Camera Información de seguridad Lea esta Guía de instalación con atención antes de instalar el producto. Guarde la Guía de instalación para poder consultarla en otro momento. Niveles de peligrosidad PELIGRO Indica una situación peligrosa que, si no se evita, provocará... - Page 80 Batería Este producto de Axis utiliza una batería de litio BR/CR2032 de 3,0 V como fuente de alimentación del reloj interno en tiempo real. En condiciones normales, esta batería durará un mínimo de cinco años.
-
Page 81: Cubierta Del Domo
AXIS Q3505–SVE Network Camera Cubierta del domo A A A VISO VISO VISO • Preste atención a no arañar, dañar o dejar las huellas en la cubierta del domo, puesto que esto puede provocar una disminución de la calidad de imagen. Si es posible, mantenga el plástico de protección en la cubierta del domo hasta que se complete la instalación. -
Page 83: Pasos De La Instalación
Guía de instalación Esta Guía de instalación incluye las instrucciones necesarias para instalar la cámara domo de red fija AXIS Q3505–SVE en su red. Para conocer otros aspectos de uso del producto, consulte el Manual del usuario disponible en www.axis.com. -
Page 84: Accesorios Opcionales
• Domo ahumado AXIS Q3505-SVE • Cable multiconector para conexión de E/S y audio Para obtener información sobre los accesorios disponibles, visite www.axis.com. Información general del hardware Soporte de montaje Carcasa de la unidad Junta de cable, cable de red Junta de cable, multicable Unidad de cámara... -
Page 85: Indicadores Led
AXIS Q3505–SVE Network Camera Protector visual Cubierta del domo Conector de red Botón de control Conector de E/S Conector de entrada de audio Conector de salida de audio Ranura para tarjetas SD LED de estado Botón de función No se utiliza... -
Page 86: Comportamiento Del Indicador Led De Estado Y La Señal Del Avisador Acústico Con El Asistente De Nivelación
AXIS Q3505–SVE Network Camera Fijo durante el inicio. Parpadea durante la actualización del Ámbar firmware. Parpadea en ámbar/rojo si la conexión a la red no está disponible Ámbar/rojo o se ha perdido. Comportamiento del indicador LED de estado y la señal del avisador acústico con el Asistente de nivelación... - Page 87 Restablecer el producto a la configuración predeterminada de fábrica. Vea página 96. • Conectarse a un servicio AXIS Video Hosting System o al Servicio de DNS dinámico de Internet de AXIS. Para obtener más información sobre estos servicios, consulte el Manual del usuario.
-
Page 88: Especificaciones
Para conocer las recomendaciones de tarjeta SD, consulte www.axis.com. Multicable (se vende por separado) El multicable se puede adquirir en cualquier distribuidor de Axis para conectar el equipo externo al producto de Axis. El cable proporciona los siguientes conectores: Conector de audio - Vea Conectores en la página 89 Conector de E/S - Vea Conectores en la página 89... - Page 89 AXIS Q3505–SVE Network Camera Conectores Conector de E/S Bloque de terminales de 4 pines Para ver un ejemplo del diagrama, consulte Diagramas de conexión en la página 90. Función Notas Especificaciones 0 V CC 0 V CC (-) Salida de CC...
-
Page 90: Diagramas De Conexión
AXIS Q3505–SVE Network Camera 1 Punta 2 Anillo Manguito Entrada de Balanceado caliente Entrada de micrófono Tierra audio (+)/Entrada de línea/micrófono balanceado frío (-) no balanceado Salida de Tierra Salida de línea (mono) audio Diagramas de conexión Conector de E/S 0 V CC (-) Salida de CC 12 V, 50 mA máx. -
Page 91: Instalación Del Hardware
AXIS Q3505–SVE Network Camera Instalación del hardware Soporte de montaje El soporte de montaje dispone de ocho orificios en el borde que deben utilizarse para ajustar el soporte a la pared. Si va a montar el soporte en una caja de conexiones, también incluye orificios para las siguientes opciones de montaje: •... - Page 92 AXIS Q3505–SVE Network Camera 3. Fije el soporte de montaje a la pared con los tornillos inoxidables adecuados. 4. Fije el conducto al soporte de montaje. Conexión de los cables y fijación de la cámara al soporte de montaje 1. Inserte la tarjeta microSD en la unidad de la cámara (opcional).
-
Page 93: Ajuste De Ángulo De La Cámara
AXIS Q3505–SVE Network Camera 8. Enrolle el cable sobrante en el soporte de montaje y fije la carcasa de la unidad en el soporte de montaje con los dos tornillos. 9. Compruebe que las juntas de cable han quedado montadas correctamente con respecto a la carcasa de la unidad y los cables. -
Page 94: Fijación De La Cubierta Del Domo
Acceso al producto Se recomiendan AXIS IP Utility y AXIS Camera Management como métodos para buscar los productos de Axis en la red y asignarles direcciones IP en Windows®. Ambas aplicaciones son gratuitas y pueden descargase de www.axis.com/techsup El producto se puede utilizar con la mayoría de los sistemas operativos y navegadores. Los navegadores recomendados son ®... - Page 95 AXIS Q3505–SVE Network Camera En la pestaña Advanced (Configuración avanzada), se puede ajustar el enfoque manualmente: 1. Haga clic en Open iris (Abrir iris) para abrir el iris hasta su máxima posición. Con esto se consigue la menor profundidad de campo posible y, por tanto, las condiciones óptimas de enfoque.
-
Page 96: Restablecimiento A La Configuración Predeterminada De Fábrica
Visite el centro de aprendizaje de www.axis.com/academy para consultar guías, tutoriales, seminarios web y cursos que pueden resultarle útiles. Información de garantía Para obtener más detalles sobre la garantía del producto Axis y la información relacionada con ella, consulte www.axis.com/warranty/... - Page 97 AXIS Q3505–SVE Network Camera 安 安 安 全 全 全 情 情 情 報 報 報 本製品を設置する前に、このインストールガイドをよくお読みください。 インス トールガイドは、後で参照できるように保管しておいてください。 危 危 危 険 険 険 レ レ レ ベ ベ ベ ル ル ル 回避しない場合、死亡または重傷につながる危険な状 危 危 危 険 険 険...
- Page 98 AXIS Q3505–SVE Network Camera 安 安 安 全 全 全 手 手 手 順 順 順 注 注 注 記 記 記 • 本製品は、お使いになる地域の法律や規制に準拠して使用してください。 • 本製品は乾燥した換気のよい環境に保管してください。 • 本製品を不安定なブラケット、表面、または壁に設置しないでください。 • 本製品を設置する際には、適切な工具のみを使用してください。 電動工具を 使用して過剰な力をかけると、製品が損傷することがあります。 • 製品の技術仕様に準拠したアクセサリーのみを使用してください。 これらの アクセサリーは、Axisまたはサードパーティから入手できます。 • Axisが提供または推奨する交換部品のみを使用してください。 • 製品を自分で修理しないでください。 修理については、Axisサポートまたは...
- Page 99 AXIS Q3505–SVE Network Camera ド ド ド ー ー ー ム ム ム カ カ カ バ バ バ ー ー ー 注 注 注 記 記 記 • 画質低下の原因となるので、ドームカバーに傷や指紋を付けたり、損傷しな いように注意してください。 可能であれば、設置が完了するまでドームカ バーに保護プラスチックを付けたままにしてください。 • 肉眼で見て汚れがない場合は、ドームカバーを掃除しないでください。ま た、絶対に表面を磨かないでください。 過度な清掃により、表面が破損す ることがあります。 • ドームカバーの通常のクリーニングには、磨耗防止タイプの無溶媒の中性石...
- Page 101 AXIS Q3505–SVE Network Camera イ イ イ ン ン ン ス ス ス ト ト ト ー ー ー ル ル ル ガ ガ ガ イ イ イ ド ド ド このインストールガイドでは、AXIS Q3505–SVE固定ドームネットワークカメラをお 使いのネットワークにインストールする手順について説明します。 製品の使用の www.axis.com 詳細については、アクシスのホームページ ( ) でユーザーズマニュア...
- Page 102 AXIS Q3505–SVE Network Camera 推 推 推 奨 奨 奨 ツ ツ ツ ー ー ー ル ル ル 注 注 注 記 記 記 ステンレススチールには耐腐食性がありますが、材質の取り扱いを誤ると、 外側がさびる可能性があります。 さび汚れや孔食を防ぐには、ステンレ ス製の工具を使用してください。 いじり止めヘックスローブレンチTR20 • 8 mmナットセッター • オ オ オ プ プ プ シ シ シ ョ ョ ョ ン ン ン ア ア ア ク ク ク セ セ セ サ サ サ リ リ リ ー ー ー...
- Page 103 AXIS Q3505–SVE Network Camera ハ ハ ハ ー ー ー ド ド ド ウ ウ ウ ェ ェ ェ ア ア ア の の の 概 概 概 要 要 要 取り付けブラケット ユニットケーシング ケーブルガスケット、ネットワークケーブル用 ケーブルガスケット、マルチケーブル用 カメラユニット ビュー保護カバー ドームカバー ネットワークコネクタ...
- Page 104 AXIS Q3505–SVE Network Camera コントロールボタン I/Oコネクタ 音声入力コネクター 音声出力コネクター SDカードスロット ステータスLED 機能ボタン 使用しません LED イ イ イ ン ン ン ジ ジ ジ ケ ケ ケ ー ー ー タ タ タ ー ー ー 注意 • ステータスLEDは、イベントの発生時に点滅させることができます。 • ステータスLEDを点滅させ、本製品を識別できるように設定することができ [Setup > > > System System Options Options >...
- Page 105 AXIS Q3505–SVE Network Camera コ コ コ ネ ネ ネ ク ク ク タ タ タ ー ー ー と と と ボ ボ ボ タ タ タ ン ン ン 107ページ 仕様と動作条件については、 を参照してください。 ネ ネ ネ ッ ッ ッ ト ト ト ワ ワ ワ ー ー ー ク ク ク コ コ コ ネ ネ ネ ク ク ク タ タ タ...
- Page 106 AXIS Q3505–SVE Network Camera コントロールボタンは、以下の用途で使用します。 114ページ 製品を工場出荷時の設定にリセットする。 を参照してください。 • AXIS Video Hosting SystemサービスまたはAXIS Internet Dynamic DNSサービ • スに接続する。 これらのサービスの詳細については、ユーザーズマニュ アルを参照してください。 機 機 機 能 能 能 ボ ボ ボ タ タ タ ン ン ン 機能ボタンには、以下のような機能があります。 水 水 水 平 平 平 化 化 化 ア ア ア シ シ シ ス ス ス タ タ タ ン ン ン ト ト ト – 画像を水平にするのに役立つ機能です。ボタンを約2 •...
- Page 107 仕 仕 仕 様 様 様 製 製 製 品 品 品 温 温 温 度 度 度 湿 湿 湿 度 度 度 等 等 等 級 級 級 AXIS Q3505–SVE IEC 60529 IP69K ‑40°C~60°C 10~100% RH (結露不可) NEMA 250 4X 規格準拠...
- Page 108 AXIS Q3505–SVE Network Camera 3– 設定可能 0~30 V DC (最大) デジタル入力 – 動作させるにはピン1 (入力また に接続し、動作させない場合はフロー は出力) ト状態 (未接続) のままにします。 デジタル出力 – 動作させるにはピン 0~30 V DC (最大)、 オ ー プ ン ド レ イ 1に接続し、動作させない場合はフ ロート状態 (未接続) にします。 誘導 ン、100 mA 負荷...
- Page 109 AXIS Q3505–SVE Network Camera 接 接 接 続 続 続 図 図 図 I/O コ コ コ ネ ネ ネ ク ク ク タ タ タ 0 V DC (‑) DC出力12 V、最大50 mA I/O (入力として設定) I/O (出力として設定) ハ ハ ハ ー ー ー ド ド ド ウ ウ ウ ェ ェ ェ ア ア ア の の の 設 設 設 置 置 置...
- Page 110 AXIS Q3505–SVE Network Camera ケーブルを、ジャンクションボックスを使用するか、壁に沿って配線します。以 下の該当する手順に従ってください。 ジャンクションボックスにカメラを取り付ける方法は次のとおりです。 1. ネットワークケーブルを (必要に応じて、マルチケーブルも) ジャンクショ ンボックスと取り付けブラケットの穴を通して配線します。 2. 適切なステンレス製ネジを使用して、取り付けブラケットをジャンクショ ンボックスに取り付けます。 壁の中を通して配線する場合は、以下の手順を実行します。 1. ドリルテンプレートを使用して、ブラケット取り付け用に孔を4つ、壁の中 にケーブルを配線するための孔を1つ開けます。 2. ネットワークケーブルを (必要に応じて、マルチケーブルも) 壁と取り付け ブラケットの穴を通して配線します。 3. 適切なステンレス製ネジを使用して、取り付けブラケットを壁に取り付 けます。 ケーブルを壁に沿わせ、取り付けブラケットのサイドホールを通して配線する方 法は次のとおりです。 1. 取り付けブラケットのサイドホールからプラグを取り外します。 2. ネットワークケーブルを (必要に応じて、マルチケーブルも) コンジットと 取り付けブラケットの穴を通して配線します。 3. 適切なステンレス製ネジを使用して、取り付けブラケットを壁に取り付 けます。 4. 取り付けブラケットにコンジットを取り付けます。...
- Page 111 AXIS Q3505–SVE Network Camera ワークケーブルを少し手前に引き、ケーブルガスケットをケーブルにぴっ たりと合わせます。 注 注 注 記 記 記 ケーブルを引いて手前に戻さないと、浸水して製品が損傷するおそれが あります。 4. マルチケーブルを使用している場合は、ユニットケーシングから他のケー ブルスケットを取り外して破棄します。 5. ユニットケーシングを通してケーブルを引き、ケーブルガスケットをユ ニットケーシングに取り付けます。 6. ケーブルをカメラユニットに接続します。 7. ユニットケーシング内のスプリングを横に引いてカメラユニットをユニッ トケーシングに取り付け、ケーブルガスケットを通してケーブルを引き、 必要に応じて短くします。 8. 取り付けブラケットに沿ってケーブルのたるみを巻き上げ、2本のネジでユ ニット ケーシングを取り付けブラケット取り付けます。...
- Page 112 AXIS Q3505–SVE Network Camera 9. ケーブルガスケットがユニットケーシングとケーブルに正しく取り付けら れていることを確認します。 カ カ カ メ メ メ ラ ラ ラ ア ア ア ン ン ン グ グ グ ル ル ル の の の 調 調 調 整 整 整 光学部品ホルダー上のライン。チルト角度 (10°ずつ) を示します。...
- Page 113 AXIS Q3505–SVE Network Camera 製 製 製 品 品 品 へ へ へ の の の ア ア ア ク ク ク セ セ セ ス ス ス ネットワーク上でアクシス製品を検索したり、Windows®でそれにIPアドレスを割り当 てるには、AXIS IP UtilityまたはAXIS Camera Managementの使用をお勧めします。 い www.axis.com/techsup ずれのアプリケーションも無料で、 からダウンロードできます 本製品は、ほとんどのオペレーティングシステムとブラウザーでご利用いただけま す。 推奨ブラウザは以下のとおりです。...
- Page 114 AXIS Q3505–SVE Network Camera ます。 << または >> ボタンで、フォーカス位置がどちらかの方向に何 段階か移動します。 [Enable iris] iris] ( ( ( 絞 絞 絞 り り り 有 有 有 効 効 効 ) ) ) をクリックして絞りを有効 4. 調整が終わったら、[Enable [Enable iris] にします。 ズ ズ ズ ー ー ー ム ム ム と と と フ フ フ ォ ォ ォ ー ー ー カ カ カ ス ス ス の の の 設 設 設 定 定 定 ‑ ‑ ‑ 監 監 監 視 視 視 用 用 用 光 光 光 学 学 学 ズ ズ ズ ー ー ー ム ム ム...
- Page 115 AXIS Q3505–SVE Network Camera 本製品を工場出荷時の設定にリセットするには、以下の手順を実行します。 1. 本製品の電源を切ります。 103ページ 2. コントロールボタンを押し続けながら電源を再投入します。 「 の、ハードウェアの概要 」を参照してください。 3. ステータスLEDインジケーターが黄色に点滅するまで、コントロールボ タンを15~30秒間押し続けます。 4. コントロールボタンを離します。 プロセスが完了すると、ステータスLEDが 緑色に変わります。 これで本製品は工場出荷時の設定にリセットされまし た。 ネットワーク上に利用可能なDHCPサーバーがない場合、デフォルトの IPアドレスは192.168.0.90になります。 5. インストール・管理ソフトウェアツールを使用して、IPアドレスの割り当 て、パスワードの設定、ビデオストリームへのアクセスを行います。 Webインターフェースを使用して、各種パラメーターを工場出荷時の設定に戻す [Setup ‑ ‑ ‑ System System Options Options ‑ ‑ ‑ Maintenance] Maintenance] ( ( ( 設...
- Page 116 Installation Guide Ver. M1.3 AXIS Q3505–SVE Network Camera Date: April 2015 © Axis Communications AB, 2015 Part No. 62434...
Need help?
Do you have a question about the Q3505-SVE and is the answer not in the manual?
Questions and answers