
Related Manuals for Flexit K2.1


Summary of Contents for Flexit K2.1
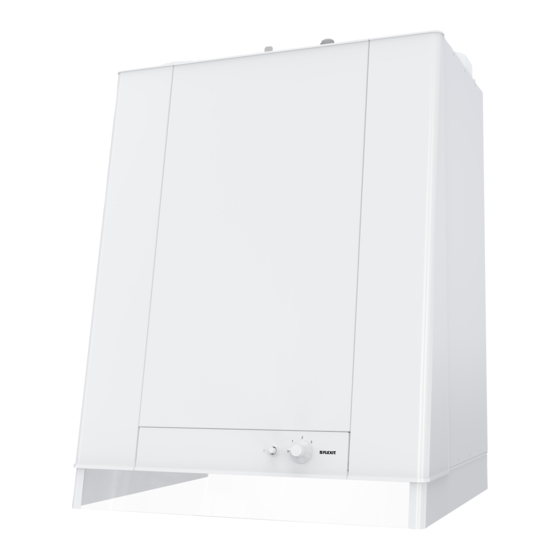
- Page 1 111140EN-14 2019-10 Flexit K2.1 ART.NO. 700114, 700116, 700118, 700119, 700122, 700123, 700124, 700126 INSTALLATION INSTRUCTIONS Air handling unit with kitchen hood and control automation INSTALLATION INSTRUCTIONS...
- Page 2 K 2 . 1...
-
Page 3: Table Of Contents
9.2.1. Adjustment .......................21 9.2.2. Temperature regulation .................21 Adjusting the kitchen hood ..................22 10.1. Forced ventilation ......................22 Adjustment curves ....................23 11.1. Forced ventilation Flexit K2.1 ..................23 Final checks ........................ 24 First use ........................24 Complaints ......................... 25 Waste handling ......................25 CE Declaration of conformity ................... - Page 4 K 2 . 1 Symbols used These products bear a number of symbols used for labelling the actual product and in installation and user documentation. Supply air Extract air Extract air from kitchen DANGER: DANGER! DO NOT ELECTRICITY TOUCH Exhaust air Outdoor air FRONT FRONT...
- Page 5 SAFETY INSTRUCTIONS • To avoid the risk of fire, electric • This unit is only designed for shock or injury, read all the safety ventilation air in homes and instructions and warning texts commercial buildings. before using the unit. • To maintain a good indoor •...
-
Page 6: Preliminaries
The control cable with plug for automatic control on top of the unit must be easily accessible. 1.2. SPACE REQUIRED Type K2.1 335 mm 2 x 2 m 215-380 mm A: Space in front of unit... -
Page 7: Recommended Sound Attenuation For Wall-Mounting
1.4. RECOMMENDED SOUND ATTENUATION FOR WALL-MOUNTING the unit is used. The unit must not be placed on a wall with rooms on the other side which are sensitive to noise. The wall must be sound-insulated. If necessary, use double plasterboards on the wall. -
Page 8: Installation
K 2 . 1 2. Installation 2.1. INSTALLING THE VOLUME HOOD Flexit K2.1 is designed for installation in the kitchen above cookers with 3-4 hotplates, see Fig. 2. The unit is steinull supplied in left and right-hand versions depending on gips what suits duct locations best (see cahp. -
Page 9: Encasing
2.2. ENCASING The casing must not be deeper than dimension A. B=2mm B=2mm 596 mm K 2 . 1... -
Page 10: Connection Of Unit And Electrical Work
K 2 . 1 3. Connection of unit and electrical work 3.1. CONNECTION OF UNIT A low-voltage cable (with connector) leaves the unit • for use on the control panel. It is important to retain See the marking on the unit (top/bottom and easy access to this plug - in case of any fault or when behind door). -
Page 11: System And General Drawings
4. System and general drawings 4.1. SYSTEM DRAWING (ELECTRIC HEATING BATTERY) Abbreviation Description Outdoor air Supply air Extract air Exhaust air Supply air temperature sensor Heating battery Overheating thermostat, manual reset Overheating thermostat, automatic reset Supply air fan Extract air fan HR-R Rotary wheel-type heat exchanger Rotor motor... -
Page 12: Nipple Location
K 2 . 1 4.3. NIPPLE LOCATION... -
Page 13: Technical Data
5. Technical data EC 700 W Rated voltage (AC 50Hz) 230 V Frequency 50 Hz Fuse size 10 A Rated current 3,8 A Rated power, total 875 W Rated power, max. electric battery 700 W Rated power, fans 173 W Rated power, rotor motor Fan type B-wheel... -
Page 14: Dimensioned Drawings
K 2 . 1 6. Dimensioned drawings Dimensions in mm... -
Page 15: Capacity And Sound Data
7. Capacity and sound data 7.1. SUPPLY AIR SIDE < 100% 100% dB(A) dB(A) dB(A) dB(A) dB(A) [m³/h] 7.2. EXTRACT AIR SIDE < 100% 100% dB(A) dB(A) dB(A) dB(A) [m³/h] K 2 . 1... -
Page 16: Correction Factor For Lw
K 2 . 1 Explanation of diagram: capacity diagrams. (This is sound to duct.) These values can be corrected by means of the table for adaptation to A band). The correction table for the various octaves is stated in Lw, which means that the Lw values are after conversion of each octave for supply air and extract air. -
Page 17: Installation Of Control Panel Ci 60/600
8. Installation of control panel CI 60/600 8.1. CONTENT 1. Control panel 2. Back piece for concealed installation 3. Back piece for surface installation 4. Installation instructions 5. Cable for control panel K 2 . 1... -
Page 18: Installation Of Ci60/600
K 2 . 1 8.2. INSTALLATION OF CI60/600 CAUTION! The control panel must be connected to the ventilation unit before the ventilation unit is connected to mains. Lay the cable for the control panel between the ventilation unit and the control panel. The control panel is adapted for concealed installation over a single connection box (use low back piece, item no. -
Page 19: Concealed Installation
8.3. CONCEALED INSTALLATION 8.5. FINISHING OFF – CI60 Lay the cable between the wall box and the ventilation unit in the preinstalled conduit pipe. Fit the back piece (item no. 2), over the wall box and click the cable in as shown by arrow no. -
Page 20: Adjusting Units
K 2 . 1 9. Adjusting units 9.1.2. Adjusting the temperature The temperature required for the supply air can be set with knob 11. The adjustment range is 10 - 30°C. 9.1. ADJUSTMENT WITH CI60 It should normally be set to around 18°C. Use of the factory setting is recommended. -
Page 21: Adjustment With Ci600
9.2. ADJUSTMENT WITH CI600 FAN REGULATION SUPPLY AIR > EXTRACT AIR > CAUTION! The unit's air supply TIMER > MUST be adjusted before the AIR VOLUME COMP unit is used for the first time. This should be done in accordance with the projection documents. -
Page 22: Adjusting The Kitchen Hood
K 2 . 1 10. Adjusting the kitchen hood Regulation type If supply air regulation is selected, no further settings If basic ventilation is desired via the kitchen hood, the can be set here. If extract air regulation is selected, the max. -
Page 23: Adjustment Curves
11. Adjustment curves 11.1. FORCED VENTILATION FLEXIT K2.1 Max. air volume through kitchen hood in case of forced air volume Measurements have been taken at 2/3 pressure in the extract air duct and 1/3 pressure in the exhaust air duct before opening the damper. -
Page 24: Final Checks
K 2 . 1 12. Final checks 13. First use Check that • Check that the control panel has been connected. • The duct insulation is in accordance with the manual • Plug the unit into the mains supply. and the technical documents. It is very important the •... -
Page 25: Complaints
14. Complaints 15. Waste handling The symbol on the product shows that this product must not be treated as household waste. Warranty claims will only be valid It must be taken to a collection point for recycling if the instructions in the manuals electrical and electronic equipment. -
Page 26: Ce Declaration Of Conformity
WEEE Directive 1907/2006/EC REACH Regulation Our products have been tested in accordance with parts 2006/42/EC Machine Directive (Safety) Producer: FLEXIT AS, Televeien 15, 1870 Ørje, Norway Type: K2.1 Ventilation unit Complies with the following standards: Safety standard EN 60335-1:2012 + A11... - Page 27 K 2 . 1...
- Page 28 Flexit AS, Televeien 15, N-1870 Ørje www.flexit.no...
Need help?
Do you have a question about the K2.1 and is the answer not in the manual?
Questions and answers