Table of Contents
Advertisement
Advertisement
Table of Contents

Related Manuals for Flexit UNI 2


Summary of Contents for Flexit UNI 2
- Page 1 111537EN-11 2019-10 UNI 2 User Manual Air Handling Unit & Automatic Control...
-
Page 2: Table Of Contents
..........................1.4 Heating element (EB1) (for UNI 2 E) . - Page 3 Important Safety Instructions: It is the installer's responsibility to carry out a full safety and function assessment of the appliance. To reduce the risk of fire, electric shock or injury, read all the safety instructions and warning texts before using the unit. This unit is only designed for ventilation air in homes and commercial buildings.
-
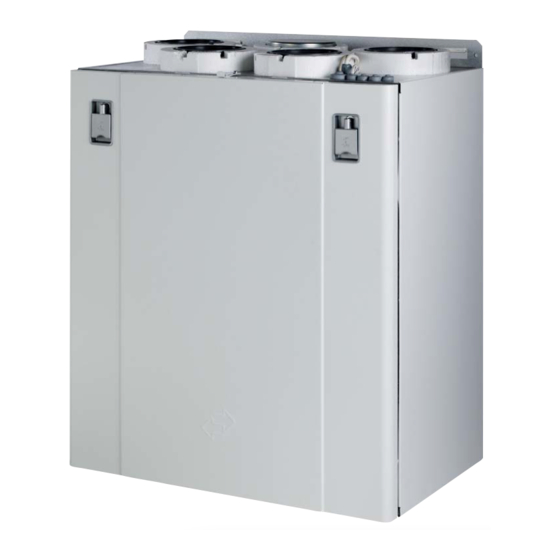
Page 4: Functional Description Of Balanced Ventilation
Fig. 2 1.4 Heating element (EB1) (for UNI 2 E) If the energy recovered from the extract air is insufficient to maintain the set supply air temperature, an electric heating element will help raise the temperature. -
Page 5: Operating The Door
2 Operating the door 2.1 Wall-mounted unit If the door needs to be removed The door can be removed when it is open between 40º 1. First undo the screw in the top of the door (see Fig. 3). and 105º. If there is limited space in front of the unit, the 2. -
Page 6: Floor-Mounted Unit
2.2 Floor-mounted unit 1. Make sure that hinge stops and a door strap are fitted (see Fig. 8, 9 and 10). 2. Undo the screw in the top (see Fig. 11). Fig. 11 3. Pull the handles out and rotate to the side (see Fig. 4). 4. -
Page 7: Ceiling-Mounted Unit
2.3 Ceiling-mounted unit Check first that hinge stops are fitted (see Fig. 14 and 15). If not, the door could fall off when opened! Be careful! Fig. 17 Note that a door strap also needs to be fitted if the unit is mounted on the ceiling. This protects the hinge stops against damage and prevents the door from opening more than 105°... -
Page 8: Overview Of Ci60 Control Panel
Overview of CI60 control panel Fig. 20 No. Description No. Description Switch for increased ventilation Potentiometer for adjusting extract air at NORMAL speed Switch for decreased ventilation Potentiometer for adjusting supply air at Indication of MAX speed NORMAL speed Indication of NORMAL speed Switch for additional heating ON/OFF Indication of MIN speed Potentiometer for adjusting supply air... -
Page 9: Ci60 In Use
4 CI60 in use 4.4 Temperature adjustment 4.1 General The temperature required in the supply air can be set with The control unit consists of a touch panel with pushbuttons, potentiometer 11. The adjustment range is 10 - 30 °C. Using LEDs for indication and adjustment potentiometers and the factory settings is recommended. -
Page 10: Reset
4.7 Reset After the filter has been replaced or the cause of the NB! If thermostat F10 trips, the unit will have to be alarm repaired, the alarm must be reset. This is done by opened up and physically reset before resetting on pressing switch 12. -
Page 11: Ci600 In Use
6 CI600 in use 6.1 General If you select a function that has numerical values, the The control unit consists of a colour display, pressure current value is displayed with a light blue cursor. The value switches and indicators (LEDs). See figure on left for more information. -
Page 12: Ci600 Main Menu
CI600 main menu 7.1 Fan speeds 7.2 Max timer The main menu contains various choices. Most concern This menu item activates a function that increases the speed fan speeds. The speed selected is indicated with large fan to MAX for a limited period before returning to the speed symbols and bold text. -
Page 13: Timer
7.6 Daily/weekly timer A good rule is to adjust the temperature to max. 18° so that the air is mixed optimally with the air already in the building. Programming the timer begins with selecting the day. In the HEATING ELEMENT OFF/ON menu item, the additional DAY / WEEK SETTINGS heating in the ventilation unit can be switched off. -
Page 14: Time And Date
7.7 Time and date The normal time is 6 - 12 months, depending on the environment. The time and date can be adjusted in this dialog. When the filter alarm is tripped, the yellow indicator 8 lights TIME AND DATE up and an information text appears. -
Page 15: Ci600 Advanced User Menu
MIN SUPPLY AIR TEMP 15° PIN CODE 1 0 0 0 Cooling NB! Flexit does not supply or project cooling machines. 8.2 Advanced user This menu contains functions for monitoring, configuration In this dialog, the cooling function is activated and the and troubleshooting. -
Page 16: Fan Control
Neutral zones To achieve more even temperature regulation, the Adjustment (supply air and extract air) neutral zones can be set in this menu. This dialog is identical for the supply air and extract air fans. The fans are adjusted individually to the desired capacity for the respective speed. -
Page 17: Configuration
8.5 Configuration The general configuration is set in this menu screen. Fire/Smoke This function requires an external sensor to be connected CONFIGURATION to the control card. > SENSORS FIRE/SMOKE FIRE/SMOKE > COMMUNICATION MODE > START/STOP SEQUENCE REST MODE > Sensors The temperature sensors can be calibrated in this menu to be better coordinated with the real situation, and a Mode... -
Page 18: Operating Time
As an additional safety function, the speed of the supply air fan can be reduced. This takes effect at the set outdoor temperature. 8.7 Service De-icing - Parameters Passwords are only revealed in consultation with Flexit's service department. Parameter Default Range Unit De-icing... -
Page 19: Menu Tree
8.8 Menu tree Fig. 23 MAIN MENU TEMPERATURE HEATING ELEMENT ON/OFF TIMER MONDAY DAY/WEEK SETTINGS SUNDAY TIME AND DATE LANGUAGE RESET FILTER ALARM FILTER FILTER CHANGE INTERVAL ALARM ADVANCED USER REGULATION TYPE COOLING COOLING RECOVERY NEUTRAL ZONE TEMPERATURE REGULATION EXT. TEMPERATURE CONT. FAN CONTROL SUPPLY AIR CONFIGURATION... -
Page 20: Cleaning And Maintenance
Fig. 24 9 Cleaning and maintenance Before opening the door: Switch off the heat, let the fans continue for 3 minutes to remove hot air, unplug the unit and wait 2 minutes before opening the doors. 9.1 Changing the filters The filters have a limited life, and to preserve a healthy indoor air quality it is important to change them when they are dirty. -
Page 21: Cleaning The Fans
9.2 Cleaning the fans Fig. 26 The fans must be cleaned at least once a year. Clean the fan blades with a grease solvent on a cloth (e.g. methylated spirits) and compressed air if possible. NB! Do not use water. To take out the top fan: 1. - Page 22 Fig. 27 Seal Seal...
- Page 23 Fig. 28...
-
Page 24: Changing The Brush Strips
9.3 Changing the brush strips Fig. 29 The brush strips become worn over time. If they do not sit tightly against the rotary wheel-type heat exchanger, it may be necessary to change them (product code 102686). Alternatively, they can be moved closer to the rotor, as the aluminium profile they are mounted in has two grooves. -
Page 25: Tightening Of Rotor Belt
9.4 Tightening of rotor belt Fig. 31 Proceed as follows: 1. Remove qty. 2 screws in the plate on the outer side of the rotor cassette (see Fig. 31). 2. Remove qty. 4 screws in the rotor cassette in order to loosen the rotor motor bracket (see Fig. -
Page 26: Maintenance Table
The capacitors must be replaced by a professional. New capacitors can be ordered from Flexit (art. no. 110354). *For units with extract air from the kitchen hood connected to the unit. 11 Troubleshooting... -
Page 27: Ce Declaration Of Conformity
EN 55014-2 EN 61000-3-2 Our products have been tested in accordance with parts of: EN 61000-3-3 2006/42/EC Machinery Directive (Safety) Producer: FLEXIT AS, Televeien 15, The product is CE-marked: 2011 1870 Ørje, Norway FLEXIT AS 29.11.2016 Type: UNI 2 R... - Page 28 Flexit AS, Televeien 15, N-1870 Ørje www.flexit.no...
Need help?
Do you have a question about the UNI 2 and is the answer not in the manual?
Questions and answers