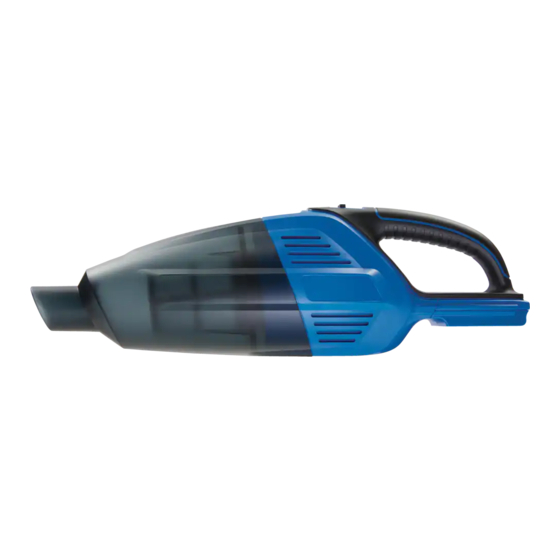
Summary of Contents for Mastervac 054-7548-8
- Page 1 054-7548-8 CORDLESS HANDHELD VACUUM KIT WITH 4 ACCESSORIES INSTRUCTION IMPORTANT: Read and understand this instruction manual thoroughly MANUAL before using the product.
- Page 2 headline bars continuation tabs notes warnings...
-
Page 3: Table Of Contents
TABLE OF CONTENTS Technical Specifications Safety Guidelines Key Parts Diagram Operating Instructions Maintenance Troubleshooting Parts List Warranty NOTE: If any parts are missing or damaged, or if you have any questions, please call our toll-free helpline at 1-800-689-9928. SAVE THESE INSTRUCTIONS •... -
Page 4: Technical Specifications
054-7548-8 | contact us 1-800-689-9928 TECHNICAL SPECIFICATIONS Rated Voltage 20V max* Run time (using 1.5 Ah Li-ion battery 11 min (054-3124-0)) Weight (without accessory) 2 lb (0.9 kg) 1.5 Ah Li-ion (054-3124-0; sold separately) Batteries 3.0 Ah Li-ion (054-3125-8; sold separately) continuation tabs *Maximum battery voltage without workload;... -
Page 5: Safety Guidelines
SAFETY GUIDELINES WARNING! Safety symbols in this instruction manual are used to flag possible dangers. The safety symbols and their explanations require your full understanding. The safety warnings do not, by themselves, eliminate any danger, nor are they substitutes for proper accident prevention measures. - Page 6 054-7548-8 | contact us 1-800-689-9928 ELECTRICAL SAFETY • Power tool plugs must match the outlet. Never modify the plug in any way. Do not use any adaptor plugs with earthed (grounded) power tools. Unmodified plugs and matching outlets will reduce risk of electric shock.
- Page 7 • Do not use the power tool if the switch does not turn it on and off. Any power tool that cannot be controlled with the switch is dangerous and must be repaired. • Disconnect the plug from the power source and/or the battery pack from the power tool before making any adjustments, changing accessories, or storing the tool.
- Page 8 054-7548-8 | contact us 1-800-689-9928 • To reduce the risk of electric shock or damage to the charger and battery, use only the batteries and charger listed. Read the manuals of the charger and battery before using.
- Page 9 • Under abusive conditions, liquid may be ejected from the battery; avoid contact. If contact accidentally occurs, flush with water. If liquid contacts eyes, additionally seek medical help. Liquid ejected from the battery may cause irritation or burns. • Do not use a battery pack or appliance that is damaged or modified. Damaged or modified batteries may exhibit unpredictable behaviour resulting in fire, explosion or risk of injury.
-
Page 10: Key Parts Diagram
054-7548-8 | contact us 1-800-689-9928 PACKAGE CONTENTS: Cordless handheld vacuum, extension tube, crevice nozzle, brush nozzle, floor nozzle and instruction manual. KEY PARTS DIAGRAM continuation tabs notes warnings Description No. Description Dust-canister release button Floor nozzle... -
Page 11: Operating Instructions
ASSEMBLY INSTRUCTIONS TO ATTACH BATTERY PACK (fig 1) fig 1 Latch Detach 1. Align the raised portion on the battery pack with the groove on the bottom of the tool, then slide the battery pack into the body of the tool. 2. - Page 12 054-7548-8 | contact us 1-800-689-9928 OPERATION INSTRUCTIONS SWITCHING fig 4 Forward ON AND OFF (fig 4) To turn the vacuum on, push the on/off switch forward. To turn the vacuum off, push the on/off switch Backward backward.
- Page 13 CLEANING THE FILTER ASSEMBLY fig 7 Filter seal ( fig 7 & fig 8 ) Remove 1. Remove the filter assembly from the dust canister: refer to CLEANING THE DUST CANISTER. 2. Remove the filter cover from the filter seal. 3.
-
Page 14: Maintenance
054-7548-8 | contact us 1-800-689-9928 MAINTENANCE Before each use: • Inspect the cordless handheld vacuum, the switch, and the accessories for damage. • Check for damaged, missing, or worn parts. • Check for loose screws, misalignment or binding of moving parts, or any other condition that may affect the operation. -
Page 15: Troubleshooting
TROUBLESHOOTING Problem Possible causes Solutions The vacuum does not start. The battery is depleted. Charge the battery pack. The vacuum is not powerful. Dust in the dust canister and filter. Clean the dust canister and filter. If the problem remains unsolved after performing the checks described above, call the toll-free helpline at 1-800-689-9928. -
Page 16: Parts List
054-7548-8 | contact us 1-800-689-9928 EXPLODED VIEW continuation tabs continuation tabs notes notes warnings warnings... - Page 17 No. Part No. Description No. Part No. Description 0547548801 Screw 0547548816 Battery Right Enclosure 0547548802 Right Enclosure 0547548817 Battery Left Enclosure Dust Canister Shift 0547548803 0547548818 Left Enclosure Assembly 0547548804 Filter Basket 0547548819 Switch Cover 0547548805 Fabric Filter 0547548820 Air Outlet Sponge Screw and Plain Washer 0547548806 Filter Cover...
-
Page 18: Warranty
054-7548-8 | contact us 1-800-689-9928 continuation tabs continuation tabs This product is guaranteed for a period of 3 years from the date of original retail purchase against defects in workmanship and materials, except for the following components:... - Page 19 h) this warranty will not apply to normal deterioration of the exterior finish, such as, but not limited to, scratches, dents, paint chips, or to any corrosion or discolouring by heat, abrasive and chemical cleaners; and i) this warranty will not apply to component parts sold by and identified as the product of another company, which shall be covered under the product manufacturer’s warranty, if any.


Need help?
Do you have a question about the 054-7548-8 and is the answer not in the manual?
Questions and answers