Table of Contents
Advertisement
Quick Links
Advertisement
Table of Contents

Related Manuals for Primera DP-4202 XRP


Summary of Contents for Primera DP-4202 XRP
- Page 1 101816-511446 User's Manual © 2016 All rights reserved...
- Page 2 Notices : The information in this document is subject to change without notice. NO WARRANTY OF ANY KIND IS MADE WITH REGARD TO THIS MATERIAL, INCLUDING, BUT NOT LIMITED TO, THE IMPLIED WARRANTIES OF MERCHANTABILITY AND FITNESS FOR A PARTICULAR PURPOSE.
-
Page 3: Table Of Contents
Table of Contents Section 1: Getting Started ................1 A. Note on Model Differences ...............2 B. Choosing a Good Location ..............2 C. Unpacking and Inspection ..............3 D. Identifying the Parts ................4 E. Loading Media (Discs) ............... 6 Installing the Ink Cartridge ............... 7 G. - Page 4 Provided by: ©2019, DTM Print GmbH More information: dtm-print.eu DTM Print GmbH Mainzer Strasse 131 65187 Wiesbaden/Germany Tel.: +49 (0) 611 92777-0 Fax: +49 (0) 611 92777-50 Email: sales@dtm-print.eu Web: dtm-print.eu...
-
Page 5: Section 1: Getting Started
Section 1: Getting Started THANK YOU… ...for purchasing a DP-4200 Series Disc Publisher. is the perfect all-in- one solution for producing professional looking discs. A wide variety of disc formats are supported, includ- ing audio CDs, DVD Video, data discs and more. Operation is sim- ple and completely automatic once a project has been started. -
Page 6: Note On Model Differences
A. NOTE ON MODEL DIFFERENCES The DP-4200 XRP Series comes in two different models including: • DP-4202 XRP (2 DVD Drives) Burns and Prints CD, DVDs and DVD-DL • DP-4202 XRP Blu (2 BDR Drives) Burns and Prints CD, DVD, DVD-DL, BDR and BDR-DL These instructions are written to apply to all models. -
Page 7: Unpacking And Inspection
C. UNPACKING AND INSPECTION While unpacking your Publisher, inspect the carton to ensure that no damage has occurred during shipping. Make sure that all supplied accessories are included with your unit. The following items should be included: • Optical Disc Publisher •... -
Page 8: Identifying The Parts
D. IDENTIFYING THE PARTS Front Panel and Top This illustration shows the DP-4202, its Control Panel, Buttons, LED indicator lights, Input and Output Bins and other components. Input Bin Ink Cartridge Carrier Robotic Disc Transporter Output Bin Cartridge Button Power Button Reject Area LED Status... - Page 9 The Control Panel contains LED Status Lights and Buttons to control the Publisher. The LED Status Lights indicate that Power is ON. They also blink in certain patterns to indicate an error or other condition of the Publisher. See Section 4 for a full explanation of the LED Status Light conditions.
-
Page 10: Loading Media (Discs)
Due to the wide variety of printable-surface CD/DVD media, you may find that certain brands of discs provide higher print quality than others. For maximum print quality, use CD/DVD media autho- rized by Primera. Refer to the following steps when loading discs into the Publisher: •... -
Page 11: Installing The Ink Cartridge
• The Publisher will automatically position the cartridge carrier and Robotic Disc Transporter to the center position allowing for easy access to the bins. • Load the Input Bin (the bin located on the right-hand side of the Publisher) with 50 blank discs and place the bins on the mount- ing pegs. - Page 12 3. Remove the ink cartridge from its packaging. Slowly remove the tape covering the cartridge's print head. 4. Insert the ink cartridge into the carrier, copper end first and snap the cartridge cover in place. 5. Close the Publisher's front cover. You will be prompted to align the cartridge in PTPublisher as soon as the software is opened.
-
Page 13: Setup The Optional Kiosk Bin
G. SETUP THE OPTIONAL KIOSK BIN Kiosk Mode allows you to use both of the Publisher's Bins as input, doubling your disc capacity from 50 discs to 100 discs. In this mode, the finished discs will be deposited through the front "reject area" of the Publisher. -
Page 14: Section 2: Creating Discs
Section 2: Creating Discs There are two main components to creating discs, printing and burning. For PC, SureThing CD Labeler is used to design the image to print on the disc. For Mac, Disc Cover is used to design the image to print on the disc. - Page 15 Select Copy Project from the Starter Window or the New Project Panel on the left side of the screen. Step one of the Copy Disc wizard will be displayed. You will be prompted to place the disc you would like to copy into the drive inside the Disc Publisher.
- Page 16 Each disc (media) brand or type has a different sized non printable outer margin or inner diameter. It also has a different printable surface. For Primera TuffCoat branded discs simply choose your media from the drop down list, the settings will be adjusted accordingly.
-
Page 17: Using Ptpublisher
Print Quality. All Primera media is automatically defaulted to the best print quality. Other media may also accept the best quality setting. However, with some media you may have to print at a lower print quality to eliminate smudging and bleeding. - Page 18 Recommended for: All CD, DVD or Blu-ray content or disc types (Audio CD, Data CD, Software Install Disc, Video CD, DVD Video, Blu-ray Video: CDR, DVD-R, DVD+R, DVD-ROM, DVD+DL, DVD- DL, BDR, BDR-DL, etc.). This is best used for single runs where you will not need to make additional copies of the master disc at a later time.
-
Page 19: B2. Steps To Any Project
Recommend for: Situations where you are having compatibility problems with the formatting created by the DVD/Blu-ray authoring software or with the media type of the master disc. This method removes some potentially complicating variables from the DVD/Blu-ray Video creation process. This method eliminates the need for a master disc. -
Page 20: Step 2: Add Print
This is the label that will appear when this disc is inserted into a computer drive. When you have selected the data you would like to burn click the next button. Step 2: Add Print If you want something printed on your disc, this is where you choose an existing label or create it. - Page 21 4. At this point you may choose to move on to the next step by clicking the next arrow. However, there are print quality and print area settings that you may want to adjust. 5. Several preset media types that correspond with the media available at our webstore can be selected from the Media drop down box.
-
Page 22: Step 3: Start Project (Summary - Settings)
4. Close SureThing or Swift Publisher. 5. You will be asked if you would like to use the label you just created in your current project. Click Yes. 6. You may now choose to adjust print settings as described above. Step 3: Start Project (Summary - Settings) In this step you can verify data and print information and set the number of copies. - Page 23 A project file is a small file that holds the locations of files to be burned, the location of the print file to be printed, and any specific project settings such as burn speed and number of copies. Note: A saved project file does not include the data to be burned or the print file to be printed.
- Page 24 • File System. The file system is the method by which the files and folder are arranged on the burned disc. Joliet is best for most CD burning applications. UDF 1.02 is best for DVD burning. UDF 2.6 is used for Blu-ray. The recording engine can also add a bridge which effectively adds another file system to the disc.
-
Page 25: B3. Publisher Status
B3. Publisher Status The status window is automatically displayed when a job starts. You may also access it at any time by clicking the More Status link under the picture and description of the robot connected. Publisher Status is only available if the Publisher is connected. -
Page 26: B4. Backup Project (Pc Disc Publisher Only)
B4. Backup Project. (PC Disc Publishers Only) To create a new backup project you must setup a data project and then schedule it. Follow these steps: Choose Data Project from the project starter window. Add the files or folders that you would like to backup. Typically there will be more data to back up than will fit on any one CD, DVD etc. - Page 27 backups of the same files/folders which may be larger. Important Note: It is not possible to span a single large file over multiple discs. Using the media drop down list, you may also choose to change the media type to one with more capacity. The data bar will change from red to green.
- Page 28 Fill out these fields with information pertaining to the backup project. Date, time and the number of discs in the backup set will automatically be printed on the disc. Click the refresh button to view your changes in the preview. Click the next button to display a summary of the project.
-
Page 29: B5. Rip Audio (Pc Disc Publisher Only)
The Scheduled Projects window will appear. Check the box next to the backup project you would like to run. Click Run Now to run it for the first time now. Otherwise, the backup project will proceed at the scheduled time. You must keep the PTPublisher software open, the Disc Publisher turned on and the discs loaded for the automatic scheduled backup to occur. -
Page 30: B6. Ptprotect (Pc Disc Publisher Only)
PTProtect allows you to copy-protect any DVD Video and mass produce protected discs using the PTPublisher software and a Primera Disc Publisher. You can protect an existing Master DVD by first converting it to an ISO image using PTPublisher or you can protect a DVD that is stored on your hard drive as VIDEO_TS and AUDIO_TS folders. -
Page 31: Creating A Print Label Using Surething (Pc)
C. CREATING A PRINT LABEL USING SURETHING (PC) The SureThing Disc Labeler software included with your Publisher is a great tool for creating professional looking discs. You can use SureThing's Smart Designs to quickly label a disc, or easily import your own design in many popular file formats. -
Page 32: Creating A Print Label Using Swift Publisher (Mac)
4A. Open the text panel by clicking the arrow on the text button. Add text by selecting one of the options below. To create text that follows the curve of the disc choose Add Circular Text. 4B. You may also choose from several SureThing smart designs. - Page 33 Open the software and select the category “Disc and Media“. Now you can choose between creating your own disc or using on of the CD/DVD templates. To design an own layout, open the tab “New Disc“. Now you can choose between different sizes. Alternativly, you can customize your own format.
- Page 34 If you select customizing, you can change the parametres X and Y, as well as the inner and outer radius and the page size. Click “OK“ to save the settings. Now you can start designing. To add a background from Swift Publisher, click on the left menu and select your favourite graphics.
- Page 35 You can also use your own designs. Therefore, you have to allow SwiftPublisher access to your images. Then you can upload your design and drag it into your image until it fits. If everything is setup, click “File - Print“ or the printer symbol on the right.
- Page 36 To save your file, go to “File - Menu „ and click “Save“. Then rename and save it. It is also possible to save your design as a template. Therefore click “File - Save as template“ and rename it. You will find it in your Swift Publisher programm under “My templates“...
-
Page 37: Advanced Printer Settings
E. ADVANCED PRINTER SETTINGS Advanced Printer Settings can be accesed from the Add Print File Step in either PTPublisher for Mac or PC. All available settings are displayed in the Printer Settings area on this screen. Below is a description of each. Print Quality This setting affects the quality and speed of the print. - Page 38 You may also want to adjust the inner diameter setting. To use the preset outer diameter setting for Primera media, select the media type from the drop down box at the top of the printer settings area.
-
Page 39: Printer Utilities And Cost Estimator
Best for Photos mode is best used for photographic images where accurate color reproduction is very essential. Images printed in this mode will look lighter than those printed in Photo mode. Skin tones especially will look more natural in this mode. NOTE: Exact color matching of the printed discs to the screen may never be possible since there are factors that affect this out of the drivers control. - Page 40 Cost Estimator After printing one disc of any design the Cost Estimator can be used to estimate the cost per discs. Ink cost is automatically and continuously calculated based on the color cartridge costs entered. Only the last printed label cost is displayed. For reference, the print file and date of last print is displayed as well.
- Page 41 If you ever wish to verify your factory-calibrated Vertical and Horizontal calibration settings, you can run a simple calibration procedure to assure that your images will be centered when printed on a CD. To do this, refer to the following steps: Click Center Print Image in the Printer Settings Window.
-
Page 42: Label Design Requirements For Other Graphics Programs
Select the OK button. Your images should now be centered when printed on a disc. Note: If you think you know what values to enter for the horizontal and vertical fields you may skip the Auto Calibration and enter the values directly by clicking Manually Set Values. -
Page 43: Section 3: Maintenance And Troubleshooting
Section 3: Maintenance and Troubleshooting The Publisher is designed to operate for extended periods of time with very little attention. In fact, no regular maintenance is recom- mended other than cleaning the outside case. NOTE: Do NOT attempt to oil or grease the Publisher's Robotic Arm shaft or other components. -
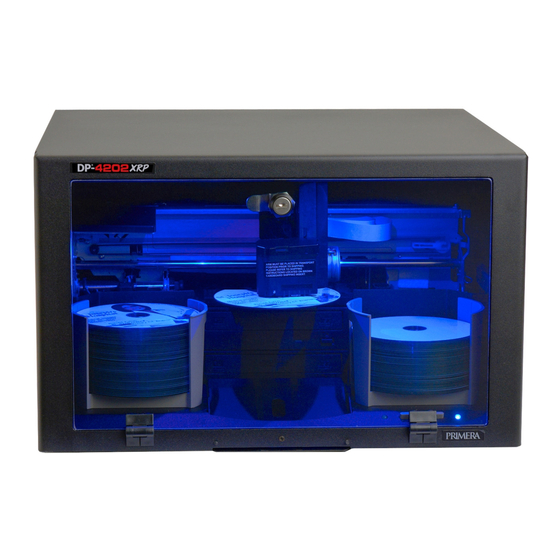
Page 44: Internal Blue Led Lights
B. INTERNAL BLUE LED LIGHTS The Publisher’s Internal LED lights provide useful light and also can provide status information. By default, the lights are set to Flash Enabled. This condition will flash the internal LED lights off and on during any error condition. •... -
Page 45: Performing A Robotic Self-Test
Continue to hold the Cartridge Button for five seconds. After sever- al more seconds, the robotics will undock and the arm will lower. Power will shut off automatically once the robotics are in transport position. If you have the cardboard spacer that was shipped with the unit, replace the spacer inside the unit and close the cover. -
Page 46: Poor Print Quality - Cleaning The Cartridge
E. POOR PRINT QUALITY - CLEANING THE CARTRIDGE It may be necessary to clean the ink cartridge nozzles if you notice reduced print quality, or if you suspect a cartridge nozzle has become slightly dried out or clogged. If the cartridge has been left out of the printer more than 30 minutes, the ink in the printhead nozzles may have dried. - Page 47 Determine if printing is now acceptable After the printer has completed cleaning the cartridge, a sample will be printed. If the sample has missing colors or voids within a color strip, remove the printhead from the printer and proceed to step 4. Good Print Bad Print - Missing Cyan Disc Publisher 4200...
- Page 48 Soak the paper towels in water for 5 seconds. Note: Do not squeeze water from paper towels after removing from water. Place one paper towel on printhead nozzles. Printhead Nozzles Place one Gently press Leave paper paper towel on paper towel with towel on printhead nozzles finger...
- Page 49 Wipe printhead nozzles. Remove paper towel Place second paper towel on from printhead nozzles flat/hard surface. and discard. Firmly press printhead nozzles into paper towel and drag printhead in the direction indicated. After wiping the printhead nozzles, the paper towel should show all three colors.
- Page 50 Clean the printhead using the clean printhead/cartridge utility. - Reinstall printhead. Access the printhead/cartridge clean function described in step 2. To insure all water has been removed from the nozzles, repeat this step twice. 10. Verify printhead is now functioning properly by repeating the print assessment described in step 3.
-
Page 51: Technical Support
Disc Publisher 4200 Clean Print Disc Publisher 4200 Clean Print Source Location Primera Knowledge Base www.primera.com/kb PTPublisher Software Help files Open the software. Click on the SureThing Software Help files Open the software. Click on the Help Menu - Contents Email Support support@primera.eu... -
Page 52: Section 4: Technical Specifications
Section 4: Technical Specifications Model Optical Disc Publisher DP-4202 XRP Configurations Blu-ray Publisher DVD+/-R-CDR Publisher Printing Method Inkjet Printing Resolution 4800 x 1200 dpi, 2400 x 1200 dpi, 1200 x 1200 dpi, 600 x 600 dpi Ink Tank: Single CMY cartridge... -
Page 53: Index
Index Abort ....................21 Audio Project ...................14 AUDIO_TS .................14, 26 Backup Project ................. 22 Blu-ray ....................1, 2 BDR ....................1, 2 Calibrate Disc Publisher ..............36 Center Print Image ................. 36 Color Matching ................34 Connections, Rear Panel ..............5 Controls, Front Panel ................ 4 Change Robot ..................18 Closed Disc ..................19 Copy Project ................ - Page 54 Recording Type ................19 Reject Area ..................5, 9 Rip Audio ..................25 Robot Options ...................9 Saturation ..................33 Save Project ..................18 Schedule Project ................19 Set Time and Date to Mastering Time .........20 Span Discs ..................22 Specifications ................... 48 Swift Publisher ................10, 28 Technical Support ................
- Page 56 P/N 511446...
Need help?
Do you have a question about the DP-4202 XRP and is the answer not in the manual?
Questions and answers