Table of Contents
Advertisement
Advertisement
Table of Contents

Subscribe to Our Youtube Channel
Related Manuals for Purkeys SELECT


Summary of Contents for Purkeys SELECT
- Page 1 SELECT™ DIAGNOSTIC GUIDE MAXON # 295210-501-M INST028-M R3.03...
-
Page 3: Table Of Contents
Wire Diagram and Legend .............4 Diagnostics ..................6 Excessive Voltage Drop Diagnostics ........6 Static Diagnostics ..............7 Stinger Diagnostics ..............9 Reefer Diagnostics ..............12 AUX Diagnostics ..............15 Charging Diagnostics .............19 Testing the DC/DC converter ..........21 Limited Commercial Warranty Policy ..........24 P: 479.419.4800 | F: 479.419.4801 | www.purkeys.net... -
Page 4: General Information
The LED indicators clearly show the status of the source as well as the status of the liftgate batteries. A quick glance at the Select Controller assures the driver that the liftgate batteries are ready to go, or alerts the driver that the... -
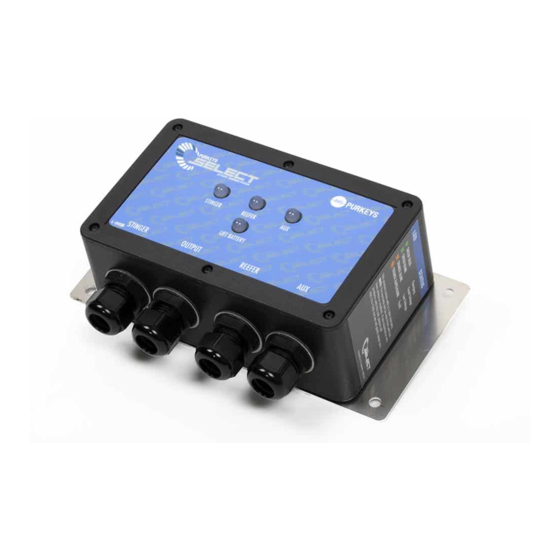
Page 5: Select Call-Outs
SELECT DIAGNOSTIC GUIDE SELECT CALL-OUTS P: 479.419.4800 | F: 479.419.4801 | www.purkeys.net... -
Page 6: Wire Diagram And Legend
30 Amp Circuit Breaker DC/DC Converter DC/DC Converter Output Stud DC/DC Converter Input Stud (+) DC/DC Converter Input Stud (-) 2 Amp Inline Fuse from Liftgate Batteries Select Controller Input Source (Stinger, 7-Way, Straight Truck Battery Pack, or Reefer Unit) - Page 7 Battery (-) Fused Stud (-) DC/DC Converter DC/DC Converter Ignition Yellow Ignition Stud Select Controller Black Power Out to DC/DC Converter Input (+) DC/DC converter Trailer Battery Positive Liftgate Battery Orange Sense (Controller Power) P: 479.419.4800 | F: 479.419.4801 | www.purkeys.net...
-
Page 8: Diagnostics
If there is excessive voltage drop between the source battery and the Select Controller, both Source and Lift Battery LEDs will briefly turn green, indicating that the Select is trying to charge the batteries. Then both LEDs will toggle orange for a few seconds. -
Page 9: Static Diagnostics
STATIC DIAGNOSTICS Not connected to a charging source or not charging (at rest) (see Figure 2 for location of Liftgate Battery LED; see Figure 3 for LED status reference, located on right side of Select Controller). Figure 2 Figure 3... - Page 10 Figure 4 REFERENCE #2 No LED: Open circuit between liftgate battery positive or liftgate battery ground and the Select Controller. Follow the steps below to diagnose the No LED Status (see Figure 5). Figure 5 Step 1: Using a voltmeter, measure the voltage between the DC/DC converter side of the circuit breaker and the negative post on the liftgate battery (see V1 in Figure 5).
-
Page 11: Stinger Diagnostics
Select Controller. Once these steps are completed, if there are still no LEDs, call customer service as the Select Controller may not be functioning properly. STINGER DIAGNOSTICS Unplug the 7-way, turn off the reefer, plug in the stinger, and start the tractor (see Figure 6 for location of Stinger LED;... - Page 12 LED STATUS CONDITION ACTION NEEDED REFERENCE Verify that liftgate battery is charging Charging with (see Charging Solid Green stinger as Diagnostics section source. on page 19 ). Input voltage Determine cause Slow from the stinger for low voltage Flashing cord has dropped Ref #4 condition and Orange...
- Page 13 Select Controller (see V1 in Figure 9). It should read 13.2 volts or greater. If yes, and the light still is not solid green, call customer service, as the Select Controller or Control Module may be defective.
-
Page 14: Reefer Diagnostics
Figure 9 REEFER DIAGNOSTICS Start the reefer unit and unplug the stinger and 7-way cord (see Figure 10 for location of Reefer LED; see Figure 11 for LED status reference, located on right side of Select Controller). Figure 10 Figure 11... - Page 15 Ref #7 and repair or replace connection. the circuit. Green, then Replace or repair Toggling Excessive the source power Ref #8 Orange and voltage drop. and ground wire Repeating harness. P: 479.419.4800 | F: 479.419.4801 | www.purkeys.net...
- Page 16 Select Controller (see V1 in Figure 13). It should read 13.8 volts or greater. If yes, and the light still is not solid green, call customer service as the Select Controller or Control Module may be defective.
-
Page 17: Aux Diagnostics
AUX DIAGNOSTICS Start the tractor and unplug the stinger cord. Turn the reefer unit off (see Figure 14 for location of Aux LED; see Figure 15 for LED status reference, located on right side of Select Controller). Figure 14 Figure 15... - Page 18 LED STATUS CONDITION ACTION NEEDED REFERENCE Verify that liftgate battery is charging Charging with Solid Green (see Charging AUX as source. Diagnostics section on page 19). Input voltage Determine cause Slow from the AUX of for low voltage Flashing the 7-way has Ref #10 condition and Orange...
- Page 19 7-way cord. Start the tractor and let the engine run. Use a voltmeter to measure the voltage between the AUX ground stud and the AUX positive stud inside the Select Controller (see V1 in Figure 18). It should read 13.8 volts or greater. If yes, and the light still is not solid green, call customer service, as the Select Controller or Control Module may be defective.
- Page 20 (see Figure 17), as the problem may be a failing circuit breaker. Either replace circuit breaker with a new part or connect the blue wire from the Select Controller to the unprotected side of the circuit breaker. Circuit protection is provided by the 30 amp fuse inside the Select Controller.
-
Page 21: Charging Diagnostics
LEDs is Solid Green). The Lift Battery LED status is as listed in table below (see Figure 19 for location of Liftgate Battery LED; see Figure 20 for LED status reference, located on right side of Select Controller). Figure 19 Figure 20 P: 479.419.4800 | F: 479.419.4801 | www.purkeys.net... - Page 22 Open ground Repair circuit and/ Flashing Ref #1 fuse. or replace fuse. Orange Open circuit from liftgate battery positive Repair circuit, reset and Select No LED circuit breaker, or Ref #2 Controller or replace fuse. disconnected ground in liftgate battery box.
-
Page 23: Testing The Dc/Dc Converter
Ref #13 side is in working order. Rapid DC/DC Flashing converter has Determine the fault. Ref #12 & #13 a fault. No Light No voltage. Determine the fault. Ref #12 & #13 P: 479.419.4800 | F: 479.419.4801 | www.purkeys.net... - Page 24 REFERENCE #12 Steps to test power to the DC/DC converter: Step 1: Look at the Source LEDs on the Select Controller and ensure that one of them is Solid Green. If no, refer to the Stinger, Reefer, or Aux Diagnostics sections. If yes, measure the voltage at the DC/DC Converter Input (+) stud and Ground (-) Liftgate Battery (Fused) stud (see V1 on Figure 22).
- Page 25 DC/DC converter is functioning properly; allow time for the batteries to charge. If no, check the wiring and connections to the DC/DC converter. If problem continues, replace the DC/DC converter. Figure 22 P: 479.419.4800 | F: 479.419.4801 | www.purkeys.net...
-
Page 26: Limited Commercial Warranty Policy
Purkeys. ANY Product alleged by a Customer to be defective must be inspected by Purkeys as a part of the warranty claims process in order to confirm that the part has failed as a result of a defect in material or workmanship. - Page 27 SELECT DIAGNOSTIC GUIDE P: 479.419.4800 | F: 479.419.4801 | www.purkeys.net...
Need help?
Do you have a question about the SELECT and is the answer not in the manual?
Questions and answers