Table of Contents
Advertisement
Advertisement
Table of Contents

Related Manuals for Lenoxx BCD118


Summary of Contents for Lenoxx BCD118
- Page 2 Are you a vinyl connoisseur, or perhaps a budding music entrepreneur? Whether you’re making memories, or on a quest for that perfect, new sound – our Retro Bluetooth Music Centre offers a treasure trove of entertainment possibilities, just waiting to be opened and discovered.
- Page 3 This appliance is intended for household use only. DANGER! CAUTION! This symbol alerts you that there is dangerous voltage inside. To prevent electric shock, do not open the enclosure. IMPORTANT! This symbol alerts you to read and observe important warnings and instructions on the unit or in this manual.
- Page 4 Installation • When installing the unit, make sure to place it: • Away from heat sources, radiators or other products that produce heat. • Away from areas with hot temperatures, high humidity or direct sunlight. • Away from excess dirt and dust. •...
- Page 5 Getting Started Before First Use • The unit may become hot during operation. Always leave sufficient space around the unit for ventilation. • The voltage supplied to the unit should match the voltage that is printed on the back panel. If you have any doubts concerning this matter, consult an electrician. •...
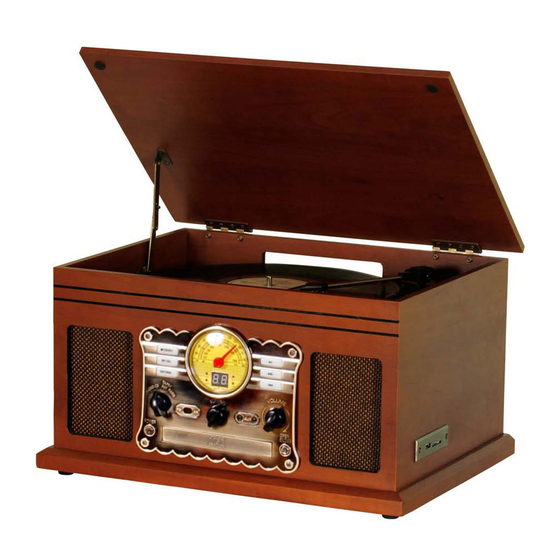
- Page 6 Location of controls *Please note: actual unit front plate decoration will vary from picture.
- Page 7 1. Display Panel 2. Stop: Stop playback in CD/USB/SD modes; stop recording. USB/SD/BT: Switch to USB or SD card or Bluetooth modes. 3. Record/Delete 4. Repeat/Program 5. Speakers (Stereo) 6. Function Knob: Rotate the knob to select PHONO, CD, AUX, or RADIO. 7.
- Page 8 31. FM Antenna 32. Line out sockets 33. Power cord Remote control:...
- Page 9 CD: Press to enter CD playback mode. Open/close: Press to open and close the CD disc tray. REC: For use during recording function. While listening to CD/PHONO/TAPE/AUX-IN (USB stick or SD card must be inserted if you wish to record), press REC. “REC” will be shown on the display screen of the unit.
- Page 10 Instructions Compact Discs • The unit is compatible with conventional audio CD’s and properly finalised CD-R and CD-RW discs. • Always place the disc in the disc tray with the label side facing up. (Compact discs can be played or recorded on one side only.) •...
- Page 11 Head Maintenance The head and tape path should be cleaned and demagnetised on a regular basis. Use cassette tape head cleaner and demagnitiser. For special details on the proper use of these items, read each item’s instruction manual. Vinyl Records •...
- Page 12 Connections FM Antenna While in FM mode, tune in to an FM station and extend the antenna to find a position that provides the best reception. The antenna may need to be repositioned if you move the unit to a new location. AC Power Cord Plug the AC power cord into an AC wall socket.
- Page 13 • Push the Lift Lever up to raise the Tone Arm and then gently move the Tone Arm to the desired position over the record. The platter will begin to spin when the Tone Arm is moved toward the record. Push the Lift Lever forward to lower the Tone Arm slowly onto the desired position on the record.
- Page 14 Playing a CD • Turn the unit ON by pressing the Power button. • Set the Function knob (PHONO/CD/AUX/ RADIO) to CD. • “- -” will blink for a few seconds. When no disc is loaded “no” will appear on the display screen. •...
- Page 15 · Turn on your smart device and access the devices Bluetooth settings. Set your smart device to search for Bluetooth devices. The Bluetooth device name for this unit is Lenoxx BCD118. Select this device on the list on your smart device and when pairing has been made successfully, you will hear a connection tone sound.
- Page 16 • To pause playback, press the PLAY/PAUSE ( ▶‖) button once to halt playing. Press it again to continue playback. • To play the previous track, press ▎◀◀ once or hold down continuously to rapidly progress through previous tracks. • To play the next track, press ▶▶ ▎ once or hold down continuously to rapidly advance through tracks.
- Page 17 Playing Music from an Auxiliary Input: Playing via the 3.5mm AUX-IN Jack • Turn the unit ON by pressing the Power button. • Set the Function knob (PHONO/CD/AUX/RADIO) to the AUX position. • Connect one end of the 3.5mm AUX-IN cable (not supplied) into the 3.5mm AUX-IN Jack on the front panel of the unit and the other end to your audio...
- Page 18 FAQ’s Problem Solution Unit will not power Make sure that the unit’s power cord is connected to an appropriate electrical outlet and the wall socket is switched on. There is no sound Rotate the power/volume knob clockwise to increase the volume. If volume is low when using Bluetooth mode, you can also adjust your smart devices volume settings.
- Page 19 SPECIFICATION INFO POWER Power input AC 220-240V Power consumption Dimensions 460 mm width x 335 mm depth x 245mm height AMPLIFIER AND SPEAKER Output power 2 x 5W Frequency response 60-20,000Hz Speaker impedance 4 Ω S/N ratio 35dB TUNER FM frequency range 88MHz-108MHz AM frequency range 530MHz-1600MHz...
Need help?
Do you have a question about the BCD118 and is the answer not in the manual?
Questions and answers