
Related Manuals for Hotpoint Ariston ARGD149K EU


Summary of Contents for Hotpoint Ariston ARGD149K EU
- Page 1 5407472 Issue 1 Sept 2008 WASHING MACHINE Models Comm. Covered Code LCD Display ARGD149K EU 61359 Service Information Indesit Company UK Ltd © 2008 Reg. Office: Peterborough PE2 9JB Registered in London: 106725...
-
Page 2: Safety & Servicing Notes
Indesit Company SAFETY NOTES & GENERAL SERVICING ADVICE 1. This manual is NOT intended as a comprehensive repair/maintenance guide to the appliance. 2. It should ONLY be used by suitably qualified persons having technical competence applicable product knowledge and suitable tools and test equipment. 3. -
Page 3: Table Of Contents
Indesit Company SERIAL NUMBER / INDUSTRIAL CODE EXPLANATION Serial Number Example 3 10 02 0895 Four remaining digits = Build number that day 895 built Third two digits = Day of manufacture 2 of month Second two digits = Month of manufacture October First digit = Year of manufacture 2003 Industrial Code Example 37 24455 0010... -
Page 4: Specifications
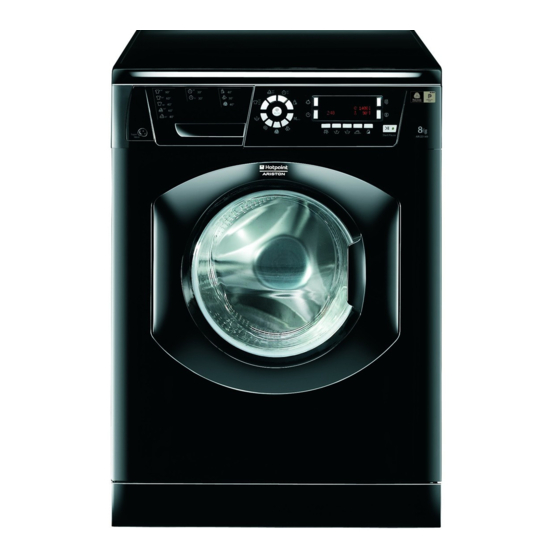
Indesit Company SPECIFICATIONS Models Covered ARGD149K EU Colour K = Black Dimensions Height 850 mm Width 595 mm Depth 600 mm Weight 72 kg Nett Weight Packed 74 kg Country of Origin Great Britain - Kinmel Park Factory (94) Electrical Supply... -
Page 5: Controls & Options
Indesit Company CONTROLS FIRST TIME USE The first time the machine is switched on, you will be asked to select the language - the display will automatically show the language selection menu. To select the desired language, press the Temperature and Spin buttons to scroll through the choices. To confirm the selection press the Child Lock button. - Page 6 Indesit Company DOOR LOCKED INDICATOR LIGHT The Door Locked indicator light will come on when you press the START / PAUSE button and will stay lit throughout the programme.When the programme has finished, the indicator light will go out and you can then open the door.
- Page 7 Indesit Company OPTIONS Option Buttons Options are selected by pressing the button and confirmed by illumination an orange LED sited in the button. If an option is not available with a programme, the LED will flash and a bleeping noise will be heard when pressing the button.
- Page 8 Indesit Company STAIN REMOVAL This function is particularly useful for the removal of stubborn stains. Place extra compartment 4 (supplied) into compartment 1. When pouring in the bleach, be careful not to exceed the “max” level marked on the central pivot (see figure). To run the bleach cycle on its own, pour the bleach into extra compartment 4, set the “Rinse”...
-
Page 9: Wash Programmes & Demo Mode
Indesit Company WASH PROGRAMMES Max. Max. D etergents load load Max. C ycle (kg) (kg) D escription of the wash cycle tem p. speed duration (°C ) (rpm ) Pre- Fabric M ini Bleach Wash N orm al wash softener Load Eve ryday wash cycle s (Daily) 90°... -
Page 10: Controls Information / Main Board Programming
Indesit Company CONTROLS INFORMATION A single control board located at the back of the machine contains all the circuitry to control the machine and interfaces with the LCD / Selector, option buttons and LEDs located on the console panel. The control board has an access port to the rear of the machine. Programmes are selected by using the Selector Dial. - Page 11 Indesit Company PROGRAMMING (Using Smartcard Reader / Card) If the Main Module has been replaced during a repair the board will require programming using the following method. Do NOT connect the machine to electrical supply. Smart Card Reader Insert the pre-programmed card into the Card and Smart Card in use reader.
-
Page 12: Automatic Features
Indesit Company Automatic Features Auto Half Load Auto half load adjusts the amount of water in the wash load depending on the absorbency of garments in the wash load. Fabric Conditioner Dispensing Dispensing of fabric conditioner is achieved by energising both the Pre-Wash and Main Wash cold valves. -
Page 13: Wiring Diagram
WIRING DIAGRAM Black Mains Input Filter Pressure Switch Wash Motor Motor Frame Thermal 100 Kohms Protector to Earth Wash (if fitted) via Input Filter Thermistor Water Valves Fabric Cold Pump 3 phase Wash Motor Tacho Lav. Test RTN_PORTA RTN_IP 1 2 3 4 5 5407472wdiag.pdf Door Interlock... -
Page 14: Error Codes & Possible Causes
Indesit Company ERROR CODES & POSSIBLE CAUSES When an error occurs the following will be indicated in the display. Refer to the chart below for the error code definitions. Display Possible Causes & Actions Code Motor triac short circuit: Check motor and module connections Motor jammed / tacho detached: Check motor and module connections NTC short/open circuit: Check thermistor and module connections Pressure switch jammed on empty: Check switch and module... -
Page 15: Dismantling Instructions
Indesit Company DISMANTLING INSTRUCTIONS SAFETY NOTES Ensure that the appliance is disconnected from the electrical supply before dismantling. Beware of sharp edges on metal panels, plastic mouldings, and pressed parts. Some fixings (especially those into plastic) must be tightened to the correct specification using a suitable torque wrench. - Page 16 Indesit Company Console PCB & Button Assemblies Remove the console panel (D). Remove wiring plug - taking note of position. Remove three securing clips and lift away from the console. Pressure Switch Remove the table top (A). Disconnect the wiring connection block and pressure hose. Carefully unclip bracket from cabinet side and then unclip switch from bracket.
- Page 17 Indesit Company Door Assembly Top Hinge removal (shown below) - Slide towards lower hinge, twist to the left and slide Open the door through 180° and remove four up to release. screws securing the hinges to the front panel. Ease the hinges from the panel. Lower Hinge removal - Slide upwards, twist to the right and slide down to release.
- Page 18 Indesit Company Motor Remove the lower rear access panel (B) and drive belt (L). Disconnect the motor wiring connection plug and earth wire. Using a 13 mm socket or ratchet ring spanner, remove both motor mount fixing screws. Ease the motor off the drum mountings. Prior to refitting the motor, ensure that the drip shield and mounting-bush are not worn or damaged.
- Page 19 Indesit Company Withdraw the suspension damper. The unit should not be split and is not serviceable. When reassembling, fit a new plastic peg if the locking-tab on it shows signs of damage. R(b) Suspension Spring Remove the table top (A). Unclip any wiring retained within the integral clip on the spring bearing keeper plate.
- Page 20 Indesit Company Remove the lower rear access panel (B). Remove the motor (M). 10. Detach the drum from the damper units by removing the two plastic pegs using special tool Part No. C00141734. 11. Remove the sump hose fixing clip and detach the sump hose from the sump chamber. 12.
- Page 21 Indesit Company Power Module ! IMPORTANT NOTE This appliance is manufactured with a '3 phase' motor and uses a different type of power module. This power board is fitted with a large aluminium heat sink which remains live after the power is disconnected. Under no circumstances should the board be removed under the time shown below.
- Page 22 Indesit Company Service Manual UK English 22 of 22...
Need help?
Do you have a question about the ARGD149K EU and is the answer not in the manual?
Questions and answers