Advertisement
Quick Links
Advertisement

Related Manuals for Case IH Luxxum


Summary of Contents for Case IH Luxxum
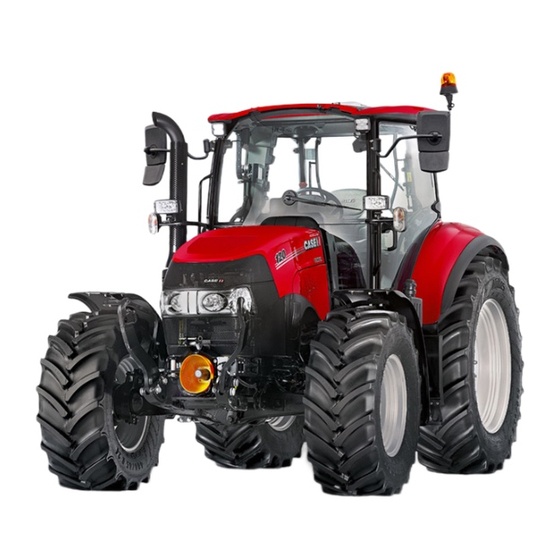
- Page 1 Luxxum Quick Instruction This booklet gives a brief overview of the most important controls. The quick instruction is not a substitute for the operator´s manual! To operate the vehicle follow the instructions in the operator´s manual! Case IH Luxxum Date: 08.01.2018...
- Page 3 Heating switch for Front/Rear Screen Tractor light main switch Heating switch for Rear mirrors Battery Main switch Rear Mirror Adjustment Trailerbrake test switch AC/Heating Control Unit Rear Screen Wiper/Washer Shuttle Lever + Neutral Button Auxiliary Light Switch Dashboard (Speed, gear settings, etc…) Front axle suspension switch Front Wiper, Indicator Front axle manual leveling...
- Page 4 Controls...
- Page 5 Mechanical rear remotes 18. PTO soft start Multicontroller 19. EDC controls Electronical remotes (f/r) 20. Signal socket Mechanical lever for front remotes 21. ISO-BUS cabIN socket Toggle switch f/r remotes 22. Power socket Encoder for remote settings (timer, flow) 23. Eco / Normal pto lever Hand throttle 24.
-
Page 6: First Steps
First steps When starting your tractor make sure: Depress clutch pedal You can only start the engine when the clutch is fully depressed. Shuttle lever has to be in neutral position Activate hitch and hydraulic functions remote valves active center: remotes and rear hitch deactivated down: remotes and rear hitch... - Page 7 Multicontroller (Version: electro-hydraulic remotes) Multicontroller (Backside) PowerClutch Constant engine speed Power Transmission Shuttle Shift modes Rear Hitch up/down, quick penetration, stop Remote Valve Remote Valve Powershift F1/R4 – R3 F1/R4 – R3 Multicontroller gears (version mechanical remotes)
- Page 8 Dashboard Side lights Front axle suspension Trailer Brake High Beam STOP WARNING Hand brake Indicator Brakes not Trailer I/II latched Eng. Oil pressure Turn left Turn right Grid heater Constant ERPM Rear/Front Rear/Front Alternator Low fuel DiffLock charging level Rear AUTO Remotes...
- Page 9 Display • rear pto speed 1 = Home / Enter • rear hitch position 2 = Up / Down • front pto speed • EFH pressure Current gear • EFH position • slippage (with radar o) gear shift mode • Ad Blue status Driving direction •...
- Page 10 GEAR SHIFT Modes Gear match: (standard setting) Automatically adapting the • powershift steps that fits best to the present speed while up- & downshifting ranges. Auto FIELD: Only PS-steps in a range • will be shifted automatically Auto TRANSPORT: All gears will be shifted •...
- Page 11 Automatic Power Shift Function: Choose FIELD or TRANSPORT Automode with button on the Multicontroller. Auto FIELD: Only PS-steps in a range will be shifted automatically. Auto TRANSPORT: All gears will be shifted automatically. Gear shifting points can be adjusted according to engine speed and load by moving the right hand throttle (5) up or down.
- Page 12 Transmission programming There are 4 different modes to program for proper driving: ActiveClutch Delta (Memory shuttle) Powershift steps in Auto Filed mode Standard gear 1. Press! To start the transmission programming procedure push the PROG button on the armrest. ActiveClutch Brings the tractor to a stop, only by pressing the brake pedal without using the clutch.
- Page 13 Powershift steps in Auto Field mode Adjusting the bandwidth of powershift gears that can be used automatically in the field. To adjust press +/- on MC. 3. Press! Standard gear Setting the standard gear that is automatically engaged after starting the engine.
- Page 14 How to drive… Choose Field or Road range. Select driving direction Realease the clutch tractor will start in the standard gear! Shift group 1 to 4 with Shift together with +/- or PS-steps with just +/- on the MC. To stop the tractor again use the clutch or Powerclutch button on the MC! Gearmatch is always active after starting the engine Change...
-
Page 15: Transmission Features
Transmission features Anti-Jack-Knifing By pushing Shuttle FWD button in this situation, automatic gear-shifts can be inhibited and tractor is driving smoothly as well down a hilly curve. Shuttle reactivity How quickly tractor will shuttle from forward to reverse. The option to have a high reactivity setting during loader work for near-instant shuttling, or may wish for a low reactivity setting during field work for a smoother ride. -
Page 16: Front Axle
Front axle Press 3 sec. The suspended axle offers the possibility to raise/lower the height of the tractor s front-end with a switch. Axle capacity of 3.500 kg The suspension can be turned off between 0-12 Manual leveling up & down km/h. - Page 17 Constant engine speed Two electronically regulated constant engine speeds can be stored. This function is particularly helpful when operating with PTO. The engine speed can conviniently be reduced on the headland by simply pressing a button on the Multicontroller and increased again in the same way.
- Page 18 AUTOMATIC STOP/RUN OF PTO SHAFT WHEN IMPLEMENT IS LIFTED/LOWERED Turn on pto Switch on auto pto. Drive off and start working. ADJUSTMENT OF ON/OFF POINTS Adjust the shut off and turn on points in accordance to the lifting height of the rear hitch: Press the auto pto switch for more than 3 seconds.
- Page 19 Mechanical valves Up to 3 rear remotes controlled with levers on side console. Positions: raise / neutral / lower / float / lock Joystick for front loader operation controls two front remote valves. Positions: raise/neutral/lower/float Detent on float position available. Oil flow volume can be adjusted for all remote valves by turning the designated plastic wheels.
- Page 20 Electrical valves 2 remote valves on Multicontroller, default: rear remotes. 2 remote valves on joystick, default: front remotes (front hitch, front loader). Toggle switch: changes operation of rear and front valves between Multicontroller and joystick. Push/turn switch to adjust timer and oil flow values. see in dashboard.
- Page 21 Electronic Rear Hitch - Draft Control 1. EDC main switch. 2. Work position selector. Adjusts maximum working depth. 3. Draft - / position control selector. Turn fully right: rear hitch position controlled in accordance to draft force variations. Turn fully left: rear hitch position remains constant regardless draft force variations.
- Page 22 EFH Panel Fully left = float control full implement weight on the ground. Two operation modes available: Fully right = pressure control Position control for precise • full implement weight on front axle. working height of the implement. turn to the right to increase value of position control.
- Page 23 CALIBRATION OF IMPLEMENT WEIGHT Adjust the height limiter so that the implement is minimally lifted from the ground. Press and hold the raise button on Multicontroller. Keep raise button pressed until red EFH control light starts flashing. When the flashing stops the calibration process is finished.
- Page 24 www.caseih.com...
Need help?
Do you have a question about the Luxxum and is the answer not in the manual?
Questions and answers