Advertisement
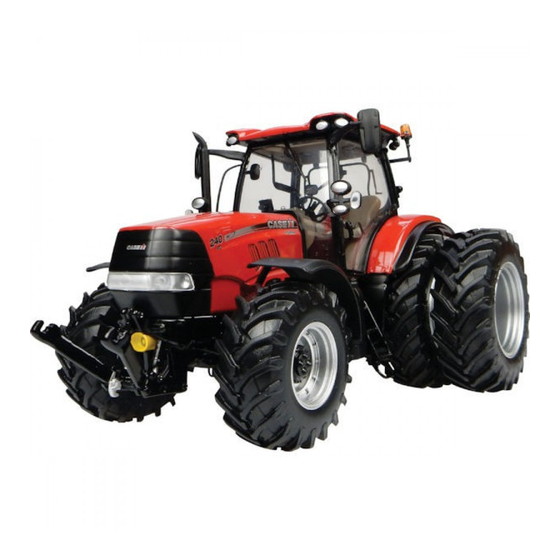
PUMA CVX
QUICK INSTRUCTION
The quick instruction is not a substitute for the operator´s manual !
Note: this quick instruction also includes optional
equipment that is not included in the basic version.
This booklet gives a brief overview of
the most important controls of the
Case IH Puma CVX
To operate the vehicle follow the
instructions in the operator´s manual !
150, 165, 175
185, 200, 220, 240
Advertisement
Table of Contents

Related Manuals for Case IH PUMA CVX 150


Summary of Contents for Case IH PUMA CVX 150
- Page 1 QUICK INSTRUCTION This booklet gives a brief overview of the most important controls of the Case IH Puma CVX The quick instruction is not a substitute for the operator´s manual ! To operate the vehicle follow the instructions in the operator´s manual ! Note: this quick instruction also includes optional equipment that is not included in the basic version.
-
Page 2: First Steps
FIRST STEPS To start using the tractor: Set Shuttle Lever in Parking Position ! To start the engine set shuttle lever in parking position (press lever down, then forward). Ensure that Multicontroller (MC) is fully pulled back ! Only start the engine with the MC in full backward position. - Page 3 FIRST STEPS Depress Clutch Pedal ! In order to start the engine the clutch pedal must be depressed. Choose the right speed range! 3 speed ranges (target speeds) each in forward and reverse are available. The target speed in each speed range can be adjusted between 0,03 and 43 or 52 km/h with the scroll wheel on MC.
- Page 4 DRIVING SELECTION OF DRIVING SPEED: Both Multicontroller and driving foot pedal change the ground speed when being moved. Engine speed and transmission ratio are automatically adjusted by the APM engine – transmission management no operator effort required. APM is always available at key on. ACCELERATION: Your Puma CVX will increase the ground speed proportionally to the rate you move the MC forward or...
- Page 5 DRIVING DECELERATION: Driving with Multicontroller: • Pulling back MC fully backward slowly / moderatly speed reduction in accordance to set aggressivity level active hold control. • Pulling back MC fully backward quickly max. deceleration through engine and gearbox (4WD engages) ...
-
Page 6: Control Elements
CONTROL ELEMENTS 1 . Shuttle Lever + Parking Brake A-Pillar Instrument AFS 700 Monitor Multicontroller Eco-Drive™ (split hand throttle) Remote Valve Operation Intuitive Control Pannel (ICP) Control Elements under Armrest Cover Power Take Off F + R on/off PTO speed selection... -
Page 7: Shuttle Lever
CONTROL ELEMENTS SHUTTLE LEVER (Forward / Reverse Integrated Parking Brake (also activates trailer brakes!) Neutral MULTICONTROLLER Power Shuttle Speed Range (Cruise Control) Remote Valve Rear Hitch up / down, quick penetration, stop Scroll Wheel target speed HMC & CERPM Button Shift head land management constant engine speed... - Page 8 CONTROL ELEMENTS CONTROLS UNDER LID OF ARMREST Lowering throttle rear hitch. Sensitivity draft control system. Height limitation rear hitch. Slip control value [%]. Remote valve configuration– oil flow, timer. Push–turn logic. Lift height limitation front hitch. Lowering throttle front hitch, (FHM only ...
- Page 9 DISPLAY ON THE A-PILLAR MULTI FUNCTION DISPLAY: - configuration menu - engine load [%] Engine coolant - engine oil pressure [bar/%] - engine oil temperature [°C] temperature - charge air temperature [°C] - AdBlue temperature [°C] - transmission oil pressure [bar] Fuel level - transmission oil temp.
- Page 10 INTUITIVE CONTROL PANEL CONSTANT ENGINE SPEED Press button 1 or 2 actual Headland Management Control engine speed is saved constant system: speed function is activated. - recording Fine adjustment with arrow keys. - automatic or sequencial replay Toggle between stored speeds with respective button on MC (page 7).
-
Page 11: Front Hitch
INTUITIVE CONTROL PANEL HYDRAULIC STATUS REAR HITCH indicator lights for de-activated Working depth (lowest position) remote valves and rear hitch Percentage draft- / position control ACCU-GUIDE Sensitive UP/DOWN (ideal for AUTO PTO activation of implement connection) plus guidance system (see page 16) operation indicator lights JOYSTICK CVT MODE... -
Page 12: Remote Valves
REMOTE VALVES OPERATION: 1 . Rear mounted remote 1 respectively – if fitted - remote 5 is activated on Multicontroller. Any remote with option configurable remote valve operation. 2. Paddle levers on armrest control up to 4 remote valves in a proportional way (default for operation of rear mounted valves). - Page 13 REMOTE VALVES CONNECTION: Connecting a single acting cylinder: Puma 185-240 CVX raising hydraulic hose coupled to port To extend cylinder paddle lever in lowering raise position (fully backwards) To retract (lower) cylinder paddle lever in float position (fully forward) raising Connecting a double acting cylinder: hydraulic pressure hose coupled to...
- Page 14 FRONT HYDRAULIC & PTO COMPONENTS: FHPL cooler single or double acting mode for front hydraulic power lift* external control FHPL front couplers front PTO front hydraulic power lift on/off* * models 185 – 240 only...
- Page 15 FRONT HITCH MANAGEMENT WORKING WITH FHM: Connect front implement with sensitve raise / lower buttons. Adjust maximum lift height. Adjust lowering throttle in off position FHM is locked. the front hitch can now be operated with the joystick. Set working position of implement.
-
Page 16: Power Take-Off
POWER TAKE OFF SPEED SELECTION PTO brake release P uma 150 – 175 CVX: 3 PTO speeds available. Options: 540 / 540E / 1.000 540E / 1.000 / 1.000E PTO speed selector Engine speeds: - 540 @ 1.969 rpm - 540E @ 1.546 / 1.592 rpm - 1.000... -
Page 17: Available Functions
AFS PRO 700 MONITOR AVAILABLE FUNCTIONS: 6 configurable general setup, adjustments work screens USB data transfer software status, GPS, RDI, VT,… status info icons configurable info field Accu Guide & area HMC I status bar tractor, imple- data ment settings storage advanced HMC II... -
Page 18: Recording A Sequence
HEADLAND MANAGEMENT CONTROL All Puma CVX tractors are equipped with a system that enables recording and playback of repeated actions on the headland HMC. HMC status and functions are displayed in AFS Pro monitor. RECORDING A SEQUENCE: Choose if you want to record sequence (field out) or (field in) time... - Page 19 HEADLAND MANAGEMENT CONTROL REPLAY OF A SEQUENCE: Choose if you want to replay sequence (field out) or (field in) with time or distance based recorded values. You can also replay sequences A and B in alternating order long short = replay standby toggle ...
- Page 20 HMC II As an option the Puma CVX can be equipped with a state of th art end of row system that is operated on the AFS monitor HMC II. Depending on the tractor configuration there are different HMC II functions storeable.
- Page 21 HMC II continue working and execute all necessary actions on the headland. Stationary recording: it is possible to record the whole sequence stationary by inserting the relevant actions and triggers directly to the AFS screen. Depending on the tractor configuration there are different HMC II functions storeable.
- Page 22 HMC II STORING A SEQUENCE: 2 different sequences (slot A+ slot B) – e.g. A for leaving the field, B for entering field - can be stored allocated to a specified implement. select an existing implement or create a new one in the implement setup (toolbox) respectively profile setup (performance).
- Page 23 HMC II Scroll...
- Page 24 www.caseih.com 06/2016...
Need help?
Do you have a question about the PUMA CVX 150 and is the answer not in the manual?
Questions and answers