Advertisement
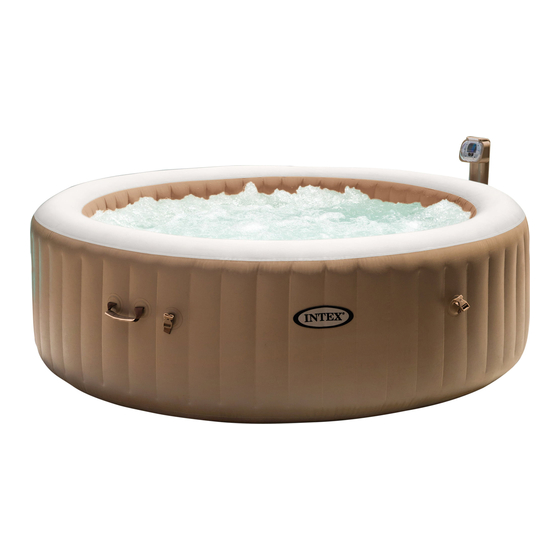
PureSpa™
SSP-10
For illustrative purposes only.
Do not forget to try these other fine Intex products: pools, pool
accessories, in-home toys, airbeds and boats available at fine
retailers or visit our website.
Due to a policy of continuous product improvement, Intex reserves
the right to change specifications and appearance, which may
result in updates to the instruction manual, without notice.
DO NOT RETURN PRODUCT TO STORE
To purchase parts and accessories or to obtain non-technical assistance, visit
www.intexcorp.com
For technical assistance and missing parts call us toll-free (for U.S. and Canadian Residents):
1-800-234-6839
Monday through Friday, 8:30am to 5:00pm Pacific Time
(192PO) SPA ENGLISH 7.5" X 10.3" PANTONE 295U 04/18/2013
IMPORTANT
SAFETY RULES
Read, understand, and follow
all instructions carefully before
installing and using this product.
IMPORTANT!
192
English
PO
192-*PO-R1-1304
Advertisement
Table of Contents

Related Manuals for Intex PureSpa SSP-10


Summary of Contents for Intex PureSpa SSP-10
- Page 1 PureSpa™ SSP-10 For illustrative purposes only. Do not forget to try these other fine Intex products: pools, pool accessories, in-home toys, airbeds and boats available at fine retailers or visit our website. Due to a policy of continuous product improvement, Intex reserves the right to change specifications and appearance, which may result in updates to the instruction manual, without notice.
-
Page 2: Table Of Contents
(192PO) SPA ENGLISH 7.5” X 10.3” PANTONE 295U 04/18/2013 English TABLE OF CONTENTS Warning..................3-4 Parts....................Set-up..................... 7-10 Operation..................LED Code Chart................12 Maintenance and Chemicals............13-15 Storage................... 15 Troubleshooting................15 Warranty..................16 S AVE THESE INSTRUCTIONS Page 2... -
Page 3: Warning
(192PO) SPA ENGLISH 7.5” X 10.3” PANTONE 295U 04/18/2013 English IMPORTANT SAFETY RULES When installing and using this electrical equipment, basic safety precautions should always be followed, including the following. READ AND FOLLOW ALL INSTRUCTIONS DANGER • Risk of Accidental Drowning. Extreme caution must be exercised to prevent unauthorized access by children. To avoid accidents, ensure that children cannot use this spa unless they are supervised at all times. • Risk of drowning. Inspect the spa cover regularly for leaks, premature wear and tear, damage, or signs of deterioration. Never use a worn or damaged cover: it will not provide the level of protection required to prevent unsupervised access to the spa by a child. - Page 4 • The plug must be accessible after product is installed. • Do not bury the electrical cord. Locate the cord where it will not be damaged by lawn mowers, hedge trimmers and other equipment. • If the supply cord is damaged, it must be replaced by a qualified electrician in order to avoid a hazard. Use only identical replacement parts when servicing. • To reduce the risk of electric shock, do not use extension cords, timers, plug adaptors or converter plugs to connect unit to electrical supply; provide a properly located outlet. • Do not attempt to plug in or unplug this product while standing in water or when your hands are wet. • Do not leave the spa empty for extended period of time. Do not expose the spa under direct sunshine. • Adequate drainage system must be provided around the spa to deal with overflow water. • Do not allow the water in the spa to freeze. Do not turn on the spa when the water is frozen. • Do not use the spa if damaged in delivery and/or malfunctioning in any fashion. Contact the Intex service center for further direction. • Never pour water with a temperature higher than 104°F (40°C) into the spa directly. • Keep all pets away from spa to avoid any damage. • Do not add bath oil or bath salt to the spa water. WARNING • This product is provided with a GFCI/RCD located at the end of the power cord. The GFCI/RCD must be tested before each use. Do not use the spa if the GFCI/RCD does not function properly. Disconnect the power cord until the fault has been identified and corrected. Contact a qualified electrician to correct the fault. Do not bypass the GFCI/RCD. There are no serviceable parts inside the GFCI/RCD. Opening the GFCI/RCD will void the warranty.
-
Page 5: Parts
(192PO) SPA ENGLISH 7.5” X 10.3” PANTONE 295U 04/18/2013 English PARTS Before assembling your product, please take a few minutes to check the contents and become familiar with all the parts. NOTE: Drawings for illustration purpose only. Actual product may vary. Not to scale. S AVE THESE INSTRUCTIONS Page 5... - Page 6 (192PO) SPA ENGLISH 7.5” X 10.3” PANTONE 295U 04/18/2013 English PARTS (continued) Before assembling your product, please take a few minutes to check the contents and become familiar with all the parts. REF. NO. DESCRIPTION QTY. PART NO. CONTROL BASE 11685 CONTROL BASE BACK COVER 11719 CONTROL PANEL (INCLUDED #4 & #5) 11737 CONTROL PANEL BOLT 11024 CONTROL PANEL CAP 11740 CONTROL PANEL BOLT WRENCH 11053 SPA/COVER INFLATION HOSE 11714 SPA CONTROL INLET/OUTLET O-RING 11699 SPA CONTROL AIR INLET O-RING...
-
Page 7: Set-Up
(192PO) SPA ENGLISH 7.5” X 10.3” PANTONE 295U 04/18/2013 English PRODUCT SPECIFICATIONS Maximum seating capacity: 4 adults Water capacity: 210 gal (795 L) Inner/outer diameter: 58/75 in (147/191 cm) Height: 28 in (71 cm) Bubble air blower: 0.9HP / 110-120 V / 60 Hz Filter pump flow rate: 400 gal/hr (1,514 L/hr) Heater power: 1,300 Watts / 110-120V / 60Hz Temperature range: 68ºF – 104ºF (20ºC – 40ºC) Temperature rise: 2-3ºF/hr (1-1.5ºC/hr) Number of Bubble Jets: Spa tub recommended working air pressure: 0.083 bar (1.2 psi) Cord-connected spa with pump, heater, blower and control panel. SET UP Site preparation and requirements • The spa can be installed indoor or outdoor. For household use only. - Page 8 1. Move the entire package to the selected site. Do not drag the spa tub across the ground as this can cause damage and leakage. Open the carton carefully as this carton can be used to store the spa during long term storage or when not in use. 2. Lay out all the parts on the ground and make sure all the parts are accounted for. For missing or damaged parts contact the appropriate Intex Service Center listed in the separate “Authorized service Centers” sheet. Safety Sign Card Posting The Safety Sign card included with the manual shall be posted in an area visible to the users of the spa to alert them of the safety rules and warnings. For replacement of the safety sign card, visit our website at www.intexcorp.com for additional print copies. Laminate the printed safety sign copy for protection from the elements.
- Page 9 (192PO) SPA ENGLISH 7.5” X 10.3” PANTONE 295U 04/18/2013 English SET UP (continued) 4. Press the button to inflate the spa tub wall until it is firm to the touch but not hard (see drawing 5). IMPORTANT: Do not over inflate or use high pressure air compressor to inflate. ˚ Press the button again to turn it off. ˚ 6. Disconnect the inflation hose (7) from the air valve and attach the pressure gauge (23) to the air valve. RESET The pressure gauge indicator should be in the green area for a properly inflated spa tub (see ˚ ˚ drawing 6). Repeat previous steps to add more air if necessary. RESET ˚ ˚...
- Page 10 (192PO) SPA ENGLISH 7.5” X 10.3” PANTONE 295U 04/18/2013 English SET UP (continued) Spa Control Unit Installation Press the button located on top of the control base and remove the back cover (see drawing 9) 2. Connect the spa control unit to the spa tub (see drawing 10). Hand-tighten the connectors securely. Do not use tools to tighten. 3. Reinstall the back cover (2) to the spa control base (see drawing 11). Back cover must be installed before using the SPA.
-
Page 11: Operation
(192PO) SPA ENGLISH 7.5” X 10.3” PANTONE 295U 04/18/2013 English OPERATION SPA CONTROL UNIT PANEL A: Heat Button B: Celsius/Fahrenheit Toggle Button C: Temperature Increase Button D: Temperature Decrease Button E: Reset Button ˚ ˚ F: Water Filter Button RESET G: Bubble Button H: LED Display Heat Button:... -
Page 12: Led Code Chart
• Ensure the outlet cover grid is clean and free from obstructions. • Clean or replace the cartridge, see Maintenance No water flow and Storage section. • Ensure the in/outlet connections on the spa tub and filter pump are not blocked. • If problem persists, contact Intex Service Center. • If the ambient temperature is below 39°F (4°C), we recommend not to use the spa. • Press the temperature increase button to set Water temperature too low the desired water temperature. -
Page 13: Maintenance And Chemicals
ALWAYS FOLLOW THE CHEMICAL MANUFACTURER’S DIRECTIONS, AND THE HEALTH AND HAZARD WARNINGS. Do not add chemicals if the spa is occupied. This can cause skin or eye irritation. Concentrated chlorine solutions can damage the spa tub. In no event is Intex Recreation Corp., Intex Development Co. Ltd., their related companies, authorized agents and service centers, retailers or employees liable to the buyer or any other party for costs associated with the loss of spa water, chemicals or water damage. Maintenance of Spa Water and Cartridge Protect all the spa occupants from possible water-related illnesses by keeping the spa water clean and sanitized. - Page 14 (192PO) SPA ENGLISH 7.5” X 10.3” PANTONE 295U 04/18/2013 English MAINTENANCE Spa Tub Drainage Turn off all the buttons (heater, filter and bubble) on the control panel unit. Connect the drain valve adaptor to a garden hose and point the other end of the garden hose to a suitable draining area (see drawing 14). Remove the drain valve cap from outside of the spa tub and attach the drain valve adaptor to the drain valve (see drawing 14). From inside of the spa tub, open the drain valve cap, water will start flowing out from the garden hose. When the water stops draining, disconnect the spa control unit from the spa tub wall. Lift the spa tub wall from the side opposite the drain, leading any remaining water to the drain and emptying the spa completely (see drawing 15).
-
Page 15: Storage
(192PO) SPA ENGLISH 7.5” X 10.3” PANTONE 295U 04/18/2013 English MAINTENANCE (continued) Spa Tub and Cover Air Bladder Repair Use the enclosed repair patch to repair any puncture: • Clean and dry the area to be repaired thoroughly. • Remove the patch backing paper and press patch firmly over the puncture. Smooth out the surface to remove any air bubbles under the patch. STORAGE Drain and clean the spa following the “Spa Tub Drainage” and “Spa Tub Cleaning” sections. Reverse set up instructions to deflate and disassemble the spa tub, spa control unit and spa cover air bladder. Make sure all the spa components and accessories are thoroughly clean and dry before storage. Air-dry the spa tub in the sun for an hour before folding. Fold the spa tub loosely and avoid any sharp corners to prevent damage or leakage to the spa tub liner. -
Page 16: Troubleshooting
MAINTENANCE (continued) TROUBLESHOOTING PROBLEM CAUSE SOLUTION • Check power source. FILTER PUMP DOES • Power failure. • Reset the GFCI/RCD. • GFCI/RCD tripped. NOT OPERATE • Contact Intex Service Center. • GFCI/RCD broken. • Set to a higher temperature. • Temperature set too low. NOT HEATING • Clean or replace the filter cartridge in time. PROPERLY • Dirty filter cartridge. • Contact Intex Service Center. • Heating element failed. • Unplug the pump. -
Page 17: Warranty
(192PO) SPA ENGLISH 7.5” X 10.3” PANTONE 295U 04/18/2013 English WARRANTY Your PureSpa has been manufactured using the highest quality materials and workmanship. All Intex products have been inspected and found free of defects prior to leaving the factory. This Limited Warranty applies only to the PureSpa listed below. The provisions of this Limited Warranty apply only to the original purchaser and is not transferable. This Limited Warranty is valid for the period noted below from the date of the initial retail purchase. Keep your original sales receipt with this manual, as proof of purchase will be required and must accompany warranty claims or the Limited Warranty is invalid. PureSpa Warranty – 1 Year If a manufacturing defect is found within the periods noted above, please contact the appropriate Intex Service Center listed in the separate “Authorized Service Centers” sheet. The Service Center will determine the validity of the claim. If the Service Center directs you to return the product, please carefully package the product and send with shipping and insurance prepaid to the Service Center. Upon receipt of the returned product, the Intex Service Center will inspect the item and determine the validity of the claim. If the provisions of this warranty cover the item, the item will be repaired or replaced at no charge. Any and all disputes regarding the provisions of this Limited Warranty shall be brought before an informal dispute settlement board and unless and until the provisions of these paragraphs are carried forth, no civil action may be instituted. The methods and procedures of this settlement board shall be subject to the rules and regulations set forth by the Federal Trade Commission (F.T.C.). IMPLIED WARRANTIES ARE LIMITED TO THE TERMS OF THIS WARRANTY AND IN NO EVENT SHALL INTEX, THEIR AUTHORIZED AGENTS OR EMPLOYEES BE LIABLE TO THE BUYER OR ANY OTHER PARTY FOR DIRECT OR CONSEQUENTIAL DAMAGES OR LIABILITIES. Some states, or jurisdictions do not allow the exclusion or limitation of incidental or consequential damages, so the above limitation or exclusion may not apply to you. This Limited Warranty does not apply if the products are subject to negligence, abnormal use or operation, accident, improper operation, improper voltage or current contrary to operating instructions, or to damage by circumstances beyond Intex’s control, including but not limited...
Need help?
Do you have a question about the PureSpa SSP-10 and is the answer not in the manual?
Questions and answers