Advertisement
Crystalline Silicon PV Module Installation Manual
1. Introduction
1.1 Purpose
1.2 Limitation of Liability
Codes and Regulations
2.
3. Safety
3.1 General Safety
3.2 Installation Precautions
3.3 Installation Safety
4. Mechanical Installation
4.1 Installation Condition
4.2 Tilt Angle Selection
4.3 Installation Methods
5. Electrical Installation
5.1 Installation Condition
5.2 Grounding
6. Maintenance
Chint Solar (Zhejiang) Co.,Ltd. | Add:1335 Bin´an Road, Binjiang District, Hangzhou | P.C: 310053
Tel: 0086-571-5603 1888 | Fax: 086-571-5603 2316 | Website: http://energy.chint.com/
Advertisement
Table of Contents

Subscribe to Our Youtube Channel
Related Manuals for Astronergy CHSM60M(DG)/F-B


Summary of Contents for Astronergy CHSM60M(DG)/F-B
- Page 1 Crystalline Silicon PV Module Installation Manual 1. Introduction 1.1 Purpose 1.2 Limitation of Liability Codes and Regulations 3. Safety 3.1 General Safety 3.2 Installation Precautions 3.3 Installation Safety 4. Mechanical Installation 4.1 Installation Condition 4.2 Tilt Angle Selection 4.3 Installation Methods 5.
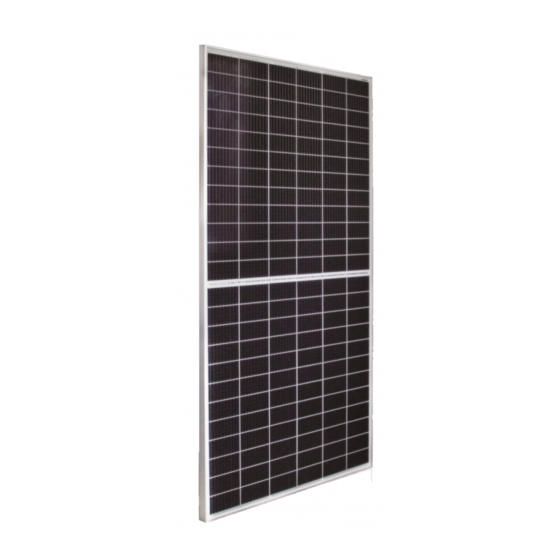
- Page 2 This document provides detailed instructions and valuable safety information regarding the installation, electrical connection, and maintenance of following Chint Solar Crystalline Photovoltaic modules: CHSM60M(DG)/F-B CHSM60M(DGT)/F-B CHSM72M(DG)/F-B CHSM72M(DGT)/F-B CHSM60M(DG)/F-BH CHSM60M(DGT)/F-BH CHSM72M(DG)/F-BH CHSM72M(DGT)/F-BH All the instructions should be read and understood before installation. The installers should be trained and conform to all safety precautions in this guide when installing the module.
-
Page 3: Installation Precautions
3.1.1 Consult and follow local codes and other applicable laws concerning required permitting as well as installation & inspection requirements, rules, and regulations. 3.1.2 PV modules should be installed and maintained by qualified personnel. 3.1.3 Use the same performance modules within a given series. 3.1.4 Follow all safety precautions of all components used in the system. - Page 4 c) Two operators work as a group, if the modules are fixed with anti-inverted tapes, grasp the module frame tightly in the same direction and take out the module one by one. It is a must that the operators remove the adhesive tape of the fixed module one by one, rive one piece and then take out one piece of module.
-
Page 5: Installation Safety
required to carry out of the level of the current and make a mark separately according to the power on the list. (e.g. 275W-L, identifies the modules of the packaging according to the power on the list, indicating a low current position; 275W-H, compared to high current position). -
Page 6: Mechanical Installation
3.3.13 Do not damage the surrounding PV modules or mounting structure when replacing a PV module. 3.3.14 Do not change any PV module components (diode, junction box, connectors, etc.). 3.3.15 The maximum reverse current is 20.25A for module with Isc≤9.61A and 27A for module with Isc>9.61A. -
Page 7: Tilt Angle Selection
the lowest edge of the modules is not covered by snow for any length of time. In addition, ensure that the lowest portion of the modules is placed high enough so that it is not shaded by tress or other plants. 4.3.6 When the modules are supported parallel to the surface of a building roof, a minimum clearance of 10cm between the module frame and the surface of the roof is required to allow air to circulate behind the modules and to prevent wiring damage. -
Page 8: Installation Methods
Mechanical Dimensions Module type Mounting Direction Load L*W*H (mm) Pressure +5400Pa -2400Pa Bolting on long frame side using four mounting CHSM60M(DG)/F-B 1664*998*30 holes. Mounting rails run perpendicularly to the CHSM60M(DGT)/F-B 1696*998*30 long frame side. CHSM60M(DG)/F-BH 1714*1010*30 CHSM60M(DGT)/F-BH 1791*1052*30 +5400Pa... - Page 9 +5400Pa -2400Pa Bolting on long frame side using four outer mounting holes Mounting rails run perpendicularly to the long frame side. +5400Pa -2400Pa (Need confirm with Chint) Bolting on long frame side using four outer +3600Pa -2400Pa mounting holes Mounting rails run parallel to CHSM72M(DG)/F-B 1980*998*30 (Standard)
- Page 10 CHSM72M(DG)/F-B 1980*998*30 CHSM72M(DGT)/F-B 2018*998*30 +2400Pa CHSM72M(DG)/F-BH 2038*1010*30 -2400Pa CHSM72M(DGT)/F-BH 2131*1052*30 Mounting with Single-axis Tracking System with 4-7*10mm mounting holes Note: the red arrows above are indicative of the bolts’ location. The installation steps are as follows (figure b): 1. Place the module underneath the mounting rack. 2.
- Page 11 2) The above figures illustrate the proper installation method of frame surface clamp. “D” indicates its mounting location, the installation location and mechanical load pressure are shown in follow table: Dimensions Module type Fig c Fig d L*W*H (mm) CHSM60M(DG)/F-B +5400Pa/-2400Pa 1664*998*30 CHSM60M(DGT)/F-B (Need confirm with Chint) +5400Pa 350±100 +3600Pa/-2400Pa...
- Page 12 +5400Pa/-2400Pa CHSM60M(DG)/F-BH (Need confirm with Chint) +5400Pa 1791*1052*30 1/4L±50 CHSM60M(DGT)/F-BH +3600Pa/-2400Pa -2400Pa (Standard) CHSM72M(DG)/F-B +5400Pa/-2400Pa 1980*998*30 CHSM72M(DGT)/F-B 450±100 (Need confirm with Chint) +5400Pa 450±100 +3600Pa/-2400Pa -2400Pa CHSM72M(DG)/F-BH 2018*998*30 (Standard) CHSM72M(DGT)/F-BH 2038*1010*30 +5400Pa/-2400Pa CHSM72M(DG)/F-BH (Need confirm with Chint) +5400Pa 2131*1052*30 1/4L±50 CHSM72M(DGT)/F-BH +3600Pa/-2400Pa -2400Pa...
-
Page 13: Electrical Installation
Figure e Figure f g) For the installation method shown in Figure d, the modules need to be fixed with professional solar pressure blocks (as shown in Figure g), and the overlap between the C surface of the module and the guide rail should be ≥15mm. If improper fixtures or incorrect installation methods are used, the Chint Solar limited warranty will be invalid. - Page 14 Max System voltage ≥ N * Voc * [1 + TCvoc x (Tmin-25)] No modules in series Open circuit voltage of each module (refer to product label or data sheet) Tcvoc Thermal coefficient of open circuit voltage for the module (refer to data sheet) Tmin The lowest ambient temperature 5.1.3 Connect quantity of modules that match the voltage specifications of the inverters used in...
- Page 15 with the PV cell string. The bypass diode in the junction box can avoid the degradation of component performance caused by shading or covering (such as aging of packaging materials, sealing-off, etc.), please refer to the junction box diode specifications provided in the relevant product specifications.
- Page 16 Figure h Grounding the aluminum frame with copper wire a) The grounding requirements must be checked in accordance with the applicable regulations and standards before work is started. b) Use the marked 5.5 mm grounding holes to ground the anodized frame. Use one M5 nut, two M5 cut washers, one M5 plain washer, one M5 spring washer, and one M5 bolt and the copper wire.
-
Page 17: Maintenance
5.2.5 Please don’t drill any additional grounding hole on the frame of the modules. 5.2.6 The frame rails have pre-drilled holes marked with a grounding sign. These holes should be used for grounding purposes and should not be used for mounting the modules. 6 Maintenance It is required to perform regular inspection and maintenance of the modules, especially within warranty scope. - Page 18 6.6.3 Do not use abrasive powder, abrasive cleaners, scrubber cleaners, polishers, sodium hydroxide, benzene, nitro-thinners, acid or alkali and other chemical substances. 6.6.4 Do not clean broken glass or modules with broken lines or exposed wires, as it may cause the electric shock. CHINT SOLAR (ZHEJIANG) Co., Ltd.
Need help?
Do you have a question about the CHSM60M(DG)/F-B and is the answer not in the manual?
Questions and answers