
Related Manuals for CAME ZL38


Summary of Contents for CAME ZL38
- Page 1 COMMAND BOARD FOR BARRIERS AUTOMAZIONE PER CHIUSURA INDUSTRIALE WITH 24V MOTOR ZL38 INSTALLATION MANUAL...
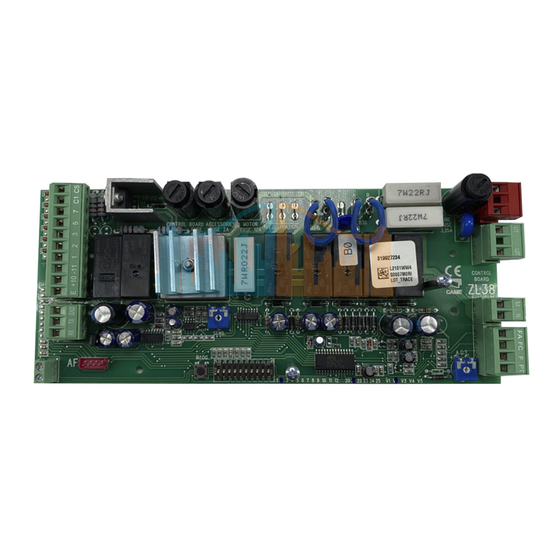
- Page 2 4.1 Command board Fully designed and built by CAME CANCELLI AUTOMATICI S.p.A. Guaranteed for 24 months unless tampered with. The command board is powered at 230V A.C. on the L-N terminals with 50÷60 Hz frequency and is protected in input with 3.15A fuses.
-
Page 3: Technical Information
- Function that increases the braking action of the barrier; - Type of command: open-close or opening only Settings: automatic closure time adjustment, amperometric sensitivity. Optional accessories: - fl ashing dome and lighted cord; - bar open light marks the opening position of the bar; it turns off after the closing operation; - LB38 card makes it possible to power the barrier using batteries in the event of mains power outage. -
Page 4: Installation
5 Installation 5.1 Preliminary checks Before proceeding with the installation, it is necessary to: - provide for suitable omnipolar disconnection device with more than 3 mm between contacts to section power supply; connections inside the case made for protection circuit continuity are allowed as long as they include additional insulation with respect to other internal drive parts;... - Page 5 5.4 Installing the electrical card G2080 G4040 G2080I G4040I 1) Unscrew the four mounting screws (or three in the case of the G4040) of the cover of the container located on the upper part of the automation. ZL 38 2) Insert the card into the container and fasten it with the screws supplied.
-
Page 6: Electrical Connections
5.5 Electrical connections 230V (a.c.) power supply 24V(d.c.) motor DIP 3 OFF - Flashing movement-indicating lamp (e.g.: fl ashing dome lamp, luminous cord) 24V max. 32W output DIP 3 ON - Flashing movement-indicating lamp and “Closed barrier” signalling lamp Power supply to accessories 24V max. 30W Stop button (N.C.) IF NOT USED Open button (N.O.) -
Page 7: Function Selections
5.6 Function selections 1 ON Automatic Closing function activated; (1 OFF-deactivated); 2 ON “Open Only” function with pushbutton (2-7) and remote control (AF - board inserted) activated; 2 OFF “Open-Close-Reverse” Function with pushbutton (2-7) and remote control (HF board inserted) activated; 3 ON 24V (10-E) output activated when moving and when closed;... - Page 8 5.9 Connection of two pairs of barriers with a single command 1) Designate the Master barrier (or pilot, namely the motor that commands both barriers) and the Slave (motor piloted by the Master). MASTER COMMAND BOARD 2) On the command board designated as the Master, execute all the wiring connections (see page 6), the instal- lation procedure for remote control,...
- Page 9 6 Installation procedure of the transmitter for remote control Read the three steps below before beginning installation procedures: - prepare the radio board (paragraph 6.1); - procedure for codifying the transmitter (paragraph 6.2); - memorizing the code on the command board (paragraph 6.3). 6.1 Prepare the radio board (AF) 1) On AM transmitters operating at 433.92 MHz (TOP and TAM series), position the jumper connection on...
- Page 10 T262M - T302M The fi rst encoding operation must be carried out whilst keeping the jumpers po- sitioned for channels 1 and 2 as per fi g. A; see fi g. B for any subsequent settings on different channels. P1 = CH1 - P2 = CH3 P1 = CH3 - P2 = CH2 FIG.A FIG.B...
- Page 11 TOP SERIES T432M - T312M set the code to dip-switch C and channel to D (P1=CH1 and P2=CH2, default setting) T434M - T314M T432S - T432SA - T434MA - T432NA - T434NA set code only see instructions on pack P1 = CH1 P2 = CH2 P3 = CH3 P4 = CH4...
-
Page 12: Mounting The Lid
6.3 Memorizing the code on the command board 1) Keep the "PROG" key pressed on the base card, the signal LED will fl ash. Radio board Flashing LED Lit LED 2) Press a transmitter key to send the code; the LED will remain lighted to signal memorization. -
Page 13: Demolition And Disposal
UNI EN ISO 14001 standard to ensure environmental protection. Please continue our efforts to protect the environment—which CAME considers one of the cardinal elements in the development of its operational and market strategies—simply by observing brief recommendations as regards disposal: DISPOSAL OF PACKAGING –...
Need help?
Do you have a question about the ZL38 and is the answer not in the manual?
Questions and answers