Table of Contents
Advertisement
Available languages
Available languages
Advertisement
Chapters
Table of Contents

Subscribe to Our Youtube Channel
Related Manuals for Fulgor Milano SOFIA PRO-RANGE 90


Summary of Contents for Fulgor Milano SOFIA PRO-RANGE 90
- Page 1 PRO-RANGE 90 FULL GAS INSTRUCTION MANUAL MANUALE DI ISTRUZIONI...
- Page 3 Dear Customer, Thank you for purchasing one of our Sofia ranges. This range was conceived, designed and handcrafted in Italy. Your selection of a Sofia range confirms you are among a special group who share a love and passion for cooking. This unique community shares in the experience of creating quality dishes;...
-
Page 5: Table Of Contents
INDICE PAGINA INDICE PAGINA 1 - Caratteristiche del forno 13 - Suggerimenti generali forno Griglie del forno 2 - Avvertenze speciali Griglie telescopiche del forno Prima di iniziare l'installazione 14 - Impostazione orologio e timer 3 - Istruzioni di sicurezza Contaminuti meccanico 4 - Dimensioni del prodotto e requisiti di ingombro Controlli touch timer... -
Page 6: Caratteristiche Del Forno
1 - Caratteristiche del forno CARATTERISTICHE DEL FORNO Pannello display Prese aria raffreddamento Guarnizione Bruciatore grill porta Luce alogena Luce alogena Luce alogena Targhetta modello e numero di serie Bruciatore inferiore (non visibile) Ventola convezione (non visibile) Retro griglia forno Griglia teglia Fronte griglia forno doppia... - Page 7 1 - Caratteristiche del forno CONTENUTO DELL'IMBALLO QTÀ DESCRIZIONE QTÀ DESCRIZIONE CUCINA A GAS PIEDINO CON COLLARE ALZATINA DA 7,6 CM (3”) QUATTRO VITI DI FISSAGGIO TRE VITI DI FISSAGGIO ANTI-RIBALTAMENTO griglie PER CUCINA DA ZOCCOLO 91,4 CM (36”) MANUALE E DOCUMENTAZIONE GENERICA PIEDINO...
-
Page 8: Avvertenze Speciali
2 - Avvertenze speciali Conservare il presente manuale ad uso IMPORTANTE: AVVERTENZA dell'elettricista locale. Si tratta del simbolo di un avviso di sicurezza. Questo INSTALLATORE: Lasciare il presente manuale al proprietario simbolo segnala potenziali pericoli che possono comportare per future consultazioni. la morte o lesioni gravi per l'utente o per gli altri. -
Page 9: Istruzioni Di Sicurezza
3 - Istruzioni di sicurezza • Non smontare i componenti prima di aver IMPORTANTE scollegato il forno dalla rete elettrica. L'apparecchio deve essere collegato da • Non usare l'apparecchio se qualche sua un tecnico qualificato in accordo con le parte (ad esempio un vetro) risulta rotta. normative applicabili. - Page 10 3 - Istruzioni di sicurezza • Le operazioni di pulizia e di manutenzione Per ridurre il rischio di ustioni durante l'uso del piano cottura, osservare le seguenti indicazioni: non devono essere eseguite da bambini non sorvegliati. • Non lasciare bambini e animali domestici soli o senza supervisione nell'area in cui è...
- Page 11 3 - Istruzioni di sicurezza sempre quando il forno è freddo. Se si ha bisogno di ATTENZIONE estrarre una griglia quando il forno è bollente, non lasciare che le presine tocchino le resistenze. Non lasciare sull'apparecchio oggetti che possano attrarre i •...
-
Page 12: Dimensioni Del Prodotto E Requisiti Di Ingombro
4 - Dimensioni del prodotto e requisiti di ingombro DIMENSIONI DEL PRODOTTO Modelli di cucina da 91,4 cm (36”) 35 3/4” (91.0) 29 3/4” (75,6) 27 1/2” (69,7) 9" (22,8) [opzionale] 3" (7,6) 7” (17,9) Max. 37 1/4” (94,7) Min. 35 3/8” (89,8) 3/8”... - Page 13 4 - Dimensioni del prodotto e requisiti di ingombro REQUISITI DI INGOMBRO min 25 1/2” (65) Minimo da max 13” (33) materiali combustibili o da fondo cappa di estrazione min 18” (45,7) min 18” (45,7) min 6” (15,2) min 6” (15,2) 3”...
-
Page 14: Installazione Della Staffa Anti-Ribaltamento
4 - Dimensioni del prodotto e requisiti di ingombro Prima di spostare la cucina, proteggere i pavimenti e fissare AVVERTENZA la/e porta/e del forno per non provocare danni. Combinazioni con cappa aspirante: Per verificare che la staffa anti-ribaltamento sia installata e incastrata: Si consiglia di installare queste cucine insieme a una cappa aspirante idonea montata in corrispondenza. -
Page 15: Informazioni Di Installazione
5 - Informazioni sull'installazione UTENSILI NECESSARI AVVERTENZA • Pericolo per peso eccessivo Sono necessarie due o più persone per l'installazione della cucina. Il mancato rispetto di questa istruzione può comporta- re lesioni alla schiena o di altro tipo. • Pericolo di taglio Fare attenzione ai bordi taglienti. -
Page 16: Istruzioni Di Installazione
6 - Istruzioni di installazione FASE 1 FASE 3 Tagliare le fascette e rimuovere l'apparecchio dal pallet Spostare la cucina all'interno prima di installare i piedini e con un carrello a mano inserendo le forche sotto la base posizionare l'apparecchio accanto al punto di installazione di polistirolo. - Page 17 6 - Istruzioni di installazione FASE 5 FASE 7 Estrarre il carrello a mano, inclinare la cucina su un lato e Dopo aver effettuato i collegamenti all'impianto elettrico e l'allacciamento del gas (vedi paragrafo corrispondente per inserire il secondo paio di piedini. Rimuovere la base le istruzioni) misurare i quattro angoli nell'area di ingombro per verificare che il pavimento sia a livello.
-
Page 18: Requisiti Dell'impianto A Gas
7 - Requisiti dell'impianto a gas FAR ESEGUIRE L'ALLACCIAMENTO DEL GAS DA UN TECNICO DI c) le posizioni delle aperture vanno scelte in modo tale da ASSISTENZA O DA UN INSTALLATORE ESPERTO IN DISPOSITIVI A evitare la possibilità che siano ostruite e, se praticate GAS. -
Page 19: Conversione Ad Altro Tipo Di Gas
8 - Conversione ad altro tipo di gas Conversione ad altro tipo di gas Prima di convertire l'apparecchio per usarlo con un tipo diverso di gas, verificare il gas per cui è attualmente configurato (etichetta adesiva sull'apparecchio). Scollegare l'apparecchio dall'alimentazione elettrica; per il giusto diametro dell'ugello, vedi relativa tabella in questo manuale. Tabella degli ugelli I diametri in centinaia di millimetri sono stampati sull'ugello. - Page 20 8 - Conversione ad altro tipo di gas Bruciatore piano cottura Portata termica nominale 4,50 4,50 4,50 4,50 4,50 4,50 4,50 4,50 4,50 4,50 Ugello anello interno dimensioni Ugello anello esterno dimensioni 0,429 0,429 0,429 0,429 0,429 0,429 0,429 0,429 0,429 0,429 Consumo...
-
Page 21: Sostituzione Degli Ugelli (Bruciatore A Doppio Cerchio Di Fiamma)
8 - Conversione ad altro tipo di gas Sostituzione degli ugelli (bruciatore a doppio cerchio di fiamma) 1. Rimuovere le griglie del piano cottura e i cappucci dei bruciatori. 2. Rimuovere le corone in alluminio. 3. Rimuovere le tre viti dal diffusore (1). 4. -
Page 22: Conversione In Gpl O Gn
9 - Conversione in GPL o GN Sostituzione degli ugelli del (bruciatore inferiore forno) 1. Rimuovere il cappuccio del bruciatore. 4. Rimuovere l'ugello ruotando con una chiave fissa da 7 mm (9-32”) in senso antiorario. 5. Installare gli ugelli forniti insieme all'apparecchio nel rispettivo bruciatore. -
Page 23: Sostituzione Degli Ugelli Del (Bruciatore Grill Forno)
9 - Conversione in GPL o GN Sostituzione degli ugelli del (bruciatore grill forno) 3. Rimuovere l'ugello ruotando con una chiave fissa da 7 1. Smontare la porta come descritto nel paragrafo "Come mm (9-32”) in senso antiorario. smontare la porta" 2. -
Page 24: Regolazione Fiamma Bassa
9 - Conversione in GPL o GN Regolazione fiamma bassa 4. Inserire un cacciavite sottile nel foro dietro la manopola (A o B) e inserire la lama del cacciavite nella fessura della vite di regolazione. PERICOLO 5. Ruotare la vite di regolazione per impostare le dimensioni della fiamma: Accendere un bruciatore a gas con un fiammifero è... -
Page 25: Accensione Elettrica Del Gas
9 - Conversione in GPL o GN Se la regolazione è corretta, la fiamma è blu, stabile e ferma e di dimensioni minime. Si può verificare la regolazione finale ruotando la manopola diverse vole da alto a basso senza spegnere la fiamma. Questa regolazione, fiamma... -
Page 26: Alimentazione Elettrica
10 - Alimentazione elettrica Collegamento del forno alla rete elettrica AVVERTENZA L'apparecchio deve essere collegato a terra. Il forno è destinato esclusivamente all'uso domestico. La tensione di alimentazione e la potenza assorbita sono indicate sulla targhetta dati tecnici posta sul montante sinistro, visibile a porta aperta. -
Page 27: Il Pannello Comandi Controllo
11 - I pannelli di controllo L'interfaccia utente presenta le seguenti caratteristiche: display, LED di preriscaldo, tasti di comando, manopola modalità di cottura e manopola temperatura. PANNELLO DI CONTROLLO Timer non presente - Modello A Contaminuti meccanico - Modello B Timer elettronico - Modello C 36”... -
Page 28: Informazioni Generali Forno
12 - Informazioni generali forno Ventola di raffreddamento La ventola è situata nella parte superiore del forno e fa circolare all'interno della camera l'aria di raffreddamento che poi fuoriesce dalle fessure sotto il pannello di controllo del forno. Si accende quando il forno è in funzione, in qualsiasi modalità. -
Page 29: Suggerimenti Generali Forno
13 - Suggerimenti generali forno Come preriscaldare il forno salate. • Per ottenere una crosta ben dorata e croccante, usare utensili • Preriscaldare il forno con le modalità Cottura statica, scuri antiaderenti / anodizzati o in metallo scuro, opaco o Cottura a convezione e Grill. -
Page 30: Griglie Telescopiche Del Forno
13 - Suggerimenti generali forno Come estrarre la griglia dal forno: Vedi figura di pagina 2 in caso di dubbi su quale sia la 1. Tirare la griglia in avanti parte frontale della griglia. Come estrarre la griglia allungabile dal forno: 1. -
Page 31: Impostazione Orologio E Timer
14 - Impostazione orologio e timer Contaminuti meccanico Regolazione del volume del segnale acustico Il contaminuti può essere impostato a un massimo di 60 minuti; emette un segnale acustico alla scadenza dell'intervallo di tempo impostato. Il contaminuti funziona in maniera indipendente dal forno. Sui modelli dotati di timer meccanico e non elettronico, la manopola del timer va ruotata in senso orario in posizione 60 minuti e poi ruotato in senso antiorario fino... -
Page 32: Selezione Della Modalità Di Cottura
15 - Selezione della modalità di cottura Accensione del forno a gas Per accendere il forno a gas, premere la manopola del AVVERTENZA termostato per attivare l'accenditore. Poi, tenendo premuta la manopola, ruotarla in senso antiorario per la modalità Durante l'uso, le parti accessibili del grill possono Cottura statica (oltre la posizione 275°F o 295°F, in base diventare bollenti;... -
Page 33: Cottura Al Forno
16 - Cottura al forno PIETANZA TEMPERATURA °F (°C) TEMPO DI COTTURA PRERISCALDO (min) Pan di Spagna 410 (210) 15 - 20 Sì Pasta frolla (biscotti) 390 (200) 10 - 12 Sì Impasti con agenti lievitanti (Schiacciata) 390 (200) 25 - 30 Sì... -
Page 34: Risoluzione Problemi Di Cottura
17 - Risoluzione problemi di cottura Sia con la cottura statica che con la cottura a convezione di sostituire utensili da forno vecchi che si sono scuriti o si possono ottenere risultati insoddisfacenti per una serie deformati nel tempo e con l'uso. di motivi che esulano dal cattivo funzionamento del forno. -
Page 35: Manutenzione Fai-Da-Te: Smontaggio Della Porta Del Forno
18 - Manutenzione fai-da-te: smontaggio della porta del forno ATTENZIONE • Verificare che il forno sia freddo e l'alimentazione scollegata prima di smontare la porta. In caso contrario, si corre il rischio di ustioni o folgorazioni. • La porta del forno è pesante e fragile. Usare entrambe le mani per smontare la porta del forno. La parte anteriore della porta è... -
Page 36: Sostituzione Della Luce Del Forno
19 - Sostituzione della luce del forno • Ogni forno è dotato di tre lampadine alogene poste sulle LUCI DEL FORNO pareti laterali. • Le luci si accendono quando si apre la porta o quando il forno è in fase di cottura. •... -
Page 37: Caratteristiche Del Piano Cottura
20 - Caratteristiche del piano cottura PIANO COTTURA DA 91,4 CM (36”) 1 2 3 A - Griglie VALORI NOMINALI USCITA GN (Naturale) GPL (Propano) BRUCIATORE: BTU/HR MODELLO DA 91,4 cm (36”) 1 BRUCIATORI A DOPPIA CORONA 15350 (Btu/h) - 15350 (Btu/h) - (bruciatore e manopola) 4500W/1200 (Btu/h) 350W... -
Page 38: Utilizzo Del Piano Cottura A Gas
21 - Utilizzo del piano cottura a gas Impostazione manopola controllo gas Bruciatori a gas I bruciatori a gas di questi modelli sono progettati per Accensione elettrica del gas semplificare le operazioni di cottura, con particolare I bruciatori a gas usano un dispositivo di accensione attenzione a dimensioni, potenza e regolazione dell'intensità... -
Page 39: Utilizzo Del Piano Cottura A Gas
22 - Utilizzo del piano cottura a gas Le fiamme dei bruciatori Come pulire i bruciatori a gas: Accendere tutti i bruciatori. Le fiamme devono essere di colore IMPORTANTE blu senza tracce di giallo. La fiamma del bruciatore non deve traballare o allontanarsi dal bruciatore. -
Page 40: Strumenti Di Cottura
23 - Strumenti di cottura Usare un coperchio che chiuda perfettamente IMPORTANTE: Non lasciare mai pentole e padelle vuote Un coperchio che chiude bene permette di accorciare sull'area di cottura o sui bruciatori quando sono bollenti. i tempi di cottura. I recipienti con fondo piatto e spesso garantiscono una maggiore uniformità... -
Page 41: Informazioni Generali Sulla Manutenzione Del Forno
24 - Informazioni generali sulla manutenzione del forno Come usare la tabella di pulizia del forno 1. Individuare il numero del componente da pulire sulla figura di questa pagina. 2. Trovare il nome del componente nella tabella. • Usare il metodo di pulizia della colonna di sinistra se il forno è smaltato con finitura colorata. •... -
Page 42: Finiture Forno / Metodi Di Pulizia
25 - Finitura forno / Metodo di pulizia Si possono pulire tutti i componenti del forno con una spugna insaponata, risciacquando e asciugando con cura. Per i residui più difficili da rimuovere, seguire i metodi di pulizia consigliati di seguito. •... -
Page 43: Pulizia Del Piano Cottura
26 - Pulizia del piano cottura Si possono pulire tutti i componenti del piano cottura strofinando con una PULIZIA DEL PIANO COTTURA spugna insaponata, risciacquando e asciugando con cura. Per i residui più difficili da rimuovere, seguire i metodi di pulizia consigliati di seguito. ATTENZIONE •... - Page 44 26 - Pulizia del piano cottura Parti e materiali Detergenti consigliati Suggerimenti/promemoria Cappuccio bruciatore Detergenti non abrasivi: Acqua bollente Le griglie sono pesanti; sollevarle con cura. griglia sgrassatore multiuso antibatterico. Appoggiarle su una superficie protetta. (smalto porcellanato Risciacquare e asciugare immediatamente. È...
-
Page 45: Risoluzione Problemi Di Funzionamento
27 - Risoluzione problemi funzionali Prima di contattare il centro assistenza, controllare quanto segue per evitare costi di assistenza inutili. Problema forno Procedura di risoluzione del problema Il display del forno rimane SPENTO. Togliere corrente dall'alimentazione principale (fusibile o quadro elettrico). Riaccendere il quadro elettrico. -
Page 46: Assistenza E Manutenzione
28 - Assistenza o manutenzione Prima di contattare il centro assistenza, si prega di controllare il capitolo "Risoluzione Problemi". Si può così risparmiare il costo della chiamata per l'assistenza. Se si ha ancora bisogno di aiuto, seguire le istruzioni sottostanti. Al momento della chiamata, accertarsi di avere a disposizione la data di acquisto, il modello completo e il numero di serie del proprio apparecchio. - Page 47 TABLE OF CONTENTS PAGE TABLE OF CONTENTS PAGE 1 - Features of your Oven 19 - Replacing an Oven Light To Replace a Light Bulb 2 - Special Warnings Before Starting Installation 20 - Features of your Cooktop 3 - Safety Instructions 21 - Gas Cooktop Operation Gas Control Knob Setting 4 - Product Dimensions and Cutout Requirements...
-
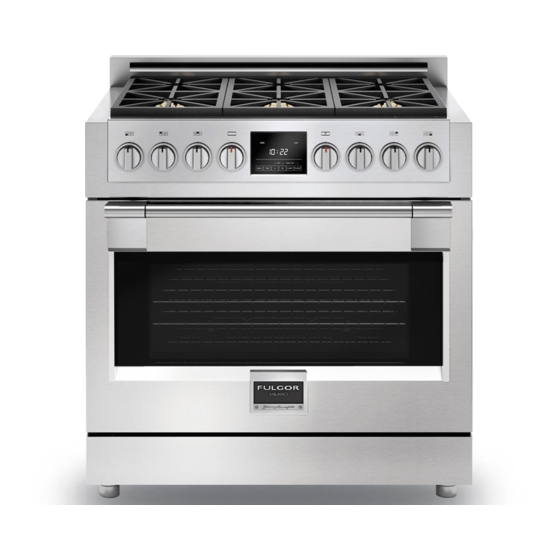
Page 48: Features Of Your Oven
1 - Features of your Oven FEATURES OF YOUR OVEN Display panel Cooling Vents Door gasket Broil Burner Halogen Light Halogen Light Halogen Light Model and Serial # Plate Bottom Burner (concealed) Convection Fan (concealed) Oven Rack Back Broiler Pan Rack Oven Rack Front Pan Stop Broiler Pan... - Page 49 1 - Features of your Oven CONTENTS OF YOUR RANGE PACK QTY DESCRIPTION QTY DESCRIPTION RANGE COOKER FOOT WITH COLLAR 3” BACKSPLASH ANTI TIP FOUR FIXING SCREWS THREE FIXING SCREWS KICK COVER Psc. FOR 36” RANGE MANUAL & GENERAL DOCUMENTATION FEET “INSTRUCTION MANUAL”...
-
Page 50: Special Warnings
2 - Special Warnings IMPORTANT: Save these instructions for the local electrical WARNING inspector use. This is the safety alert symbol. This symbol alerts you to INSTALLER: Please leave this manual with owner for future potential hazards that can kill or hurt you and others. You reference. -
Page 51: Safety Instructions
3 - Safety Instructions • Do not disassemble any parts prior to having IMPORTANT disconnected the Range from the mains. The appliance must be connected by qualified • Do not use the appliance if any part is technician in accordance with the applicable broken (for example a glass). - Page 52 3 - Safety Instructions • In order to avoid damage to the oven To reduce the risk of burn injuries during cooktop use, observe the following: enamel coat, do not cover the oven muffle sole with any item (e.g. aluminum foil, pans •...
- Page 53 3 - Safety Instructions To reduce the risk of fire in the oven cavity: 1. Do not store flammable materials in or near the oven. WARNING 2. Do not use water on a grease fire. Smother fire or use a dry chemical or foam-type extinguisher.
-
Page 54: Product Dimensions And Cutout Requirements
4 - Product Dimensions and Cutout Requirements PRODUCT DIMENSIONS 36” Wide Range Models 35 3/4” (91.0) 29 3/4” (75.6) 27 1/2” (69.7) 9" (22.8) [optional] 3" (7.6) 7” (17.9) Max. 37 1/4” (94.7) Min. 35 3/8” (89.8) 3/8” (1) 1 3/8” (3.5) 3 3/8”... - Page 55 4 - Product Dimensions and Cutout Requirements CUTOUT REQUIREMENTS min 25 1/2” (65) Minimum to max 13” (33) Combustibles or to botton of ventilation hood min 18” (45,7) min 18” (45,7) min 6” (15,2) min 6” (15,2) 3” ( 9 ) 3”...
-
Page 56: Anti-Tip Bracket Installation
4 - Product Dimensions and Cutout Requirements Before moving the range, protect any finished flooring and WARNING secure oven door(s) closed to prevent damage. To verify the anti-tip bracket is installed and engaged: Vent hood Combinations: It is recommended that these ranges be installed in conjunction •... -
Page 57: Installation Information
5 - Installation Information TOOLS WILL YOU NEED WARNING • Excessive Weight Hazard Use two or more people to move and install range. Failure to do so can result in back or other injury. • Cut Hazard Beware of sharp edges. Use the polystyrene ends when carrying the product. - Page 58 6 - Installation Instructions STEP 1 STEP 3 Cut the banding and remove the appliance from the pallet by a Move the range indoors before installing the legs, position the hand-truck inserting the blade under the foam base. appliance near its final location as the legs are not suitable for moving the appliance over long distances.
-
Page 59: Installation Instructions
6 - Installation Instructions STEP 5 STEP 7 Pull out the hand-truck, tilt the range laterally and insert the After the electrical and gas connections (see the paragraph for second pair of legs. Remove the base instructions) measure the four corners in cutout area to verify if flooring is level. -
Page 60: Gas Requirement
7 - Gas Requirement QUALIFIED SERVICE MAN OR GAS APPLIANCE INSTALLER If an electric extractor fan for the removal of foul air is installed MUST MAKE THE GAS SUPPLY CONNECTION. in the room, the apertures provided for air changes must Leak testing of the appliance shall be conducted by the installer allow a ventilation rate of at least 35 m3/h per kW of power according to the instructions given. -
Page 61: Conversion To A Different Type Of Gas
8 - Conversion to a Different Type of Gas Conversion to a Different Type of Gas Before converting the appliance for operation with a different gas type, check which type of gas it is currently set to operate with (adhesive label (Figure 1) on appliance). Disconnect the electrical power supply to the appliance;... - Page 62 8 - Conversion to a Different Type of Gas Top burner Nominal heat input 4,50 4,50 4,50 4,50 4,50 4,50 4,50 4,50 4,50 4,50 Inner ring injector size Outer ring injector size 0,429 0,429 0,429 0,429 0,429 0,429 0,429 0,429 0,429 0,429 Consumption...
-
Page 63: Replace Injectors (Two Ring Flame Burner)
8 - Conversion to a Different Type of Gas Replace Injectors (two ring flame burner) 1. Remove the grates and burner caps. 2. Remove aluminium gas spreader. 3. Remove the three screws from the simmer gas spreader (1). 4. Remove the two screws of the injector cover (2). 5. -
Page 64: Conversion For Lp Or Ng Gas
9 - Conversion for LP or NG Gas Replace injector on (oven lower burner) 1. Remove the burner cover plate. 4. Remove the nozzle by turning 9-32” (7 mm) nut driver counter clockwise. 5. Install the injectors supplied with this appliances in the appropriate burner. -
Page 65: Replace Injector On (Oven Grill Burner)
9 - Conversion for LP or NG Gas Replace injector on (oven grill burner) 3. Remove the nozzle by turning 9-32” (7 mm) nut driver 1. Remove the door as described in the paragraph “Door counter clockwise. removal” 2. Remove the screws securing the grill burner and withdraw the burner from the support. -
Page 66: Low Flame Adjustment
9 - Conversion for LP or NG Gas Low Flame Adjustment 4. Insert a slender, thin-blade screwdriver into the recess DANGER behind the control knob (A or B) and engage blade with slot in adjusting screw. Lighting gas burners with a match is dangerous. You should match light the burners only in an emergency. -
Page 67: Electric Gas Ignition
9 - Conversion for LP or NG Gas Proper adjustment will produce a stable, steady blue flame of minimum size. The final adjustment should be checked by turning the knob from high to low several times without extinguishing the flame. This adjustment, at low setting, will automatically provide the proper flame size at medium setting. -
Page 68: Electrical Supply
10 - Electrical supply Connection to the electrical power mains WARNING This apparatus must be earthed. The oven is only for domestic use. The feed voltage and the absorbed power are as indicated on the data plate attached to the left-hand side upright, which can be seen when the oven door is open. -
Page 69: The Control Panels
11 - The Control Panels The user interface has the following features: display, preheat light indicators, keys for commands, cooking mode and temperature selectors. CONTROL PANEL No Timer - Model A Mechanical Minute Timer - Model B Electronic Timer - Model C 30”... -
Page 70: General Oven Information
12 - General Oven Information Cooling Fan The fan is situated at the top of the oven and creates a circulation of cooling air inside the cabinet which comes out of the slits under the instrument panel of the oven. It comes on whenever the oven is turned on, for whatever function. -
Page 71: General Oven Tips
13 - General Oven Tips Preheating the Oven Oven Condensation and Temperature • Preheat the oven when using the Bake, Convection Bake • It is normal for a certain amount of moisture to evaporate and Broil modes. from the food during any cooking process. The amount •... -
Page 72: Oven Telescopic Racks
13 - General Oven Tips To remove extendable rack from the oven: 2. Lift rack up at front and then remove it 1. Lift of rack slightly and push it towards the back of the oven until the stop releases. To replace an oven rack: 1. -
Page 73: Setting The Clock And Timer
14 - Setting the Clock and Timer Mechanical Minute Timer Adjusting beep volume The minute minder can be set to a maximum time of 60 minutes; it emits an alarm tone when the set time period has elapsed. The minute timer operates independently of the oven. On models equipped with a mechanical timer rather than an electronic timer, the timer knob must first be turned clockwise to the 60 minute position and then turned counter-clockwise to... -
Page 74: Selecting The Oven Mode
15 - Selecting the Oven Mode Lighting your gas oven Broil To turn on the gas oven, push in the thermostat knob to activate To turn on the broiler, press and turn the knob clockwise to the the spark generator. Then, keeping the knob pushed in, turn broil position. -
Page 75: Cooking In The Oven
16 - Cooking In The Oven MAIN COURSE TEMPERATURE °F (°C) COOKING TIME (min) PREHEAT Genoese Sponge (Swiss Roll) 410 (210) 15 - 20 390 (200) 10 - 12 Short Pastry (Biscuits) Dough With Raising Agent (Schiacciata) 390 (200) 25 - 30 Sponge Cake (Small Paper Pastry Cases) 375 (190) 20 - 25... -
Page 76: Solving Baking Problems
17 - Solving Baking Problems With either Bake or Convection Bake, poor results can occur for many reasons other than a malfunction of the oven. Check the chart below for causes of the most common problems. Since the size, shape and material of baking utensils directly affect the baking results, the best solution may be to replace old baking utensils that have darkened and warped with age and use. -
Page 77: Do-It-Yourself Maintenance Oven Door Removal
18 - Do-it-Yourself Maintenance Oven Door Removal ATTENTION • Make sure oven is cool and power to the oven has been turned off before removing the door. Failure to do so could result in electrical shock or burns. • The oven door is heavy and fragile. Use both hands to remove the oven door. The door front is glass. •... -
Page 78: Replacing An Oven Light
19 - Replacing an Oven Light • Each oven is equipped with three halogen lights located in OVEN LIGHT the lateral walls of the oven. • The lights are switched on when the door is opened or when the oven is in a cooking cycle. •... -
Page 79: Features Of Your Cooktop
20 - Features of your Cooktop COOKTOP 36” 1 2 3 A - Grates BURNER OUTPUT RATINGS: NG (Natural) LP (Propane) BTU/HR MODEL 36” 1 DOUBLE CROWNS 15350 (Btu/h) - 4500W/1200 (Btu/h) 350W 15350 (Btu/h) - 4500W/1200 (Btu/h) 350W (burner & knob) 2 DOUBLE CROWNS 15350 (Btu/h) - 4500W/1200 (Btu/h) 350W 15350 (Btu/h) - 4500W/1200 (Btu/h) 350W (burner &... -
Page 80: Gas Cooktop Operation
21 - Gas Cooktop Operation Gas Control Knob Setting Gas burners The gas burners design of these cooktop models, allow a Electric gas ignition pleasing option for cooking where size, power and simmering The gas burner use an electric ignition device located near are a primary concern. -
Page 81: Gas Cooktop Operation
22 - Gas Cooktop Operation The Burner Flames cleaning agents or any other material to enter the burner ports. To Clean gas burner: Turn each burner on. Flames should be blue in color with no trace of yellow. The burner flames should not flutter or blow IMPORTANT away from the burner. -
Page 82: Cookware
23 - Cookware IMPORTANT: Never leave empty cookware on a hot surface WARNING cooking area, element or surface burner. Ideal cookware should have a flat bottom, straight sides, a well fitting lid and the material should be of medium-to-heavy thickness. Rough finishes may scratch the cooktop. Aluminium and copper may be used as a core or base in cookware. -
Page 83: General Oven Care
24 - General Oven Care How to Use the Oven Cleaning Chart 1. Locate the number of the part to be cleaned in the illustration on this page. 2. Find the part name in the chart. • Use the cleaning method in the left column if the oven has a colored enamel finish. •... -
Page 84: Oven Finishes / Cleaning Methods
25 - Oven Finishes / Cleaning Methods The entire oven can be safely cleaned with a soapy sponge, rinsed and dried. If stubborn soil remains, follow the recommended cleaning methods below. • Always use the mildest cleaner that will do the job. •... -
Page 85: Cleaning The Cooktop
26 - Cleaning the Cooktop The entire Cooktop can be safely cleaned by wiping with a CLEANING THE COOKTOP soapy sponge, then rinsing and drying. If stubborn soil remains, follow the recommended cleaning methods below. ATTENTION • Before cleaning, be certain the burners are turned off and the grates are cool. - Page 86 26 - Cleaning the Cooktop Parts and materials Suggested cleaners Suggestions/Reminders Exterior finish Hot sudsy water: rinse and dry thoroughly. Acidic and sugar-laden spills deteriorate the (Porcelain enamel) abrasive cleansers: Ammonia, porcelain enamel. Remove soil immediately. Fantastic®, Formula 409®. Do not use wet sponge or towel on hot Mild abrasive cleansers: Bon Ami®, Ajax®, porcelain.
-
Page 87: Solving Operational Problems
27 - Solving Operational Problems Before contacting service, check the following to avoid unnecessary service charges. Oven Problem Problem Solving Steps The oven display stays OFF Turn off power at the main power supply (fuse or breaker box). Turn breaker back on. If condition persists, call an authorized service. -
Page 88: Assistance Or Service
28 - Assistance or Service Before contacting service, please check “Troubleshooting.” It may save you the cost of a service call. If you still need help, follow the instructions below. When calling, please know the purchase date and the complete model and serial number of your appliance. - Page 89 Notes...
- Page 90 Notes...
- Page 91 Note / Note / Nota...
- Page 92 Note / Note / Nota...
- Page 93 Note / Note / Nota...
- Page 94 Note / Note / Nota...
- Page 96 09FL8740 ed 08/2017...
Need help?
Do you have a question about the SOFIA PRO-RANGE 90 and is the answer not in the manual?
Questions and answers