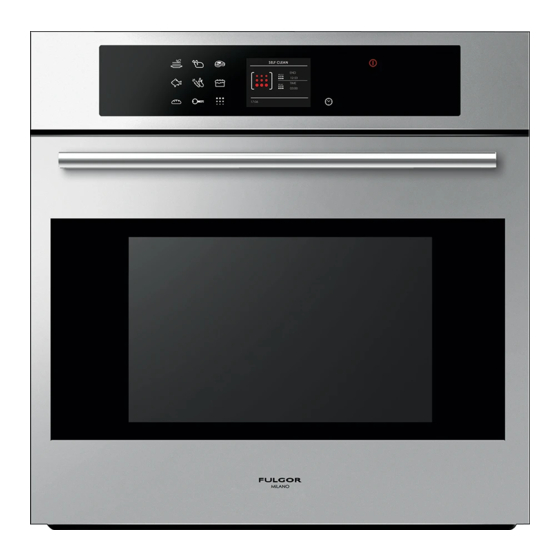
Fulgor Milano F7SP24S1 Use & Care Manual
Hide thumbs
Also See for F7SP24S1:
- Installation instructions manual (28 pages) ,
- Installation instructions manual (118 pages)

Subscribe to Our Youtube Channel
Related Manuals for Fulgor Milano F7SP24S1


Summary of Contents for Fulgor Milano F7SP24S1
- Page 1 F7SP24S1 ELECTRONIC OVENS USE & CARE MANUAL FOURS ELECTRONIQUES GUIDE D’UTILISATION ET D’ENTRETIEN HORNOS ELECTRÓNICOS MANUAL DE USO & MANTENIMIENTO...
-
Page 3: Table Of Contents
TABLE OF CONTENTS PAGE TABLE OF CONTENTS PAGE 1 - General Appliance and Oven Safety Precautions 10 - System Setting Safety for the Oven Event Log Safety for the Cleaning Oven Demo 2 - Features of your Oven 11 - Starting your Oven Switching the oven on and off 3 - General Oven Information Selecting the cooking mode... -
Page 4: General Appliance And Oven Safety Precautions
1 - General Appliance and Oven Safety Precautions IMPORTANT INSTRUCTION Please read all instructions before using this appliance. WARNING CAUTION When properly cared for, your new oven has been designed Do not store items of interest to children above the oven. to be a safe, reliable appliance. -
Page 5: Safety For The Oven
Safety for the Oven Safety for the Cleaning Oven • Tie long hair so that it doesn’t hang loose. CAUTION • Do not touch heating elements or interior surfaces of oven. Do not leave food or cooking utensils, etc., in oven during the •... -
Page 6: Features Of Your Oven
2 - Features of your Oven FEATURES OF YOUR OVEN Control Panel Cooling Vents Broil Element Light (not visible) Rack Levels Convection Fan and Element (IF PRESENT) Model and Serial Plate Door Gasket Bake Element (not visible) Oven Rack Back Oven Rack Front Slide Arm Broiler Pan... -
Page 7: General Oven Information
3 - General Oven Information CAUTION Component Cooling Fan Activates during any cooking or Self-Cleaning mode to cool Before using your oven inner components and outer door surfaces. This air is exhausted through the vent located above the oven door. It continues to •... -
Page 8: General Oven Tips
4 - General Oven Tips Default Settings • Each level guide consists of paired supports formed in the walls on each side of the oven cavity. The Cooking Modes automatically select a suitable temperature. • Always be sure to position the oven racks before turning on These can be changed when a different one is needed. -
Page 9: Control Panel
5 - Control panel Your appliance could vary slightly compared to the illustrations below. A - Function keypad B - Display screen C - Shortcut keypad FRIDAY 11/20/2015 04:26 Keypad Control panel To operate the key, press gently. The keypad will not work if more than one key is pressed at the same time. -
Page 10: General Oven Information
6 - General Oven Information Locking the keyboard Before using your oven for the first time remove all packing and foreign materials from the oven(s). Any material of this Hold the key for 3 seconds. Commands are now locked and a sort left inside may melt or burn when the appliance is used. -
Page 11: General Oven Tips
7 - General Oven Tips Preheating the Oven Oven Condensation and Temperature • Preheat the oven when using the Bake, Convection Bake and • It is normal for a certain amount of moisture to evaporate Convection Roast modes. from the food during any cooking process. The amount depends on the moisture content of the food. -
Page 12: Getting Started
8 - Getting Started Instructions for initial switch-on Once the oven has been connected to the power supply for the first time, the control automatically prepares for setting a number of user settings, which remain stored in case of any subsequent switch-on. -
Page 13: User Settings
9 - User Settings Temperature & Weight Press the arrow key to select one of the two With the oven on, select the icon and confirm with the temperature options “°C/°F” or weight options Kg/ib and to enter the SETTINGS menu. This menu permits confirm with the key. -
Page 14: Language
Date Volume Press the arrow key to select the date format from among Press the arrow to select the desired volume level and the options “D.M.Y. – Y.M.D. – M.D.Y.” and confirm with the confirm by pressing the key. key. Subsequently set the value using the arrows confirm with the key. -
Page 15: System Setting
10 - System Setting Demo The purpose of this function is to set the DEMO mode, which With the oven on, select the icon and confirm with the makes the oven useless for cooking but automatically performs to enter the SETTINGS menu. This menu permits setting a demonstration of functions. -
Page 16: Starting Your Oven
11 - Starting your Oven Switching the oven on and off Functions IMPORTANT DEHYDRATE • The key does not stop the function. WARM • After switching off the oven, the cooling fan could continue to operate until the inner parts of the oven have cooled down. - Page 17 COOKING MODE ICON FAST MEAT TEMPERATURE PREHEAT PROBE Min. Preset Max. DEFROST DEHYDRATE 120° F (50° C) 140° F ( 60° C) 160° F ( 70° C) WARM 80° F (25° C) 100° F ( 40° C) 120° F ( 50° C) WARM PLUS 130°...
-
Page 18: Cooking Mode Quick Menu
Cooking mode quick menu Pre-heating phase The quick menu function allows you to rapidly select the most suitable While the oven is in pre-heating phase, the instantaneous cooking modes for the type of dish you want to cook. temperature is displayed underneath the cooking mode icon. MAIN TRUE CONVECTION COURSES... -
Page 19: Fast Preheat
Fast Preheat Using Oven Lights The FAST PREHEAT function permits reaching the desired A single light key activates the lights. temperature quicker compared to standard preheating. The Touch to turn lights on or off . function can be enabled for all the cooking modes in the BAKE Oven lights turn on automatically when the door is opened. -
Page 20: Time Oven Mode Operation
12 - Time Oven Mode Operation Be sure that the time-of-day clock is displaying the correct time. The timed mode turns off the oven at the end of the cook time. CAUTION Never leave food in the oven for more than one hour before and after cooking. -
Page 21: Setting The Meat Probe (If Present)
13 - Setting the Meat Probe (if present) When roasts, steaks or poultry are being cooked, this is the • Do not defrost food at room temperature, always in the best way to tell when the food is correctly cooked. fridge or in the oven using the specific function. - Page 22 1. Set the required probe temperature by means of the arrows WARNING and confirm with the key. • To avoid burns, use a kitchen glove to fit and remove the meat probe when the oven is hot. TRUE CONVECTION • Always remove the probe using the grip. If it is removed by pulling the cable, it could suffer damage.
-
Page 23: Understanding The Various Oven Modes
14 - Understanding the Various Oven Modes Roast Tips and Techniques • Multiple rack cooking for oven meals is done on rack positions 1, 2, 3 , and 4. All four racks can be used for Roasting is cooking with heated air. Both upper and lower cookies, biscuits and appetizers. -
Page 24: Convection Roast Tips And Techniques
Convection Broil Tips and Techniques Quick and easy recipe tips Converting from standard BAKE to CONVECTION BAKE: • Place rack in the required position needed before turning • Reduce the temperature by 25°F (15°C). on the oven. • Use the same baking time as Bake mode if under 10 to 15 •... -
Page 25: Dehydrate Chart
Dehydrate Chart FOOD PREPARATION APPROXIMATE TEST FOR DONENESS DRYING TIME* (hrs) FRUIT Dipped in ¼ cup lemon juice and Apples 11 - 15 Slightly pliable 2 cups water, ¼ slices Dipped in ¼ cup lemon juice and Bananas 11 - 15 Slightly pliable 2 cups water, ¼... -
Page 26: Recipes
15 - Recipes The Recipe function of your oven gives you the chance to cook food without having to set the oven manually every time. By selecting a “SET” recipe, the cooking mode, the temperature and the time are automatically set according to the recipe selected from the menu. - Page 27 4. At this point, the recipe can be saved in the list of 7. To start the recipe, confirm with the key. “PERSONAL” recipes by selecting “SAVE” and confirming During a recipe, a number of acoustic and visual messages by means of the key.
-
Page 28: Classic Pizza (On Some Models)
16 - Classic Pizza (On Some Models) The CLASSIC PIZZA was specifically designed so you can and proper cooking of the toppings of your pizza, like at the bake perfect PIZZAS in just a few minutes. pizzeria. For perfect results, select the to access this special recipe. - Page 29 Tips For A Good Pizza: • Given the high temperatures and short baking time, we recommend that you insert and remove the pizzas quickly so that the door is open for as short a time as possible and the temperature doesn’t drop. •...
-
Page 30: Sabbath Mode Instructions (On Some Models)
17 - Sabbath Mode Instructions (on some models) The Sabbath Mode function of your oven complied with Jewish laws. This function allows the oven to perform only the static function. When the Sabbath function is selected, the following functions are disabled: •... -
Page 31: Oven Care And Cleaning
18 - Oven Care and Cleaning Abrasive detergents and steam cleaning equipment should not • The oven light does not operate during this mode. be used for cleaning. • During Self-Clean, the kitchen should be well ventilated to help eliminate odors associated with Self-Clean. Odors will WARNING lessen with use. -
Page 32: Setting The Self Cleaning Mode
19 - Setting The Self Cleaning Mode To Set the Self-Clean Mode To Delay the Start of Cleaning 1. Press key and confirm with key 1. Follow steps 1 through 3 above. 2. A message appears on the screen to remove all objects or 2. -
Page 33: Oven Door
20 - Oven Door Automatic door locking during pyrolytic cycle For safety reasons, the door is locked automatically as soon as self-clean mode is selected (both standard, both eco clean). The door is also unlocked automatically when the clean time has expired but only after the temperature has fallen below the safety threshold. - Page 34 4. Slide out the internal glass as shown below. Remove the 5. Replace the middle panes after cleaning in reverse order, second and third panes of glass (middle panes) for cleaning checking that they are oriented so the words INTERNAL sliding out the rubber strip.
-
Page 35: Replacing An Oven Light
21 - Replacing an Oven Light • The lights are switched on when the door is opened or when OVEN LIGHT the oven is in a cooking cycle. • The oven lights are not illuminated during SELF- CLEAN. • Each light assembly consists of a removable lens, a light bulb as well as a light socket housing that is fixed in place. -
Page 36: Solving Baking And Roasting Problems
22 - Solving Baking and Roasting Problems With either Bake or Convection Bake and Convection Roast poor results can occur for many reasons other than a malfunction of the oven. Check the chart below for causes of the most common problems. Since the size, shape and material of baking utensils directly affect the baking results, the best solution may be to replace old baking utensils that have darkened and warped with age and use. -
Page 37: Solving Operational Problems
23 - Solving Operational Problems Before calling for service, check the following to avoid unnecessary service charges. Oven Problem Problem Solving Steps E008 Error appears A problem with latch mechanism occurred. Remove power and turn it back on again after in the display window.
Need help?
Do you have a question about the F7SP24S1 and is the answer not in the manual?
Questions and answers
Clock trying to find the right time
To set the clock on the Fulgor Milano F7SP24S1:
1. Select the time format (AM/PM or 24h) using the arrow keys and confirm with the START button.
2. Enter the hour using the numeric keypad or arrow keys, then confirm with START.
3. Enter the minutes using the numeric keypad or arrow keys, then confirm with START.
This answer is automatically generated