Curtis G4 Series User Manual

Curtis G4 Series User Manual

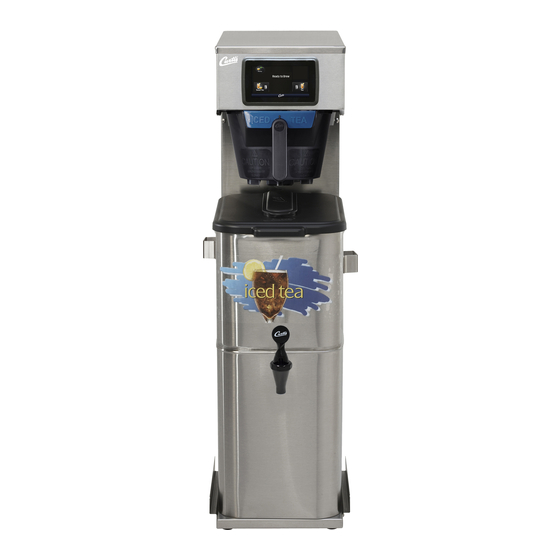
Digital iced tea brewing system
Hide thumbs Also See for G4 Series:

Advertisement

Quick Links

USER GUIDE
G4 Digital Iced Tea Brewing System
READ AND SAVE THESE INSTRUCTIONS
NOTICE TO INSTALLER: Please leave this booklet with the machine.

Advertisement

Table of Contents
loading
Need help?

Need help?

Do you have a question about the G4 Series and is the answer not in the manual?

Questions and answers

Summary of Contents for Curtis G4 Series

  • Page 1 USER GUIDE G4 Digital Iced Tea Brewing System READ AND SAVE THESE INSTRUCTIONS NOTICE TO INSTALLER: Please leave this booklet with the machine.
  • Page 2: Table Of Contents

    CONTENTS ....................FS5 ............................... IS2 ..........................II2 ..................II8 ..............................OI4 ..........................CI1 ........................CI6 ............................................................................. IP5 ..................IP21 ..............................ES11 ....................................................................................................................EC1 ..............................Contact Information Wilbur Curtis Co., Inc. . PT...
  • Page 3: Fs5

    KEY FEATURES/SPECIFICATIONS/SYSTEM REQUIREMENTS Key Features • Generation Four (G4) Digital Control Module – Large, 4.3” touchscreen. Icon-driven interface streamlines operation. Provides precise control of all critical brewing functions. • G4 Enhanced Tea Flavor and Clarity – With digital accuracy, two separate precision valves provide unsurpassed control over brewing and dilution cycle.
  • Page 4: Is2

    INSTRUCTIONS could result in personal injury or void the warranty. • This appliance is designed for commercial use. Any service other than cleaning and preventive maintenance should be performed by an authorized Wilbur Curtis service technician. • serviceable parts inside.
  • Page 5 IMPORTANT SAFEGUARDS CE Requirements • This appliance must be installed in locations where it can be overseen by trained personnel. • • This appliance is not suitable for outdoor use. • • • This appliance must not be cleaned by water jet. •...
  • Page 6: Ii2

    INSTALLATION INSTRUCTIONS WARNING: WARNING: Improper electrical connection may result in an electric shock hazard or damage the unit. This appliance must be properly grounded. NOTICE: DO NOT connect this appliance to a hot water supply. The water inlet valve is not rated for hot water.
  • Page 7: Ii8

    INSTALLATION INSTRUCTIONS Installation Leveling WARNING: Use the leveling legs to level the brewer only. Do not use them to adjust brewer height. Do not extend them higher than necessary. Position the brewer on the countertop. Level it left to right and front to back by turning the bottom of the legs.
  • Page 8 INSTALLATION INSTRUCTIONS Connect the Brewer Wiring (cont.) 11 If the power cord will be connected directly to the junction box, connect the power cable wires to the terminals in the junction box. See the ELECTRICAL SCHEMATIC for the power supply requirements. WARNING: Turn off power to the junction box at the circuit breaker panel before connecting the power cable to the brewer.
  • Page 9 INSTALLATION INSTRUCTIONS Power Up the Brewer (cont.) 16 Make sure that the circuit breaker supplying power to the unit is on. 17 Turn the toggle switch on the back of the brewer to the 18 When the water in the tank rises to the correct level, the heating elements will turn on automatically.
  • Page 10: Oi4

    OPERATING INSTRUCTIONS Brewing Instructions WARNING - TO AVOID SCALDING, AVOID SPLASHING. WARNING - The G4 Tea Brewer is factory preset for optimal performance. DISPENSER The brewer should be ON. Remove/open the lid from an empty tea dispenser and the brew basket. Fill with the switch.
  • Page 11: Ci1

    CLEANING INSTRUCTIONS WARNING: HOT SURFACES - To avoid injury, allow the brewer and dispenser(s) to cool before cleaning. NOTICE - Do not use cleaning liquids, compounds or powders containing chlorine (bleach) or corrosives. USE OF THESE PRODUCTS WILL VOID THE WARRANTY. Cleaning The Brewer - Daily WARNING: DO NOT immerse the brewer in water or any other liquid.
  • Page 12: Ci6

    CLEANING INSTRUCTIONS Cleaning the Tea Dispenser (Daily) The following cleaning process requires a mild solution of dish-washing detergent and warm water, and One-Pro Handle Bonnet Container Remove the dispenser from the brewer and remove the Seat cup Wash Faucet the detergent solution and a soft bristled brush to wash Rinse Sanitize Disassemble the faucet - Unscrew the faucet assembly...
  • Page 13 Brew Button Control symbols - all symbols may not be present at the same time Home Undo Curtis logo Scroll Return to previous left/right Manual Programming Mode The ACCESS CODE screen will appear. The The MAIN MENU screen contains a series of sub- default pass code is 1 2 3 4.
  • Page 14 PROGRAMMING GUIDE PG36 Manual Programming Mode (cont.) Tea Recipes Control Settings Brew Settings Model Select Settings Summary Exit Coffee Combo Temperature Settings By Volume Quality Timer By Time Standard-Purple Energy Savings Dilution by Volume Standard-Gray Sounds Dilution by Time Standard-Amber Diagnostics Tea/IC-1Batch Dilution Delay...
  • Page 15 PROGRAMMING GUIDE PG36 Recipes Menu (cont.) Recipe Default Brew Settings Tea-Sweet and Dual-Sweet, Full Batch Temperature Tea by Volume Tea by Time Tea Dilution Volume Tea Dilution Time Tea Dilution Delay Tea Dilution Stir Standard Purple 204°F/96°C 128 oz./3.8 L 5 min.
  • Page 16 PROGRAMMING GUIDE PG36 Control Settings Menu (cont.) Preventive Maintenance • Maintenance Interval - • Service Telephone Number - Brew Counter - Passwords • Programming Password - default is 1234. • Brew Password - turns the brew access password feature on and off and is used to create the brew pressed.
  • Page 17 PROGRAMMING GUIDE PG36 Brew Settings Menu (cont.) Tea Dilution Stir - turns the dilution stir feature On and Off. See the Recipes settings. Tea Fast Brew - Tea Pulse Brew - routines. Tea Drip-Out - sets the Tea Drip-Out time. Drip-out allows additional time for tea to drain from the brew Sweetener Time (units equipped for brewing sweet tea only) - are 2 minutes for full batch and 1 minute for half batch.
  • Page 18 PROGRAMMING GUIDE PG36 Automatic Programming - USB IMPORTANT: starting the following process. Uploading the Software to the Flash Drive as desired. Downloading the Software to the Brewer from the Flash Drive a second. Once the download is complete, the UCM will reboot so that the changes take effect. USB File Transfer FILE TRANSFER Upload...
  • Page 19 ROUGH-IN DRAWINGS G4TB - Tea Brewer 18.39 in [46.7 cm] 9.11 in 16.61 in [23.1 cm] [42.2 cm] 34.29 in [87.1 cm] 23.96 in 22.67 in 22.29 in [60.9 cm] [57.6 cm] [56.6 cm] 13.41 in 11.80 in [34.1 cm] [30.0 cm] 10.04 in 20.84 in...
  • Page 20 ROUGH-IN DRAWINGS G4TBP - Tea Brewer 9.14 in [23.2 cm] 25.70 in [65.3 cm] 10.97 in [27.9 cm] 18.39in [46.7 cm] 9.11 in 16.61 in [23.1 cm] [42.2 cm] 29.38 in 9.94 in 9.59 in [74.6 cm] [25.3 cm] [24.3 cm] 6.27 in 18.98 in [15.9 cm]...
  • Page 21 ILLUSTRATED PARTS/RECOMMENDED PARTS G4TB, G4TBP - Main Chassis - Exploded View (G4TB Shown) Chassis style varies with model *Orientation varies with model and date of manufacture G4TB, ILLUSTRATED PARTS/RECOMMENDED PARTS 061118C...
  • Page 22: Ip5

    ILLUSTRATED PARTS/RECOMMENDED PARTS G4TB, G4TBP - Main Chassis - Parts List ITEM # PART # DESCRIPTION ITEM # PART # DESCRIPTION COVER, TOP ALPGT/D500GT/D60GT TLP/TCTS/ SWITCH, TOGGLE NON-LIT SPST 15A 125/6A WC-58117 WC-102 CBS/GEMSS 250VAC RESISTIVE TRANSFORMER,120VAC-24V 4.8A W/ LEADS & WC-10008 UNIVERSAL HOST ADAPTER USB WC-589-101...
  • Page 23: Ip21

    ILLUSTRATED PARTS/RECOMMENDED PARTS IP21 WC-6277/WC-75236[-20] - Tank Assembly WC-6277/WC-75236[-20] - Tank Assembly - Parts List ITEM # PART # DESCRIPTION ITEM # PART # DESCRIPTION TANK, COMPLETE 1600W 120V D500GT/TCTS/ WC-5528K* KIT, WATER LEVEL PROBE, SILICONE WC-6277 PTT/CBS KIT, PROBE, ASSY WATER LEVEL W/HEX FITTING, WC-5502-01* TANK, ASSY D500GT/H/TCTS/PTT3/ CBS W/WC- O-RING &...
  • Page 24: Es11

    ELECTRICAL SCHEMATICS ES11 G4 TEA BREWERS (UPM) Pin Assignments 120V Hot Input 120V Hot Input Brew Valve Not Used 120V Neut ral Inlet Valve Not Used Not Used Triac Gate 10 Triac A2 11 Not Used 12 Not Used 13 Dilut ion Valve Right 14 Dilut ion Valve Left 15 Sweetner Pump 16 Sweetner Pump...
  • Page 25 TROUBLESHOOTING GUIDE WARNING: Electric Shock Hazard - Scald and Burn Hazard - IMPORTANT: always check all Valve Test Procedure Troubleshooting Guidelines • • • • Valve Test Procedure in either direction Water Not Hot Enough replace the temperature sensor Water Heats More Slowly Than Usual During Brewing...
  • Page 26 TROUBLESHOOTING GUIDE No Power - Display Not Lit Water Tank Does Not Fill Brewer Does Not Start When Brew Button is Pressed Brewing Brewing Sensor Error Message...
  • Page 27 TROUBLESHOOTING GUIDE Water Tank Does Not Fill IMPORTANT: Coffee/Tea Too Strong Dispenser Not Filled To Normal Level During Brewing Dispenser Not Filled To Normal Level During Brewing sure that the spray head is correctly aligned and that the tubing is routed properly to allow for maximum water All Of The Time...
  • Page 28 TROUBLESHOOTING GUIDE No Water/Tea Flows From Brewer During Brewing Water Tank Does Not Fill Low Water Flow Warning Water Level Error Message Water Level Error Message “Internal Error 1” Message on Display “Internal Error 2” Message on Display PROGRAMMING GUIDE...
  • Page 29 TROUBLESHOOTING GUIDE Water Does Not Heat At All Check to see if the water level in the tank is in contact with the water level probe. If not, see Tank Does Not Fill. • The water will not heat unless it is in contact with the probe. If the water heats, but is not hot enough, see Water Not Hot Enough.
  • Page 30 Display view varies Using the Diagnostics with model The MAIN MENU Control Settings. Diagnostics Auto Test to test all circuits. If a button is highlighted green the Curtis logo DIAGNOSTICS Left Auto Test Right Dump Vavle Inlet Valve Dump Vavle Cone Lock...
  • Page 31: Ec1

    ERROR CODES Warning Messages - Allows Brewer to Continue Brewing MESSAGE DISPLAY WARNING DESCRIPTION CAUSE Brew count “Gallons Since Reset” exceeds programmed Maintenance Required Maintenance Required preventative maintenance period. If the Inlet valve remains on longer than XX seconds (during the brew cycle only) and repeats TWICE during that brew Low Water Flow Low Water Flow...
  • Page 32 Return Merchandise Authorization (RMA): All returned equipment must be properly re-packaged in the original carton and received by Curtis within 45 days following the issuance of a RMA. NO UNITS OR PARTS WILL BE ACCEPTED WITHOUT A RETURN MERCHANDISE AUTHORIZATION (RMA).

This manual is also suitable for:

G4tbG4tbp

Table of Contents